Showing posts with label pattern runway. Show all posts

Wednesday, January 22, 2014

Fitting Journal: Pattern Runway Pussy Bow Blouse

Hi all!

I didn't intend to take a one-week hiatus, but you know how it is sometimes:  stuff is going on, but nothing really worth writing about.  I did a lot of crafting in the last week, but one (knitted) item is a gift I won't be able to post about until February.  Then I started a BHL Charlotte skirt muslin; it's got some problems that I'll have to work out, so no use writing about that yet.

I put the skirt on the back burner for a while in order to try some of my newly learned fitting techniques on my favorite blouse pattern:  Pattern Runway's Pussy Bow Blouse (which from now will be known as the PR PBB).

I've made this blouse twice before.  The first one was a bit too small across the back and the hips.  The second time I made it, I gave myself a 1/4" broad back adjustment and graded the hip out from XS to S.  And that one fits pretty well - acceptable really.  But I wanted to see if I could tweak the pattern a bit more.  I'm always chasing the dream of a blouse that fits my wonky body perfectly.

So over the weekend I got out my pattern and went to town.  In the interest of clarity, I'm going to show each adjustment separately and how I feel it worked.  What that really means is:  WARNING:  Picture Heavy Post!  But that's better than no pictures, right?!


I increased my Broad Back Adjustment from 1/4" to 3/8".  This did make it more comfortable to wear, but it ends up looking like there is a lot of fabric back there, especially around my waist.  I may consider adding in some vertical fisheye darts in future.


A 1/2" Sway Back Adjustment took care of some of the pooling of fabric in the lower back.  I could probably take more out in the future.


I did a 1/2" Foward Shoulder Adjustment to both shoulders, tapering to nothing at the neck.  This blouse does sit more comfortably on my shoulders than the previous two, and doesn't pull to the back.


I gave myself a little extra space in the back for my shoulder blades with a Prominent Shoulder Blade Adjustment, as shown in Fitting and Pattern Alteration.  I used the "seam method" - you slash the seam line and move it out, so that while you give yourself more space, the length of the seam line remains the same.  (This book was a gift from my mom a year (or two?) ago - it's very expensive, but a super reference book if you can afford it or if you know someone who wants to give you an extravagant gift!)  I think this worked pretty well.


I used that same "seam method" to swing my side seam out front and back by about 1/2", making sure front and back match.  On my first two blouses, I can't really button the bottom button; on this one I can.


Moved shoulder point forward 1/2" to match forward shoulder adjustment.


And cut 1/2" off the front sleeve seam and added it to the back sleeve seam so that the sleeve seam would match up with the side seam.  While the shoulders feel good, I'm not sure this sleeve adjustment is working for me (this is one of the methods recommended in Fit For Real People).  The armscye feels tight, and there is still some pulling on my right arm especially.


The only adjustment I made to the front was to move the bust dart down 1/2", based on trying on my second blouse.  But once this blouse was finished, I decided I was better off with it in its original position, so I moved it back.

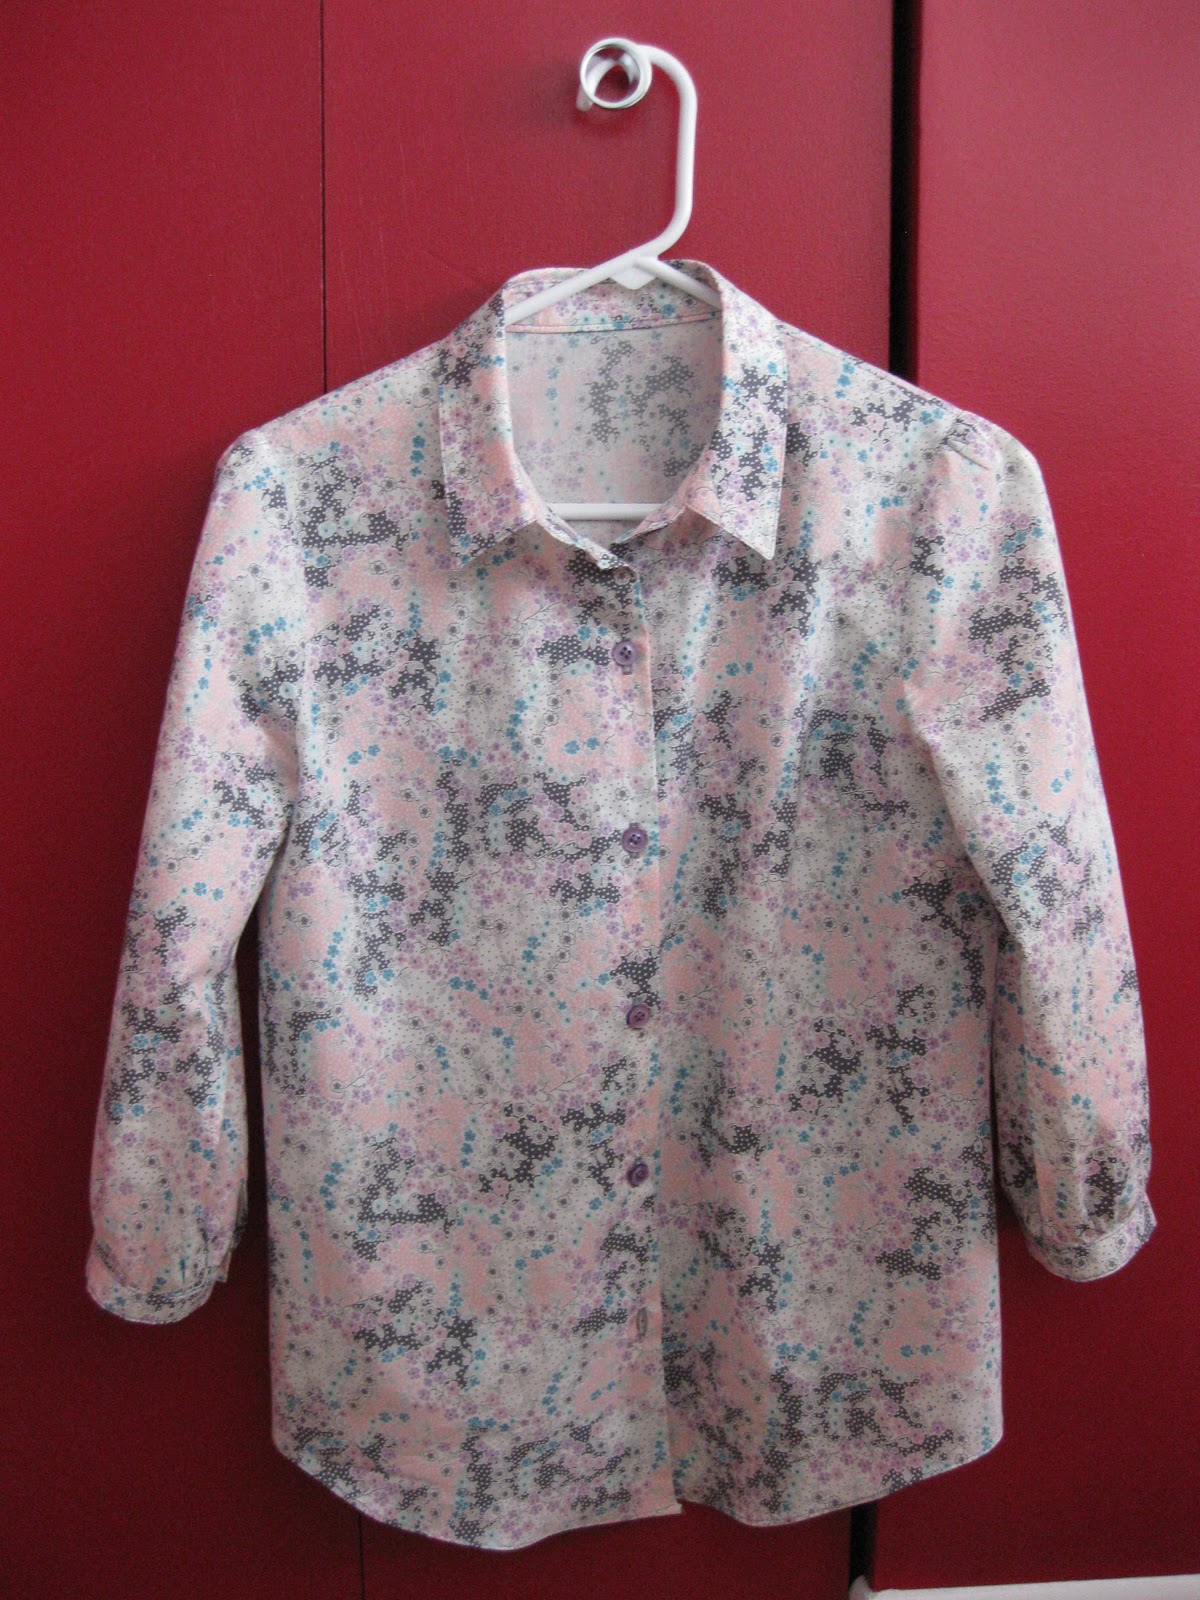
I'm having a period of low sewjo - we all get those - so that coupled with wanting to knock this one out to assess the fitting changes means that this isn't the best blouse I've ever made.  It's not horrible, but it's not the awesome blouse I was hoping for.  Part of that is the color - while I like this fabric as fabric, it doesn't really suit my coloring.  I feel it really washes me out, and even with the pink and white designs and the cute red buttons, it still reads GREY.


That said, because I don't LOVE it, that means I will probably actually wear it!  I've noticed I have a tendency NOT to wear the things I love, for fear of messing them up.  (I'm working on it.)


Here's the thing I'm struggling with, and I'd be curious to know if any of you have this problem too.  I'm starting to wonder if the holy grail of a perfectly fitting shirt is a myth.  I've noticed that a lot of my clothing that LOOKS good doesn't feel comfortable to me.  And the things that do feel comfortable tend to look sloppy and frumpy.  I've been operating under the assumption that there's a happy medium, but I'm starting to wonder if that's true.  Technically, this blouse fits better than the first two.  But I much prefer how the second one looks on me, and it's not just about the fabric choice.


Granted, it does look better across the upper back.  On the next one I will move the dart back to its original position, which should take care of some of that frumpiness across the front,  and also shorten the shirt - I think this is 1 or 2 inches too long for me.


I'm also going to consider adjusting for my lower right shoulder.  I haven't wanted to go there - having to make two separate pattern pieces for left and right just seems a step too tedious.  But then I think, what if that's the missing piece of the puzzle?

So, even though this isn't the OMG PERFECT shirt I was hoping for (because let's face it:  that's the hope with every single project, right?) it is wearable, and I learned some things. 

And this is my third make from Stash, so that gets me one step closer to a new fabric allowance :-)

Friday, March 15, 2013

A Keeper

You can tell how much I like a project by how quickly I take pictures of it.  It took a month for me to take pictures of yesterday's tee shirt, and another couple weeks to post it.

I finished this one yesterday.


(Please ignore my hair.  It was in a messy bun.  Messy being the operative word.)

This is the Pattern Runway Gorgeous Pussy Bow Blouse, sans bow.  It's described as an "easy fit blouse with bangle-length sleeves" - right up my alley.   It has a sweet little collar with separate stand, and neat little sleeve plackets.  All in all a very feminine, yet comfortable blouse.


I first made my muslin of this blouse just over a year ago.  The fit was pretty good, but a teeny bit snug in the hips and across the back.  Before I started working on this version, I extended the side seam out below the waist to the next size up, and also gave myself a quarter-inch Broad Back Adjustment.  This is the first time I've done the adjustment, although I've known for quite a while I need it (thank you, C2 Rowing) - it really does make a difference.  I could even stand a little more ease in the back, but then I'd have to ease the back shoulder with a gathering stitch.  With this small adjustment, I was able to ease the back shoulder into the front just by pulling the front shoulder more taut as I sewed - easy peasy.


Sadly, the light around here this morning wasn't good enough to give you the understanding of just how gorgeous this fabric is.  This is Robert Kaufman Baby's Breath in Vintage (even the name is fantastic!) from the London Calling Lawn line.  Liberty-esque without the pricetag, IMO!  I fell in love and bought enough to make this very blouse the instant I saw it.  I also bought it in the "Celebration" colorway:


Anyway, here are some close-up pictures so you can see the colors of "Vintage" better.

I love my little lavender buttons!

Edge-stitching courtesy of the blind hem foot!

Rolled hem - that was hard on those curves!

And you want to see my shoes, right?  Bought these years ago from Boden:


They go with both these fabrics!

So, do you guys feel all better now, since you got a smiley face today rather than a pouty one?!

Sunday, September 16, 2012

Lunch with friends.

As promised, here's my Tippi Dress on my body rather than on a hanger!  We had lunch with some friends who have birds, so I thought it was the perfect thing to wear!


The somewhat larger waistband elastic turned out to be a good thing - I'm stuffed!

Saturday, September 15, 2012

Tricot-mania

I just can't seem to get enough of sewing with knits these days.  On Thursday, I sewed not one, not two, but three knit garments:  another Kimono Dress, a Dolman-Sleeve Tee and a Foldover Waist Skirt.  This morning I made a second Dolman-Sleeve Tee, and I'm hoping to knock out another this afternoon, plus maybe another skirt.  What is going on here?!

Let me show you my new wardrobe, in order of execution.  First up is the dress, in another of the fabrics I got on sale at Girl Charlee.  This fabric is called "Raining Dots."  It's a cotton-modal blend, and is so silky soft.


With this dress, I think I can say I've perfected my technique - it came off without a hitch!  Here's a closer look at the fabric:


Next I used Cindy's new, free top pattern.  I've been wanting to try this out since she first posted it.  I love her blog and I'm always so impressed by the way she just makes stuff - no pattern, just ingenuity! Of course, this is another sale fabric from my Girl Charlee haul - did anyone else stock up in the Labor Day sale like I did?  This fabric is called "Limoncello Floral Burnout" and is sadly no longer in stock.  It's quite thin, but doesn't have a whole lot of stretch.


The design is in pale yellow and cream, on a white burnout background:


I'm kind of a sucker for burnout!

Lastly, I knocked out the Foldover Waist Skirt pattern from the Craftsy class on sewing with knits.  This is a truly quick and cheap project - it only uses a yard of fabric (for the knee length skirt) and has three pieces:  front and back, which are the same, and one waistband piece.  Three seams and you're done!  It looked tiny, but fit perfectly.  The pattern is a-line, so I used the waist measurement to determine my size.  I made this from some very thin, drapey unidentified jersey I got at Vogue.  Because I didn't want to interfere with the amazing drape and swish at the bottom edge, I didn't hem it.  Sadly, I got a little over-zealous in my seam pressing, and stretched it out so much that it hangs on my hips!  But that didn't stop me from wearing it out for coffee with Alicia yesterday, which is why it looks wrinkled now!

 
waistband folded down

waistband unfolded - this is how I wore it

Yesterday I didn't sew a thing, but this morning I got back to it and made Dolman-Sleeved Top #2, in Girl Charlee's Graffiti Stripe Jersey in Tangerine.  I will admit that I spent a fair amount of time arranging my fabric so that the stripes would match, but even so, I was able to make this top in about an hour and fifteen minutes total!  That includes arranging the fabric, cutting out, sewing and ironing!  Upon completion, we headed over to Chinatown to get me the frozen yogurt I've been craving for two weeks.  Here I am in front of Joy Yee Plus, in my new tee shirt, frozen yogurt in hand:


I've got another piece of this fabric in navy and white stripe, which I'm hoping to make up this afternoon.  I'm also a sucker for dolman sleeves, so I really love this pattern!

Thursday, September 13, 2012

Tippi Dress (The Birds)

A while ago I bought this bird-print fabric from Girl Charlee with the intent of making a long-sleeved Renfrew top.  But the more I thought about it, the more I felt I'd rather it become a dress.  So yesterday I made another knit Kimono Dress, with a few changes.


This time, rather than folding the neck and sleeve edges back and topstitching, I made narrow binding bands.  I'm really pleased with the more finished look this gives.  For my size (size small), I cut bindings of 1" x 18" for the sleeves and 1" x 22" for the neckline.  I sewed the short ends together, then folded the bindings in half and ironed them along the fold before sewing them to the neckline and armholes.  All seams on this dress were done on my serger.


I did a better job on my elastic application too.  This time, I pressed my waist seam allowance toward the top, and applied the elastic to the very top edge of the skirt.  It went in much more smoothly than the last time, when I tried to sew the elastic to the seam allowance!  However, I cut my elastic longer this time and now I'm wishing I hadn't!  I gave myself an extra inch or two because I felt like after I ate, my first dress was too tight!  But with the longer elastic, the dress doesn't hang in the same way.  Live and learn!


The biggest problem I had with this dress was with the hem, believe it or not.  I've been watching another Craftsy course on sewing with knits, and the teacher recommends using a walking foot.  I decided to try it out.  It worked great on my samples, but made a huge mess of my actual hem!  The fabric wouldn't feed through, and I ended up with a big, tangled, knotted mess on the back and stitches so short they almost cut through my fabric!


I tried it twice and got the same result - I literally spent at least half an hour trying to pick it out!  I finally gave up and just did a straight stitch with my normal presser foot.

When Niecey-poo and family were here, she and my sister-in-law and I went shopping for school clothes at Old Navy (they LOVE Old Navy!).  I happened upon this bird-print scarf that I thought would be a nice compliment to the dress:


You're getting hanger photos because I'm "saving" this to wear on the weekend, with some black flats and a super cute red, black and turquoise hat I have.  Now to figure out where to go in this ensemble!

Thursday, September 6, 2012

Sophie Dress

On Tuesday, I made a dress!


I bought this knit fabric from Girl Charlee just before Niecey-poo came to visit in mid-July, so this idea had been festering in my brain since then.  I fell in love with the print, and it's a modal-cotton blend, so it's also nice and soft.  Girl Charlee listed it as being a fabric designed by clothing manufacturer Blue Platypus, and you can see the dress they made from it here.  I changed the name (a little) to protect the innocent (me).

I wanted a similar dress, but I knew that if I made a dress with no elastic at the waist, I would constantly be tugging at it and rearranging how the belt held it.  After  lot of thought, I decided to use the Pattern Runway Kimono Dress pattern again.

Since I was using a knit rather than a woven fabric, I made some construction changes.  I did away with the back neck opening altogether.  I also decided that using facings at the neck and armholes would interfere with the drape of the fabric, so I eliminated those as well.

I made a strip of binding for the neck, 1" wide by the length of the neck opening.  I serged one side of the binding, then sewed the other side to the neck.  Then I folded it to the inside and topstitched it down 1/4" from the edge.

For the armhole openings, I felt that using a strip of binding would keep the sleeves from draping the way I wanted them to, so I just serged the edges and folded them to the inside, then topstitched them down.  I'm not 100% satisfied with the way this looks on the inside, but I haven't yet thought of a better way to do it.  All the topstitching was done with a straight stitch at the longest length for my machine (4), while slightly stretching the fabric.

This color is more accurate than the collage above.

I did the hem in much the same way, but folded the fabric twice to the inside, a little more than an inch.


Adding the elastic to the waist was the hardest part.  The first time I made this dress, I was afraid to sew the elastic right to my beautiful coral silk, so I made a casing.  But I wasn't very happy with that - the waistband tends to shift a lot while I wear the dress.  So this time I followed directions, pinning the elastic to the center front and back and side seams, then pulling like crazy while "straight" stitching the elastic to the waist.  I put "straight" in quotes because mine is anything but!


Luckily, the bodice blouses over the waistband, so you can't see my wavy stitching.

I'm mostly happy with this dress, and have plans to make at least one more.  I wore it all day yesterday and was pretty comfortable - until I ate banh mi and the elastic started to feel tight around my waist!

Friday, March 16, 2012

Pattern Runway Easy Kimono Short-Sleeved Dress

Well, it turns out today is a sunny day after all!  This morning I convinced Hubby to take some pictures before he left for work, which means you get to see more of my plain, grey wall!  I intentionally don't hang any pictures there because it seems to be the place in our house with the best light for taking photos.  I had really wanted to get outside and do the photos there, but time was of the essence.

In order not to spam the place with pictures of my new dress, I made a couple of collages on Picnik.  I'll be so sad when that service is not available any more;  so far it doesn't appear on Google+.  Big pouty face.

I did two looks:  a fancier one for going out in the evening, and a casual one for day.  I have SO many things in my closet that go with this dress, it was a little hard narrowing it down!  It appears I like coral.  A LOT.

First, the fancy look:


It's probably too small for you to see, but I've got on some high-heeled bronze leather slingback sandals, a bronze metallic braided belt, and plenty of gold jewelry.  The good thing about having the photos a little smaller is that you're spared seeing my veiny old-lady hands too closely.  I've had those old-lady hands since I was a teenager.  Sigh.

Here's a back view.  In the photo on the left, notice that the facing is flipping out a little.  The pattern has you tack the facings to the dress at the shoulder and just under the arm, rather than stitching it all the way around.  It mostly stays put, so I'm not really sure why it's flipping here.  You may also notice that I got about 8" of hair cut off!  Today it's in its natural "wild child" state, since I was in a hurry.


Moving on the the casual look, I took off the heels and jewelry and added a scarf and some bronze metallic leather flip flops.  I actually prefer this look!


I like the center photo:  I'm looking at a big dust bunny on the floor!  Maybe a little less knitting and sewing, and a little more housework is in order?

So, do I like the dress?  Yes, I like it.  I LOVE the color and the feel of the silk.  My workmanship is still not as fine as I'd like though.  This silk twill was easier to work with than some of the others I've used, but it's clear I still have a way to go before I master silk.

I used the step-by-step tutorial on Pattern Runway's site.  Odd that someone who loves words as much as I do will generally choose to just look at the pictures rather than read the instructions!

The only thing I did differently from the pattern was to add a casing for the elastic, rather than sew it onto the seam allowance on the inside.  But now I'm wondering if that was a good idea - the gathers tend to shift when I move very much, and not always in a figure-flattering way.

So there you have it.  I was so glad to get this off my guest bed after looking at it in its half-finished state  for the last two weeks.  And if this weather keeps up, I may even get to wear it soon!  But not today:  it's laundry day again!

Thursday, March 15, 2012

I finished my kimono sleeve dress today.*


Of course, that means it will be too cloudy to take pictures tomorrow!  Isn't that always the way?

*I also made some progress on Collar #1.

Thursday, March 1, 2012

New Dress?

For the last several days, all I've wanted to do (craft-wise) is knit, so I've been working away on my Karanfil sweater and getting my Winnie project ready for the trip.  I sort of felt like I lost my sewing mojo.  But this morning I felt like I might be able to have a good sewing day, so I started my new dress:  Pattern Runway's Kimono Sleeve Dress.

I had assembled and traced the pattern yesterday so that everything would be ready when I wanted to sew. I made very few adjustments; I did the bodice in a straight XS, and tapered the skirt from XS to M using my hip curve.  When I go to put in the elastic at the waist, I'll use the length for the S.

After Hubby went to work, I got busy ironing my fabric and cutting out my pieces. I'm not 100% convinced this style will work on me, so I got some fabric I like a lot, but which was not expensive:  a nice silk twill with lots of drape in a coral pink color:

This picture makes it look more pink than it really is.

There were only three yards of it left, so I bought all three.  It's nice to know that I have some leeway in case something goes wrong!

It's not the easiest fabric to work with - it's somehow sticky and slippery at the same time.  Not too unusual for silk, I guess.  I seem to have traded fitting headaches for fabric headaches.

I spent the first half hour applying interfacing to the facing pieces.  I bought very lightweight knit interfacing, which I had never used before.  The lady at the fabric store told me that I should soak it in hot water for 20 minutes and hang it to dry. She claims that will prevent it from bubbling.  It went on like a charm, and I really like it - it gives just enough structure without interfering with the drape.

 
As I was working, I serged all the edges that needed it.


After a couple hours, I felt like my attention was beginning to wane.  I'm very proud of myself that I put everything away rather than push through.  I think when I keep going even though I'm tired, that's when I start to get careless.  So here it is, in my staging area (a.k.a. the guest bed) waiting for another day:

This one is more color-accurate.

I've been daydreaming about which shoes to wear with this, of course.  IF it looks good on me.