Showing posts with label by hand london. Show all posts

Thursday, January 30, 2014

Pencil No. 2

I made another pencil skirt yesterday, same as the first.

I used one yard of this printed stretch denim from JoAnn's.   It has a lot of pretty colors.


I have nothing more to say.

You may now breathe your sigh of relief.

Wednesday, January 29, 2014

Pencil Skirt: Construction

One of the reasons I'm so proud of this skirt (aside from the fact that it's awesome) is because I put a lot of thought and consideration into it.  All too often, I rush headlong into a project without thinking things through, and then don't get the stellar result I was hoping for.  This time, at each stage I stopped to consider how to proceed.

My original intent was to make this a lined skirt, just because I usually line skirts.  But after I stopped to think about it, I realized a few things: one, this is stretch fabric, and I didn't have any stretch lining.  Also:  it's denim.  Maybe they exist, but I've never seen a lined denim skirt.  So I scrapped the lining and decided to concentrate on keeping the insides neat.


Here's a quick rundown of the order in which I constructed the skirt - it's a little different from the instructions (which I've now read).

1.  Sew darts.
2.  Apply fusible knit strip to entire center back edges.
3.  Finish back and side seam allowances on serger.
4.  Insert invisible zip.
5.  Close center back seam.
6.  Sew side seams.
7.  Finish bottom edge on serger.
8.  Fold waistband in half lengthwise, apply fusible interfacing to one half.
9.  Finish un-interfaced side of waistband on serger, removing 1/4" of width.
10.  Stitch interfaced side of waistband to skirt, then grade seam allowances.
11.  Stitch waistband edges closed.
12.  Fold waistband to inside, pin, then stitch in the ditch from outside to attach.
13.  Press up hem 2" then stitch down with coverstitch or twin needle.
14.  Sew hook and eye at back closure.

It looks like a lot of steps, but they're all easy, short steps :-)  And of course there's pressing after each step.

Now, some particulars.

I noticed that I've been getting kind of sloppy with my darts lately, so that they're dimpling at the ends.  I took extra care this time - I didn't want any dimples!  I usually don't bother with shortening the stitch length for the last 1/2" of the dart, because I invariably forget to increase it again before the next one.  But this time I did, and it paid off.


Sunni has a lot of great information on pencil skirt sewing on her blog.  In one of her posts I read that she uses fusible tape not only on the zipper edge, but all the way down the back of the skirt to give extra stability.  So I did that too.  I must say that ever since watching her Craftsy class, I've been using the tape on my zippers and it makes a big difference on how they sit in the fabric - so much more smooth.


Here's a picture of all the serger-finished edges.  I went with 4-thread instead of my normal 3 for finishing, because of the weight of the fabric.  You can also see the tape going all the way down to the hem.


All these pictures were taken after the skirt was finished, not during construction.  So I don't have a picture of the waistband in progress.  But here's how it looks from the inside and outside.  I chose to serge the bottom inside edge and stitch it down with stitch-in-the-ditch rather than folding the inside bottom edge in to eliminate bulk.  I really like how it worked out, and it was faster and easier than doing it the normal way.


Here's the coverstitched hem:


And finally, here's a shot of the whole skirt:


And with that, I think I've finally exhausted all I wanted to say about this skirt!

Tuesday, January 28, 2014

Pencil Skirt: My Fit Fixes

I'm surprised at how many people expressed interest in knowing my fixes!  Luckily for you all, I like to blather on about this stuff :-)

As I mentioned yesterday, the pattern I used is the By Hand London's Charlotte skirt.  I'd read so many reviews from people who had great success with this pattern, not having to make any adjustments and getting a great fit, that I shelled out the $16 too.  I should have known better, but hope springs eternal.

I feel I should mention that although I love the style of the BHL girls, I really felt this pattern was lacking enough basics that I wondered if I would have been better off tracing something from a Burda magazine, or picking up a Big 4 pattern on sale.  Call me a curmudgeon, but I think that a long, pegged pencil skirt needs to have a back vent and an angled turn-up for the hem, maybe even a lining.  Especially since this is rated as a beginner pattern - imagine someone new to sewing, turning back that pegged hem and then wondering why they couldn't get it to lay flat.  I drafted mine in because I knew better, but I did so grudgingly - I felt that having spent so much money on the pattern, the Girls ought to have done that bit for me.  Yes, I'm a grouchy old lady.

I can't speak to the directions, because I didn't follow them.  But it did seem to me that a lot of the more refined information wasn't in the instruction book but in a number of sew-along posts on the blog.  Again, for a beginner-rated pattern, I think that kind of stinks.  To my mind, a "beginner" pattern means there are extra instructions, i.e. more hand-holding.  And even though I'm not a beginner, when I'm in the midst of sewing, if I have to look at directions, I don't want to have to look at 2 or more sources at once.  I want all my information in one place.

At any rate, all of this probably won't keep me from buying their patterns in the future, and I already own all the ones they've put out.  But I do think there's room for improvement.

Anyway, back to my skirt saga . . .

In my naive and overconfident state, I traced out the pattern and immediately made up a muslin, only grading from size 8 waist to size 10 hip.  The picture wasn't pretty, as evidenced by this Instagram pic:


EDIT:  I realized I forgot to say something very important!  You may notice on the picture above that I sewed my side seams with right sides out.  I know a lot of people fit their pencil skirts inside out, but my body is so asymmetrical from the right side to the left that I can't do that.  Inside out, you're fitting the skirt to the opposite side of your body!

I spent a lot of time looking at this and thinking about why it didn't work.  The main problem was that the fabric poofed out away from my body at the lower abdomen (you'll see why in a bit).  There also wasn't quite enough room in the seat, and I had diagonal drag lines on the back.

I mulled it over for several days, and then had a nice sit down with my Fit for Real People book. I started to think about the shape of my body and looked for the fixes that would correspond.  And so that you can see the fit issues I'm dealing with (in case you have the same), I drew a couple pictures.

But before I share them, let me state the following:  the terms I've written next to my "problem areas" are fitting terms, not judgments on the shape of my body.  I am quite happy with my body.  But the reality is that pattern makers don't draft for my particular shape, so "problem area" really means "area I have to diagnose and then change to get a good fit."

Here's a rough look at my outline from the front.  For me, the fullest part of my body is my upper thigh, at about 10" below my waist.


Looking from the side, you can see that the upper section of my abdomen is fuller than the lower section, which dips in, and then my upper thighs protrude out again, leaving a gap that fabric from a skirt will have to bridge.  That's the area that was causing me the most problems with my 1st muslin.


I already knew that the fixes for sway back and flat derriere are often the same.  I've copied them here for you from FFRP:


And indeed, I did end up redoing my back waistline seam in exactly the manner shown.  Below you can see my original tissue.  After I'd decided what fixes I wanted to try, I did a tissue fitting to see how they would work.  And to me, this is interesting:  I used to be very anti-tissue fitting, and only grudgingly did it in the fit class Andrea and I took.  And I discovered it wasn't so bad!  When I got to the point of reworking my skirt, I almost went ahead and made a new muslin, with just shortening the front darts and raising the back waistline.  I'm SO glad I stopped and made myself do the tissue fitting instead, because the changes needed were a lot more drastic than I was expecting, and it led me to an adjustment I hadn't considered but which was the biggest key to the good fit I got.  (teaser)


The top edge of the tissue is the cutting line as given in the pattern.  The pink line below it is my new back waist seam - a good inch below the old one.

Based on my tissue fitting, I also had to pull up the front waist seam, but not as much as the back.  That corresponds to the fix for the full tummy (as compared with the back waist seam line).  The other thing I did for the full tummy was to eliminate the inner front dart, and shorten the remaining dart.  Both darts stayed in the back and kept their length, as they gave me a good fit there.


Once I'd done these things, I took a really good look in the mirror to see where the rest of the problem was.  I realized that my full thighs were keeping the pattern pieces from reaching my center in both the front and the back below hip level.  AHA!!!  THIS is the adjustment that changed everything for me:


A wonderful slash and spread, keeping the side seam line mostly unaltered, but giving more room where I need it.  Hallelujah!  Mine looks exactly like the one in the picture, but it's harder to see through all my masking tape!  I did this front and back.


This final adjustment got me almost all the way there - I just needed to shave a little bit of curve off the hip, as evidenced by the new, pink seam line above.

Once I'd done all these adjustments, I traced some fresh (tapeless) pattern pieces for myself, including that angled turn-back for my 2" hem allowance.

new back pattern piece
new front pattern piece

It's hard to see in this cloudy-day photo, but the reason the front looks so much wider than the back is that I left 2" of paper off the "fold" edge.  I like to do that now for anything that's cut on the fold - it makes it much easier for me to cut pieces single layer (as I did for this skirt) by pinning that fold line to the fabric, cutting one side, then flipping it to the other side to cut the mirror image.

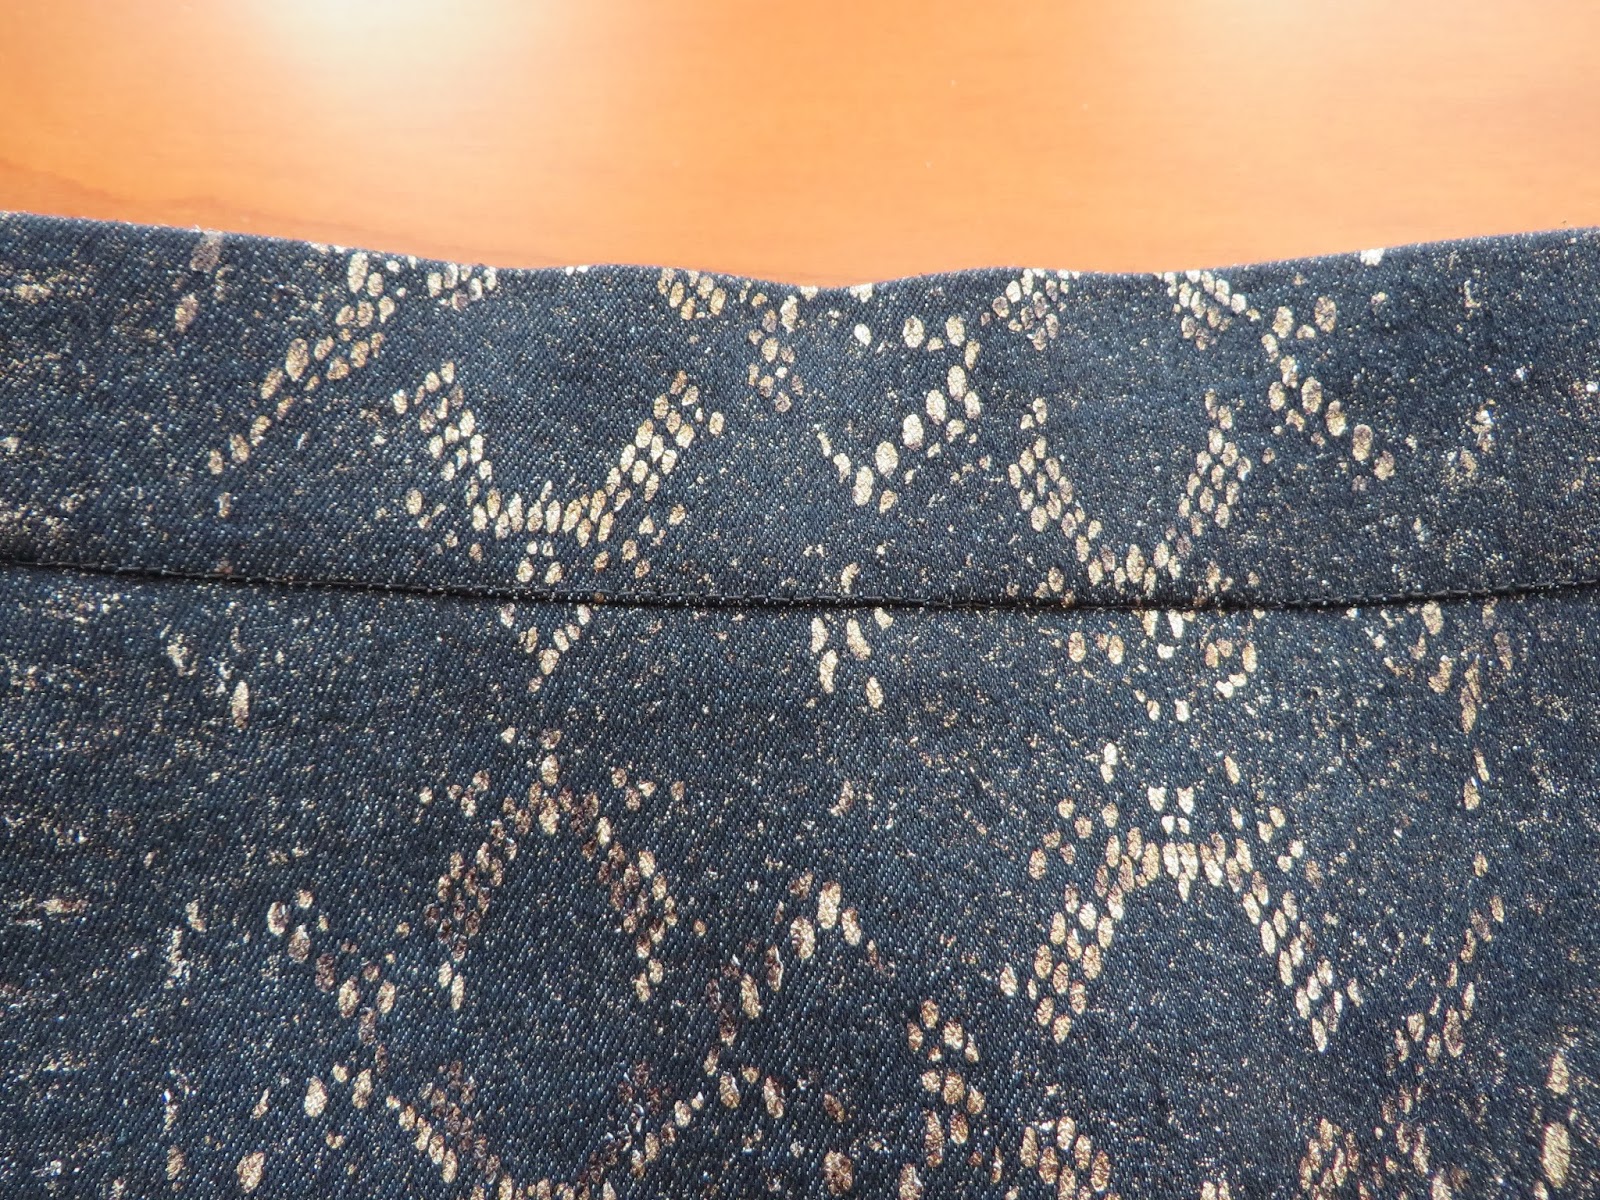
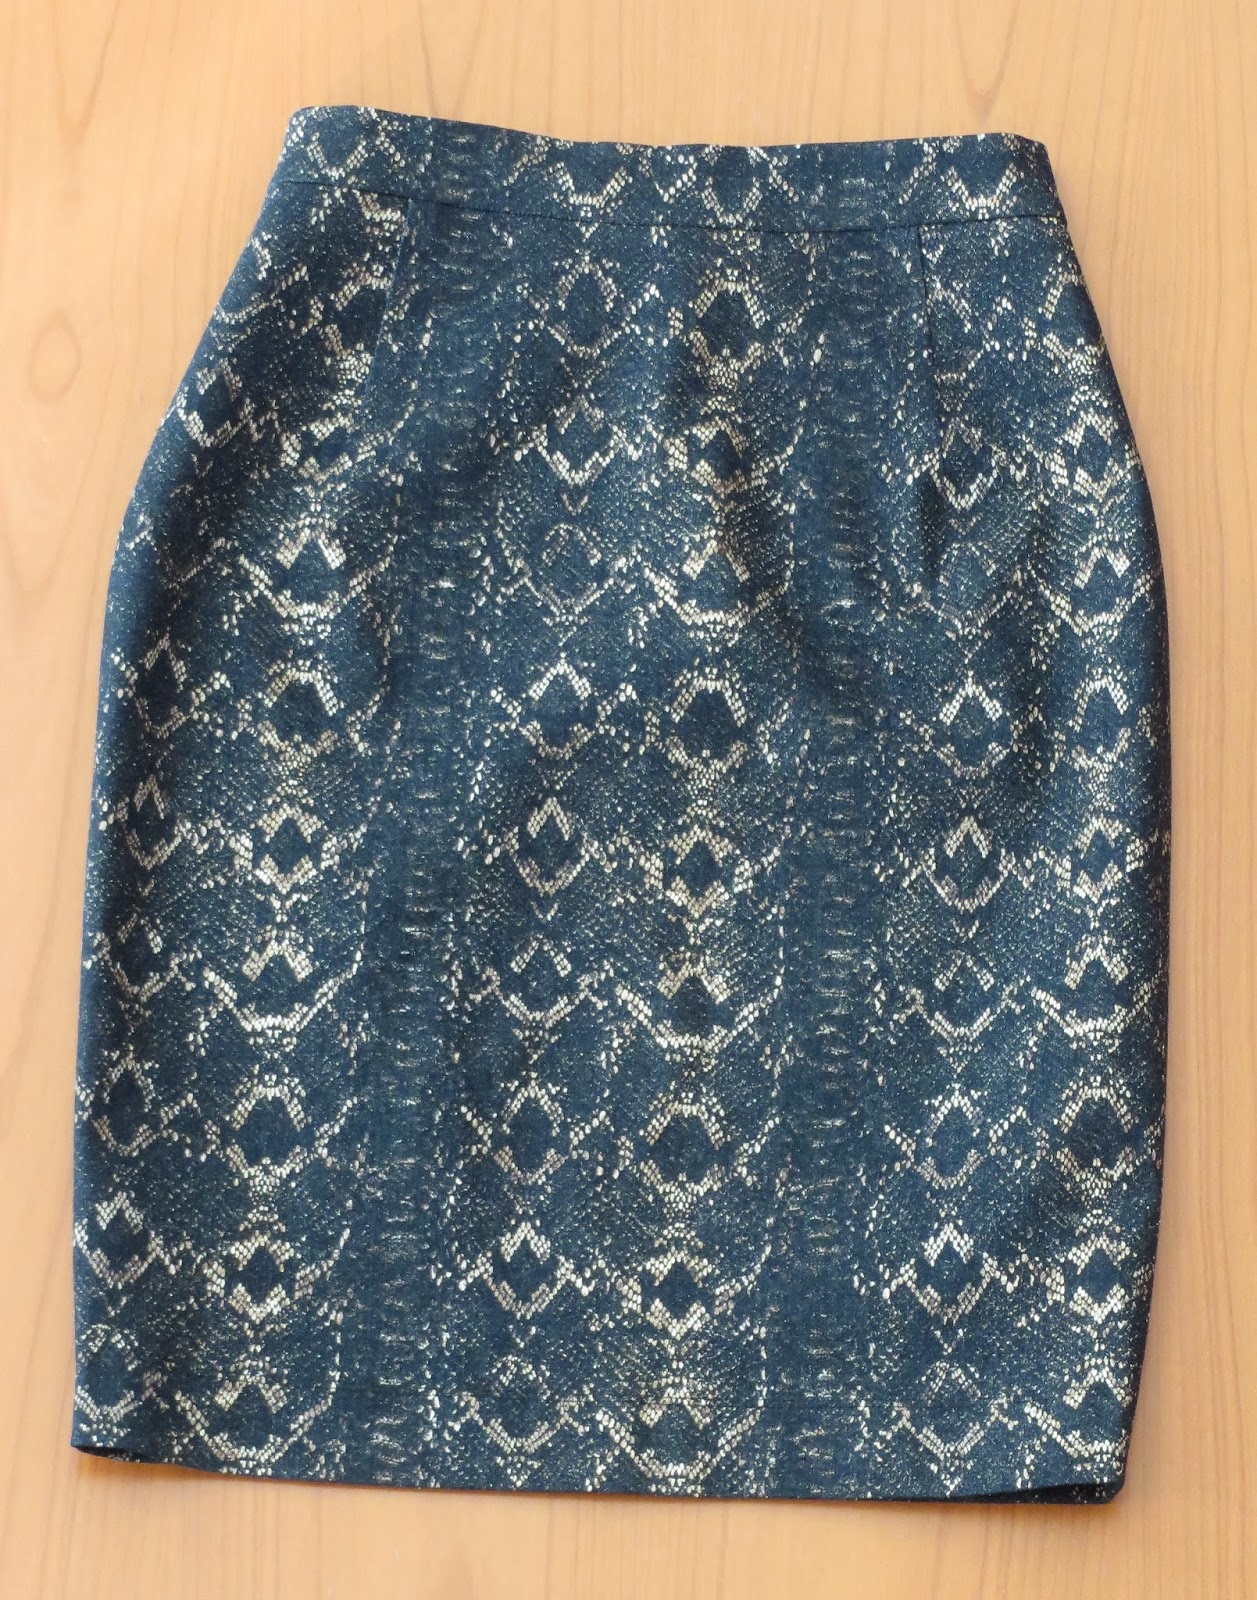
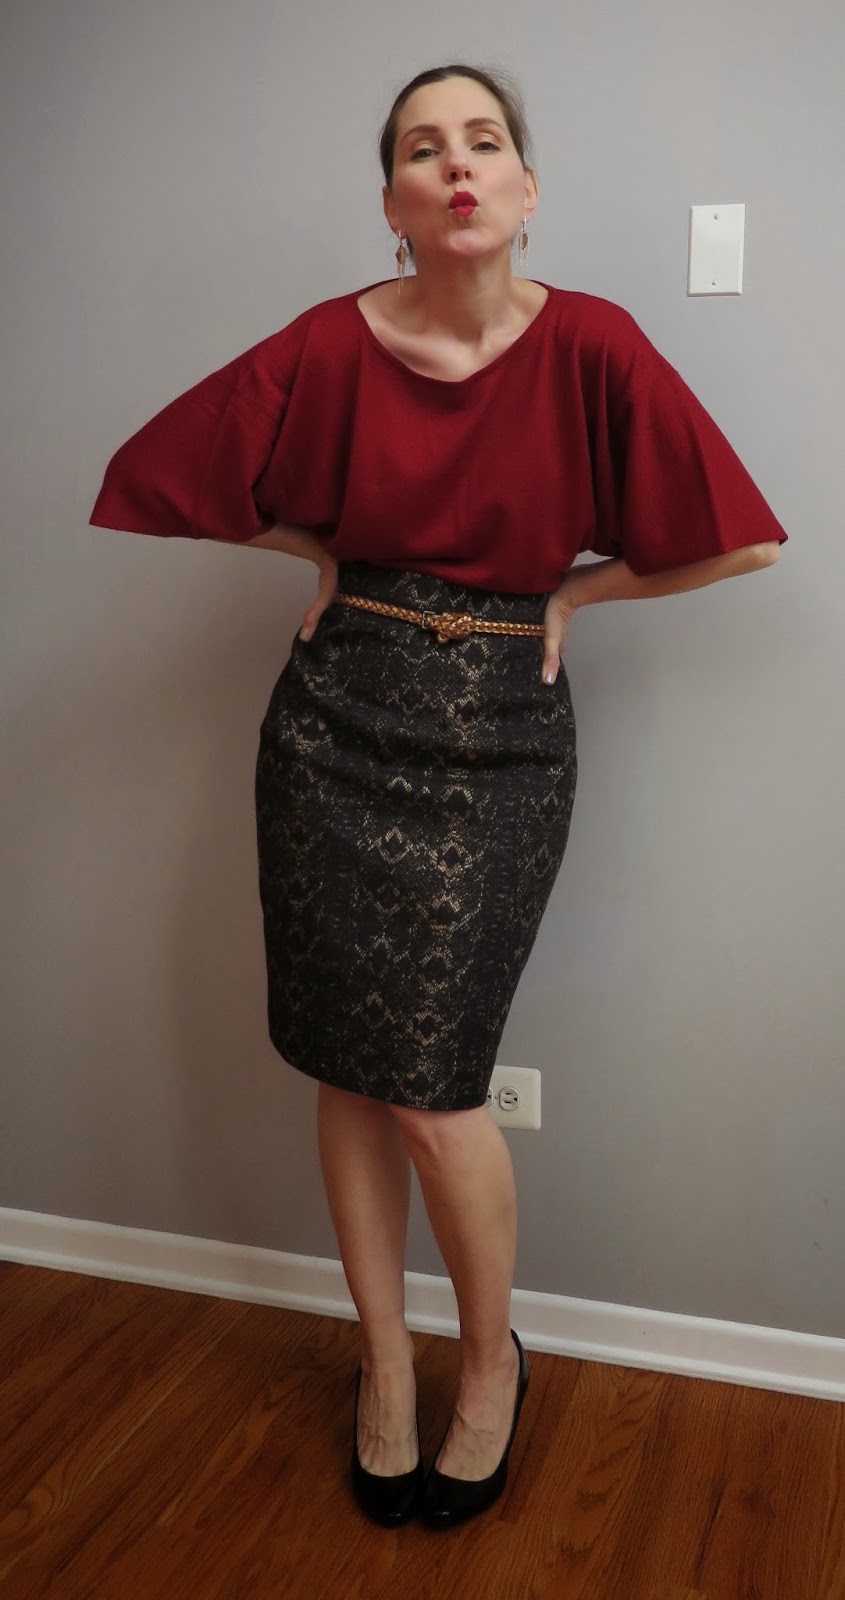
I didn't take any pictures of the waistband because it's just a big rectangle.  I wasn't sure how my waist seam changes were going to affect the waistband, and by the time I finished all of the above I was too pooped to take measurments.  So when I cut my waistband the next day, I just cut it a few inches longer for insurance.  I will say however that I'm considering tissue-fitting again, to create a curved waistband piece.  The waistband on my Snakeskin Skirt doesn't lay quite flat against my body.  It doesn't concern me too much because I'm likely to always be wearing something that will cover it.  But knowing that I can make it better makes me want to :-)

Next up, some construction info.  Look at me, getting three blog posts out of one yard of fabric!


Monday, January 27, 2014

Pencil me in.

I have a pencil skirt!  At last!!

Like a lot of you, RTW pencil skirts have never fit me, so it's been a goal for a long time to make one myself.  This one started life as a BHL Charlotte, but I made so many changes, I really hesitate to call it that any more.

I took a lot of photos, both of my pattern changes and of my construction.  Today I just want to show off my new skirt; I'll tell you all about the rest in another post (or maybe two more).  Just let me get my shoes on first:


This skirt is made from a fabulous stretch black denim printed in gold foil with snakeskin.  I got this at JoAnn's last month specifically for this project, which may be my last for this session of Jungle January.  I LOVE this fabric!  After I finished the skirt, I said to Hubby:  "I love this fabric.  I want to make everything from this fabric!!"  And he replied, "You should.  Then when one thing gets old, you can just shed your skin and put on a new one."  That boy cracks me up.  That's why I love him so much!


I discovered AFTER I made the skirt that I was supposed to hand wash and line dry this fabric rather than machine wash cold and tumble dry like I did.  No matter though - some of the gold is flaking off, which I think makes it even more snake-like.


Not bad for an old broad, eh?  I think this skirt is so flattering, and yet, it's super comfortable and easy to wear.  As I drifted off to sleep last night, I was thinking about all the versions I could make using fabrics in my stash.  You will be seeing more of these!


I took care to match my patterns throughout, centering the print front and back.  Still, I made this from a mere one yard of 56" wide fabric, and I've got enough left over for a fabulous clutch.  You know that's going to happen!


I cut this skirt to a 24" length, which for me is just at the bottom of the knee.  Even though I didn't add a back vent on this one, I still have room to walk normally.  In the future I'd like to make at least one midi length version, and that will require a vent.


I guess you can tell that I really love this skirt.  It hugs my curves perfectly, but not in a way that makes me feel exposed, like my first pencil skirt did.  I think that partly has to do with using a stretch fabric this time.  But it's mostly due to the fitting changes I made, because the muslin I made for this one was done from a non-stretch and it fits just as well.

I'm pleased to say I think I've finally cracked the pencil-skirt-fitting nut, for my figure at least.  And because it makes me feel sexy and fabulous, I leave you with this:


Monday, October 14, 2013

A Few Anna Pictures

I did indeed get to wear my new dress yesterday morning for our breakfast date with friends, and it was a lovely day.  I got Hubby to snap a bunch of pictures.  But first, a few more details about this dress that didn't go under construction notes:

*  My muslin was a size 6 bust, size 8 waist and hip with a 1" swayback adjustment, and as you know, I felt it was a little large.  So for this dress I made a new, size 4 bust/size 6 waist bodice muslin.  The fit was great - as long as I didn't need to move.  At all.  And I do tend to move quite a bit.  So I made a second muslin in a straight size 6 with 3/4" swayback adjustment, and that's the size I've landed on.  Obviously, I didn't bother to muslin the skirt.  I could probably go back up to the 1" swayback adjustment, but it's OK this way too.

*  On the day I finished this dress, the fit was really great, but I guess I was having a "skinny day" yesterday - it felt a little loose!  Can't win for losing!  But I really like it, and it's good to know I can fill up my tummy while wearing it :-)

**EDIT**  I forgot to mention for those of you who have yet to try this pattern:  according to the envelope, my waist falls into the size 8, but this size 6 waist feels fine on me, and I abhor any tightness around my waist. Granted, the waistline seam hits a tiny bit above my natural waist.  I wanted to include this to give you guys an idea of the fit.  I still struggle with knowing what size to make when I'm trying a pattern for the first time, and always look for this kind of information online before making my muslin.

*  While the skirt felt like A Lot Of Fabric when I was making the dress, it felt very light and floaty while wearing it yesterday - to the point of me wondering whether it was hanging correctly.  And I even had a slip on underneath!  I felt a tiny bit exposed.  But I always seem to feel this way in my home-made dresses and skirts - I wonder why?

OK - pictures!  These were all taken in the Lurie Garden next to the Art Institute.

posing

from the back so you can see where it hits the calf

action shot!

and a closer look at the print

Even though this fabric is cheap (and I mean that in both senses), I really love the print.  The background is a very pale yellow-green, with feathers and roses in dark blue-grey, dark and light olive green, pink and fuchsia.  When I bought it I had no idea what to do with it, but at $3 a yard, I couldn't pass it up.  This dress ended up being a great match, because the structure of the bodice doesn't break up the print.  There's a big rose on my right shoulder (which I put there on purpose) - but sadly, my hair is covering it up in every single picture!

Thursday, October 10, 2013

Anna Tea Dress: Construction Notes

For the last week plus, I've been working on another Anna dress, this time with a full gathered skirt.  Should be nothing easier, right?  Well, figuring this thing out nearly did me in!  I had to take a break of several days to ruminate on it. 

The problem was that I wanted my bodice to be underlined, but my skirt to be lined - hanging free of the zipper, if possible.  That problem was compounded by the fact that my outer skirt and skirt lining pieces were not the same width, so I couldn't just smack them together and gather them as one.

So, because I intend to do this at least once more, and because it may help some of you out, I took lots of pictures (after I was done) and I have lots of notes.  Fair warning:  this is going to be a long one!  And you probably won't get to see the finished dress for a few days because I'm hoping to wear it on Sunday when we go out for brunch with some friends.  I know, I'm a tease. 


The Process:  I'm writing this out step by step because I intend to use this post as my instructions for the next time I do this.  So while it may not make for entertaining reading, it will be useful and more concise than I usually am!

Bodice

1.  Cut outer pieces, and underlining pieces, for bodice front and backs only.  (Underlining is white cotton batiste; outer is loosely woven cotton lawn.)

2.  Baste underlining to outer at 1/4" all the way around each bodice piece.

3.  Mark darts on underlining; sew up center of each then sew darts.  (Sew only to 1" below top of release pleats on front so stitching doesn't show.)

4.  Interface facing pieces with very lightweight fusible tricot. 

5.  Sew shoulder seams of bodice; finish on serger.

6.  Turn under sleeve hem and hand stitch to underlining.


7.  Sew shoulder seams of facing.  Finish outer edge only on serger.

8.  Attach facing to bodice.  Grade and clip curves, then understitch all the way around the neckline.


9.  Sew side seams; clip curve then finish on serger.


At this point the bodice is complete, with unfinished edges at the center back.

Skirt

1.  Tear off two pieces of fabric for skirt, 29" long by width of fabric.  (My fabric here was approximately 60" wide.)  Cut one piece in half to create a center back seam.

2.  Tear off two pieces of batiste for skirt lining, 26" long by width of fabric.  (My batiste is 45" wide.)  Cut one piece in half to create a center back seam.

3.  Sew side seams of both skirt and lining using French seams.

4.  Make three rows of basting stitches at the top of both skirt and lining (separately) at 3/8", 5/8" and 7/8".

5.  Make a mark on inside of bodice 1.5" toward center back from side seam, because the front bodice of this pattern is significantly narrower than the back. 

{pink marking is barely visible}

6.  Gather outer skirt to bodice, matching center front and lining skirt side seams up with markings from previous step.  Baste in place.

7.  Gather lining on top of skirt, matching in the same way as before.  Baste in place.

8.  Sew over basting to create waist seam.  Serge all layers together, trimming away excess.  Press seam up toward bodice.


At this point, the skirt and lining are attached to the bodice and all center back seams are unfinished.

Finishing

1.  With serger, finish center back openings all the way from the outer edge of the facing to the hem edge of the skirt, making sure not to catch in the lining.

2.  Fuse Knit Stay Tape to zipper openings. (1.25" wide ivory)

3.  Turn facing to the outside (RS together with bodice)  and stitch along center back (I used a 1/2" center back seam to give myself a little more room, as determined when trying on the dress at this point.)

4.  Turn out facing and press.  Continue pressing under center back seam allowance from neck edge all the way down to hem edge of skirt.

5.  Press skirt lining seam allowance under separately from outer skirt.

6.  Sew center back seams of skirt and skirt lining separately, RS together.  Finish lining opening by stitching down the turned-back seam allowance.


7.  Insert hand-picked zipper.  My zipper is an invisible zipper because that's what I originally planned to use.  But I realized that using a hand-picked zipper would make the construction a whole lot easier with the interlining/lining thing, while enhancing the vintage vibe of the dress.


8.  Try on dress to determine hem length.  I changed plans here again too:  my original intent was to have a deep hem to finish just below knee length, which is why I tore off my skirt pieces at 29" long.  But when I tried on the dress, I really loved the mid-calf tea length, so I decided to use a narrow hem.

9.  And I got my most successful narrow hem ever by doing one simple thing:  I pressed my hem back by 3/16" (less than 1/4" but more than 1/8") all the way around.  The biggest problem I've had with my narrow hem foot is keeping the feed a consistent width from the edge.  By pressing it back first, that problem was eliminated.  I also set my needle at 3.0 - one notch right of center - to get the stitching right down the middle of the narrow hem.


10.  Finally, create "hem" for lining by using a contrasting color thread and the "scallop" stitch on my machine, set at a stitch width of 7.0  and stitch length of 0.7.    Cut away free edge once stitched.


Whew!  If you made it this far, you're a trooper!  And if you followed the links, you saw that I relied heavily on tutorials by Tasia at Sewaholic.   I have learned so much from her site over the last year or so, I'm thinking of going all the way back to the very beginning of her blog and reading it like a book!


Wednesday, September 18, 2013

Anna Almost-Wearable Muslin

But let's get real - I'm already wearing it, so there's not a huge chance I'm going to change my clothes!

I finished this up this morning, after working on it bit by bit over the last week.  The jury's still out on this, and if I do make it again, I'll have to make some more changes.


The only changes I've made so far are to go from a size 6 at the bust to a size 8 at the waist and hips, and a 1" swayback adjustment (a half inch either side of my horizontal line).

According to the pattern envelope, I should be in a size 2 for the bust, but I wanted room for my shoulders and I don't like to be constricted.  Also, I didn't want to grade across 3 sizes from bust to hip, and I think I do need the room of the 8 in the waist and hips.  The bodice feels a bit big though, so I may scale it back to a 4 next time.  I'll also need to take some length out of the bodice over all - maybe 1/2" - and a bit more in the swayback, 1/4" or so.  As it is, I'm getting some "lumping" around my waist where the bodice meets the skirt.  I tried to capture it for you, but the combination of my on-its-last-leg camera and this crazy fabric I used make it a little difficult to see:

let's pretend we don't see that weird wrinkle you-know-where


you can see that the front is still a bit shorter than the back


Things I did differently from the instructions:

1.  Interfaced my neck facing with my very lightest interfacing - I wanted a bit more structure there.

2.  Pressed the waist seam down rather than open.  Let's face it:  you just can't get away from Gravity.  It was going to end up that way eventually, so I just pre-empted it.  I finished the two seam allowances together with the serger.

3.  Tacked my facing to the shoulder by stitching in the shoulder seam ditch for 3 stitches - a nifty trick I learned from the Pattern Runway Kimono Dress instructions.

4.  Understitched my facing to the seam allowance, then trimmed it to about 1/4".  (This is, of course, after clipping into the curve.)


Things I didn't do and wish I had (aside from the fit issues):

1.  A full lining.  This fabric is one of the more supple quilting cottons, and it feels a bit lightweight to me.

In the Beginning Fabrics:  Bloom Modern, Seeds Red

2.  Stabilize my zipper opening.  Honestly, by the time I got to the zipper, I was getting kind of bored.  I really just finished the dress to get it off my coffee table.

3.  Taken more care with my hem.  The fabric is so busy no one will notice the terrible job I did, but I know it.

4.  Lengthened the skirt.  I only hemmed it to about half the height recommended in the instructions, and this "midi" length hits me mid-knee.  I'm only 5'4"  people!  I wanted it a little bit longer to coordinate with the vintage vibe of my cool shoes:


Conclusion:

It's OK.  I don't love it and I don't hate it.  I'm not sure yet if I like it enough to do the work it needs to fix it, and if I do, it will be a while.  Right now I'm ready to move on to something else.  I like it slightly better belted, but I don't have a belt to go with these shoes.


I'm sure you've also noticed that these pics are a little hair update.  I'm not at the point yet where my second-day hair looks as great as the first, but I've definitely got a lot more curl going on than I did a week ago!  I'm really loving this method so far.


this picture is about the hair

I want to give a big shout-out to Pam at Paint Box Polish for turning me on to Turbie Towels - thanks Pam!  I bought a couple a few days ago and tried it out this morning for the first time.  Between the Turbie Towel and the diffuser, my hair was dry enough to work with in about a half hour!  Go get one, people!


NATURAL!! I still can't believe it!