Showing posts with label quilting. Show all posts

Wednesday, December 24, 2014

Tangier Ikat Quilt

The last item in my FO parade is a quilt.  I pieced the top of this quilt last spring, and it's been sitting around since then waiting to be sandwiched and quilted together.


The fabrics are 10 different prints in oranges, hot pinks and dark corals, with accents in green, aqua and white.  I bought these as a fat quarter bundle which included one cut of each print in the series.  It's been over a year since I bought the fabric, so of course it's no longer available as a FQ bundle, but some of the prints are still around.

I wanted this top to look very busy and kind of souk-esque.  I think I succeeded!


I find fat quarters to be a difficult size to work with.  I much prefer to cut quilt pieces from yardage.  It took me a long time to figure out how to use all of the fabrics, in the way I wanted to use them.  Some of the prints are quite large, as you can see, and I didn't want to break those up too much.

Finally I decided to cut each piece into squares and rectangles of 9" x 9", 9" x 6" and 9" x 3".  The 6" and 3" rectangles got sewn together to make 9" squares, and then all the squares were sewn together with the rectangles being oriented in different directions.  The main purpose of this quilt is to give me some beautiful, cheerful fabrics to look at throughout the dreary days of winter.

I had every intention of free-motion quilting this with random squiggles, but I gave up after about 3" of that!  This quilt is heavy!  And rather large, so I didn't think my arms could hang in there long enough to get it all done.  So I switched back to my walking foot and just did straight-line quilting spaced about 4" apart.

The batting was also pieced together from scraps of previous quilts, using my edge-joining foot and a wide zigzag stitch.  I was glad to get those used up - they take up a lot of room!

The binding is a very pale blue and white stripe, which I think ties in nicely with the aqua and green in the main fabrics.  And the backing is plain muslin.


I was anxious to start using this quilt, so I sandwiched, quilted and bound it all in one day last week!  And it's been used every night since :-)


Saturday, March 8, 2014

Breaking News: Feather Bed Quilt FINISHED!!

After we got back from our trip, I had a lot of catching up to do - as you do after being away, even for a bit.  I didn't feel like I had the time or energy to start a new sewing project, so instead I concentrated my little bit of free time on my knitting and on finishing up my Feather Bed Quilt.

I didn't have a whole lot left to do on the quilt.  I spent about 2 hours on the remaining quilting over a couple of days, and finished that up early yesterday morning.  I was so excited to be nearly done that I scrapped my plans for the rest of the day and trimmed the edges, cut my binding, pinned and sewed it on, then hand-slip stitched it, for a total of about 4 more hours work.  I was so engrossed that I didn't even take any in-progress shots! (Except one of the binding that I posted on Instagram.)

I finished up at about 4:30 yesterday afternoon, and immediately popped my new quilt into the washer.  After piecing, my favorite part of quilting is that final wash and dry - I love seeing how the quilt wrinkles up around the lines of quilting.


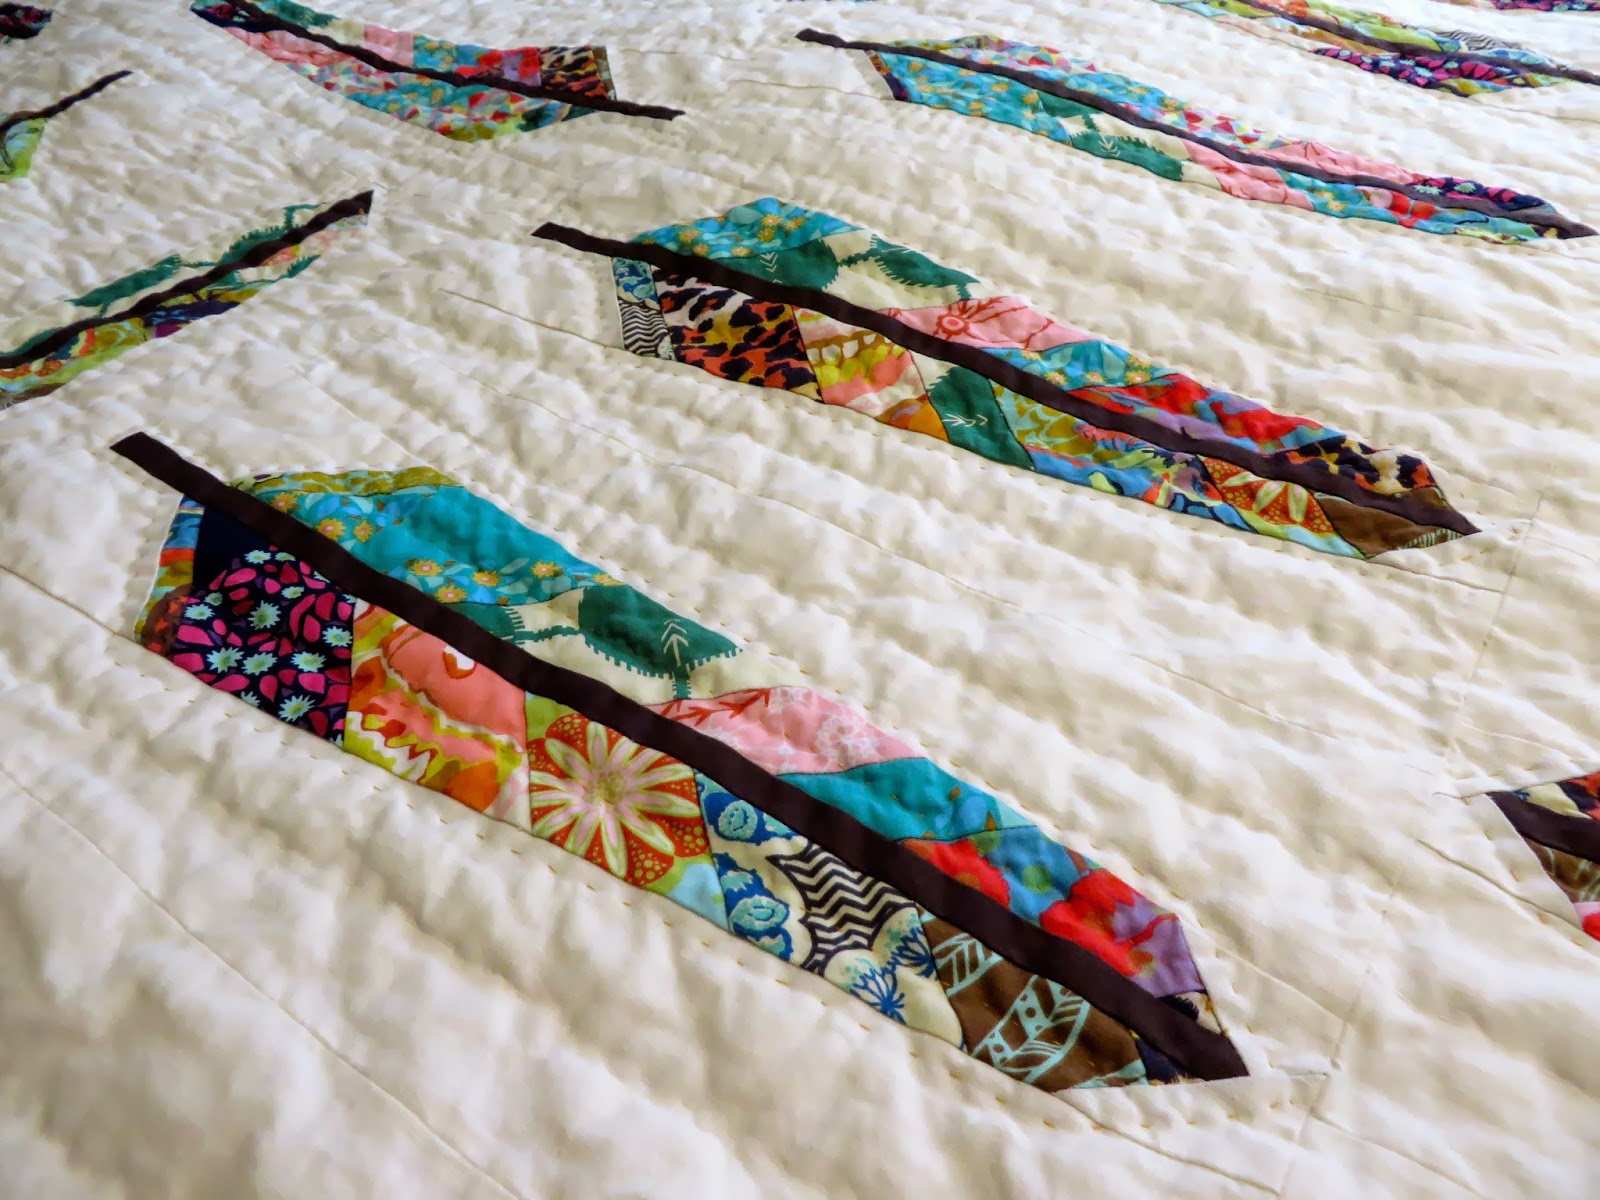
Here's the final reveal.  Honestly, it looks pretty much like the in-progress shots I've been showing all along, except that now it has a binding.


My backing is one full piece of Anna Maria Horner voile:  Coordinates in Saffron.  It's deliciously soft and silky.  My finished top measured 53" by 70", so I bought a two-yard piece of this 54" wide fabric.  However, I got some shrinkage after the pre-wash and my backing ended up a bit narrower than I needed.  So I got creative and incorporated the printed selvedge into the design; my love for the selvedge has already been documented!


I think I mentioned in one of my previous posts that I made this quilt smaller than the "twin" size given in the pattern.  For my quilt, I made 22 feathers rather than the 38 given in the directions.  This yielded a quilt exactly the size I like.  Here it is on top of my king size bed, to give an idea of the size.


My feathers were made using all the prints from the Patina colorway of the Field Study quilting cotton line.  For the binding, I used another piece of the same leopard print as in the feathers.  I cut my binding strips 3" x width of fabric, and then attached it with a 3/8" seam allowance rather than the 1/4" usually used.  I did it that way partly because I wanted the leopard-ness to be a bit wider and more noticeable, but also because it just feels more secure to me.


I'm so pleased with this quilt.  I will say though, using the linen/cotton blend as the background of the feathers makes it quite a bit heavier than if I'd used quilting cotton - heavier than I like really, so I'm not sure I'd use it again, although it's a lovely fabric. 

And now I'm having fun imagining what my next quilt will be . . .  I actually have another one started, which will be pieced and quilted entirely by hand.  I save that one for when I feel like doing some hand work.  So I think I need another machine-pieced project to have around, and I already have a fat quarter bundle in my stash from which it will be made.  Pink and orange . . . mmmmm!

Thursday, October 24, 2013

The Beginning of the End

Ooooooh!  Dramatic!

Really it just means that I've begun to finish my quilt ;-)

My backing fabric came lickety-split, and yesterday I washed it up and made my quilt sandwich.  I was just able to cover the back of my top with a single, 2-yard cut of 54" wide voile.  I won't have the normal 1" - 2" extra buffer around the edges, so I'm going to have to be super careful with my quilting.  To that end, I pinned the heck out of that sandwich!


And then I did my first little foray into hand quilting.  It's really not that hard.  Maybe a little straining on the hand holding the needle, but manageable.


I decided to go all the way around each feather, about 1/4" from the edge, and then down the middle of each vane.  (Yes, I googled "parts of a feather" to find the correct word.  Once a Montessorian, always a Montessorian!  We're obsessed with nomenclature!)  I used a piece of dried bar soap to mark the line down the vane to keep things nice and neat, but the outline is freehand.


You can kind of see the dimples down the center of the rachis (ha!) where I tested out how I liked stitching on that.  I didn't, so I took it out.

My quilting thread matches the saffron color of the backing.  My plan is to do all the outlining of the feathers first, and then go back and do some quilting on the background in ivory.

It looks pretty cool from the back too:


The hand quilting isn't as slow or tedious as I'd thought it would be, but this certainly isn't going to be quick.  And that's OK with me.


Friday, October 18, 2013

Comfy Cozy

Remember my Feather Bed Quilt?

I worked on it here and there over the summer, a feather at a time.  Last week I started looking at it again, thinking, "I really should get back to that."  And since the last few days were cold and rainy here, all I wanted to do was things that make me feel warm and cozy:  knitting and quilting.

I had half the feathers done, and decided that things would go faster if, rather than doing each feather individually, I did the remaining feathers assembly-line style:


So Wednesday evening, I attached all the B pieces to the A pieces.  Yesterday morning I was back at it.  It didn't take me long to sew the A/B units to the C piece (the stem), so I went ahead with D.


And once I had D on, I felt like I might as well go ahead and attach E.  And since that didn't take long either, I went ahead with piece F - which finishes out the block!

Well, of course, having all my feathers put together, there was no way I could resist arranging them on the floor to see what my finished top would look like:


And once they were down there in an arrangement I liked, I figured I might as well just go ahead and sew them together so I didn't have to worry about keeping them in that order.  So, although I didn't mean to do it, I spent ALL day yesterday working on it, and finished the top!  Here it is with the first few rays of sunshine this morning:


When I started this project, I planned to make the twin size from the pattern, which requires 38 feathers.  But each feather is surprisingly large, and I realized that 38 feathers would produce a much larger quilt than what I wanted.  So I scaled my pattern back to 22 feathers.  As it is, this top almost completely covers the top of my queen-sized guest bed, at 54" x 71":


My background fabric is Essex Linen, which I'd never used before this project.  It is a lot heavier than I realized, so for the back I'm going to use voile - another print from this line, Anna Maria Horner's Field Study Coordinates in Saffron.  I've been thinking about how best to quilt it so as not to interfere with the design, and I'm thinking it's going to be hand-quilted.


So while last week I was wondering if I would get this quilt done before the end of the year, now it's looking like I will.  I'm very excited about that, and am already planning out the next quilting project . . .

Thursday, August 22, 2013

Field Study Bag

For a long time I'd been wanting to try Elizabeth Hartman's quilt-as-you-go technique for creating bag panels, and this week I finally got around to it.  I really loved doing this - it's so fun to build your panel as you go, deciding which piece of fabric to use next. 

I selected some leftover bits from my scrap box in mostly pinks and purples.  I love it that even the small pieces are useful in this technique - some of my bits are only about 2 inches square.  Here are the two panels I created:


On both my panels, I decided to use pieces of the printed selvage.  The first one says "Field Study No. 2" -


And on the other side, I decided to keep the feathered edge on the outside.  When I showed the finished bag to Hubby, he said that was his favorite detail.  It's mine too :-)


 And here is how the quilting looks from the back.  The bits of fabric are quilted directly onto a layer of batting with a backing.  My backing is a heavier muslin.


To make my bag, I roughly followed the directions for the Style B bag from Elizabeth Hartman's Perfect Zip Bags pattern.   However, I changed my dimensions and the inside pockets based on how I wanted my bag to be.  After my panels were quilted, I cut them to 10.5" x 7".  On one side of the lining I sewed a 2-slot card pocket, and on the other side I made a single pocket.  I'm proud of myself that I thought about what kind of pockets and strap I wanted before starting, and then did all the maths to figure them out.  I usually just delve in, and then have to make corrections later, or get an outcome I'm not happy with!


For my strap, I decided I wanted a D-ring at the side, but a swivel clasp that could be connected either to the D-ring or the zipper pull.  About a month ago I ordered a bunch of swivel clasps from this Etsy vendor, and D-rings from this one.  The swivel clasps aren't that easy to track down, because they go by a lot of different names!   Now I have plenty to last me a while :-)
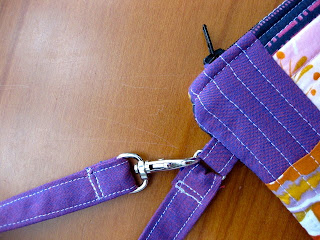


My finished bag measures about 9.5" x 6", and is quite sturdy.


And here's the finished bag from each side:


And the pockets on the inside:


Can you tell I love my new bag?  This one has room for a packet of tissues and a lip balm!  And all the different fabrics make me happy - they're all leftovers from garments I've made.

Have any of you ever tried this technique?  I think I'm a little in love with it!

Saturday, August 3, 2013

A New Quilt

Here's a little project I finished up today.


This a baby quilt for my youngest nephew.

He's eight years old now.

Oops.

This thing had been sitting in my scrap fabric box, 75% finished, for all that time.  It bugged me every time I got into the box.  I'd made one using the same pattern (from an old Kaffe Fassett quilting book - I don't remember which one) for his older brother.  I hoped to get a second quilt out of the leftover fabric, but I just didn't have enough, so I lost steam and never finished it.

But my procrastination over the shirt inspired me to dig it out this week.  I added one more strip of blocks to the length to give me an odd number on each side (9 by 11 blocks) then pieced together  some leftover muslin for the back, made a sandwich, and did a quick stitch-in-the-ditch quilting.


The bias strips for the binding were already cut years ago, so all I had to do was sew them together, trim, and attach them to the quilt.  I decided to do the final bit by hand, just for practice, since this is a very small quilt.  I did that today while listening to one of the Thread Cult podcasts Lisa G. turned me on to.  Then I finished up with a quick wash and dry.


I really love this combination of fabrics, and would do a full size quilt like this if I could find similar yardage.  It's a combination of ticking, chambray, a navy and white plaid and various colors of madras plaid.  Each square is 2.5" square before sewing, so only 2" square after sewing.  Each strip alternates a blue piece with all of the different madras pieces.


Since I ran out of fabric, it's very small.  It was 18" x 21" before washing, and it shrunk by a full inch in either dimension after washing and drying, so it's now 17" x 20".  It's going to live on the back of my knitting chair, antimacassar-style, and I'm going to use it to protect my thighs from the computer when it gets warmed up and I'm wearing shorts!

Have you guys ever finished a project yeeeeeeears later?  I've done it several times!

And there's still one more unfinished quilt in that box . . .

Monday, February 4, 2013

Feathers!

I got inspired to work on my quilt over the weekend, thanks to Andrea.  I spent a good four hours on Friday cutting out almost all the pieces for the blocks:


Even though I haven't completely finished the stripped yardage needed for the feathers, I decided to start cutting them.  I'm hoping to be frugal enough with my prints that I can have some fabric leftover for making bags.


I'm making the Twin Size, and the pattern calls for 5 1/2 yards of background fabric.  That sounded like an awful lot to me, but I ordered that much anyway because I'm a novice at this kind of thing.  And I figured I would be able to use any leftover for . . . making bags!  But in cutting out my background pieces I used all but about 3/4 yard - and that's with very frugal cutting, sharing edges.

Each block consists of 2 feathers, and each feather consists of 9 pieces of fabric (if you count the stripped feather piece as one).  I need 38 feathers for the quilt.  On Saturday, I sewed off and on throughout the day and managed to complete 4 feathers:


I loves them.


It felt really good to get some forward movement on this quilt.  Andrea has committed herself to working on her quilt every Friday, and I'm going to try to do the same.  Only 34 more feathers to go!

Tuesday, January 8, 2013

New Quilting Project

Things have been kind of crazy around here the last several days, and it likely won't slow down until at least tomorrow.  I have not done a single stitch of sewing yet in 2013 - a travesty!  At least a little bit of knitting has happened.

But I didn't want to wait any longer to show my new quilting project:  Anna Maria Horner's Feather Bed Quilt

I first came across this design in late August, just before Niecey-poo and her family left us, via the Hawthorne Threads newsletter.  The moment I saw this quilt, I fell head over heels in love - it's what inspired me to try out quilting again after so many years.  I quickly ordered a half yard of each print in the "Patina" colorway  of the new Field Study line.  The pattern itself is a free download on Anna Maria's website.

I started my quilt about a month ago.  The first step is to cut strips of random widths across the whole 45" width of the fabric.


These strips then get sewn together to form a new fabric, which will get cut into the feather shapes.  Here's a picture of my first third of the pieced fabric, made about a month ago.  It contains one piece of each of the fabrics:


The pattern is very detailed, giving the yardages and layout diagram for each size quilt, and step-by-step instructions for piecing the feathers.


Since taking these pictures, I've finished another third of the pieced fabric.  I'm hoping to complete the final third later this week and begin cutting out my feather pieces.  I still haven't decided on a background color, but am leaning toward a cream or linen shade.

I'm not in a rush to complete this one.  I really like knowing it is there on the sidelines, waiting for those times when I feel like sewing straight lines.  My only goal is to have this complete by the end of 2013, and to enjoy the process along the way!