*HB = Hips and Buns. In other words: this skirt is too tight!
I finished it last week, but didn't have the time or inclination to take pictures until yesterday. Also, I have a lot of things I want to say about this project, so I've spent some time getting my thoughts in order, as opposed to my usual stream of consciousness. I made an outline and everything!
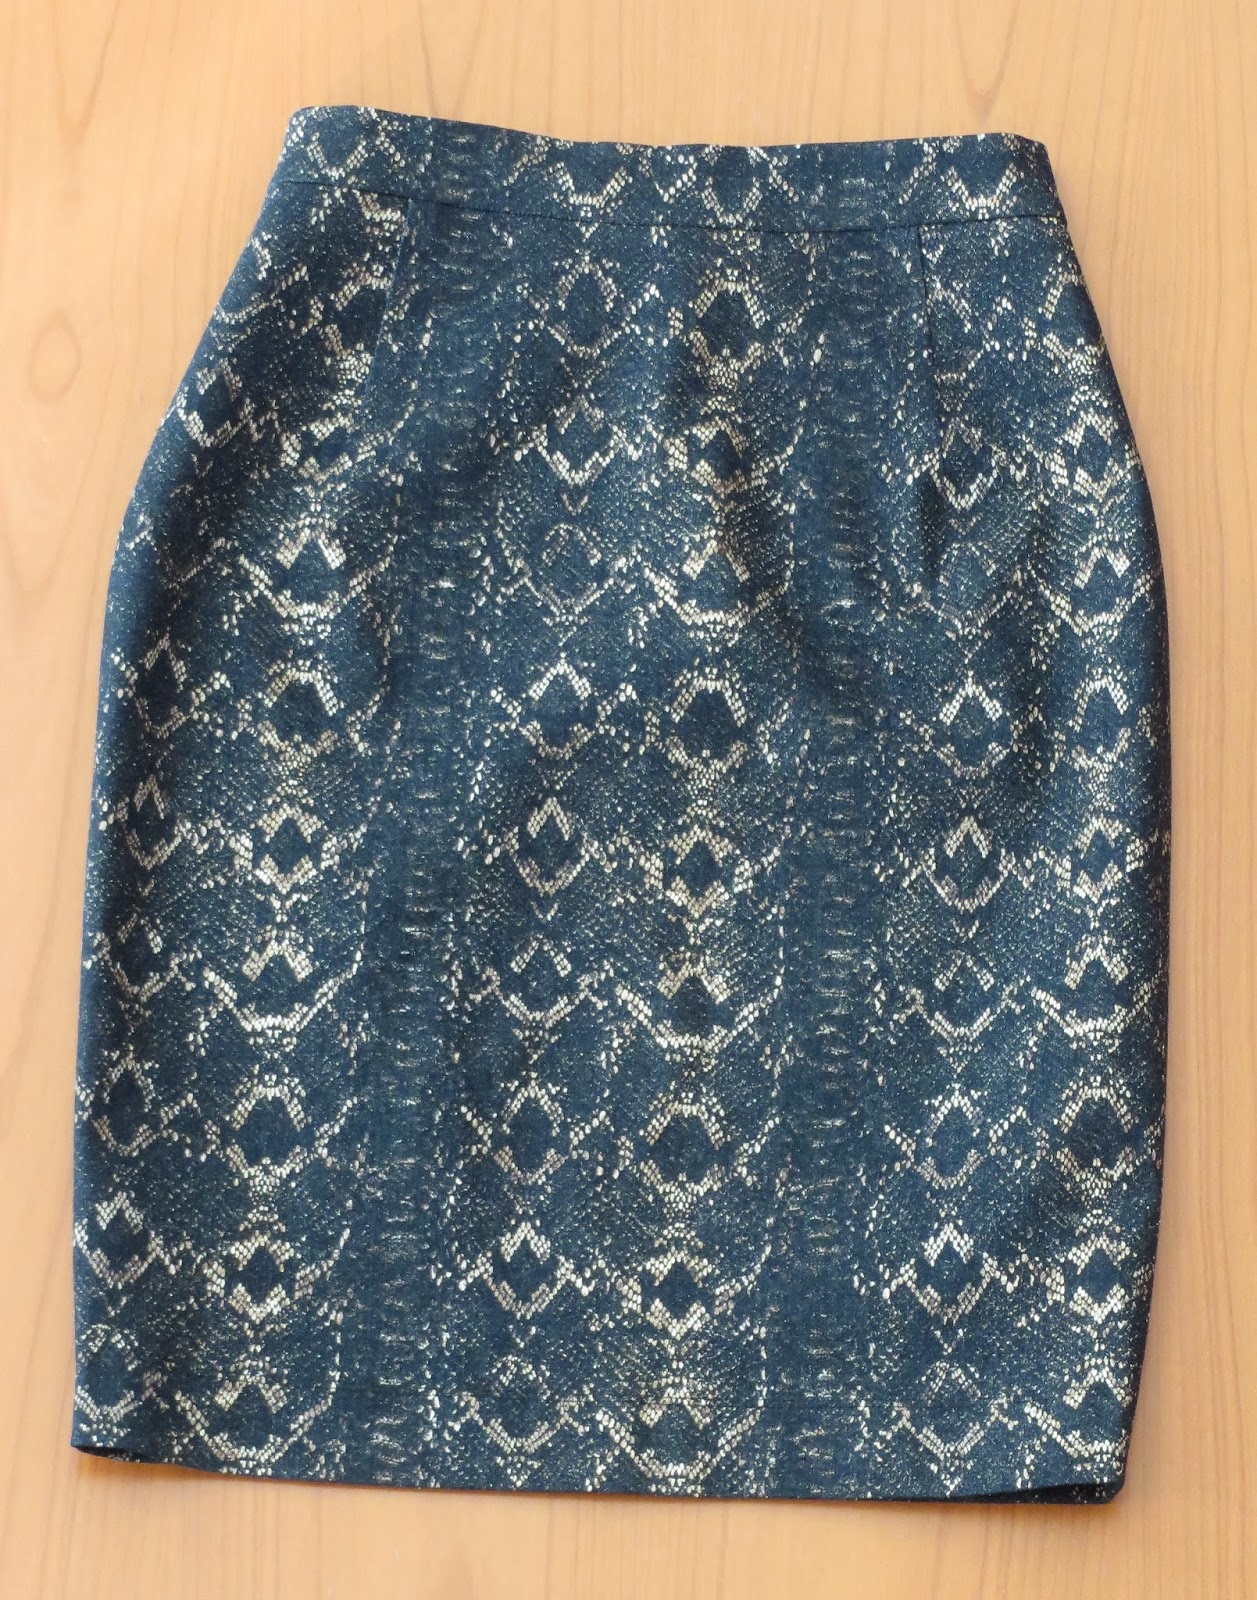
Let's start with the pattern envelope, so you can see the lines and style of the garment.
This Burda pattern (7175) is listed only as "retro" - no year is given. But the style looks to me like early 1960s. I love the whole ensemble, and while I traced the pattern pieces for both the top and the skirt, I decided to start out by making the skirt only. This is the first time I've used one of the Burda patterns that comes in an envelope, so this project was as much about testing the pattern company as it was about testing the garment. I did a couple of searches, and haven't found any other examples of this garment or reviews for this pattern, so I wanted to include my two cents here.
The Burda patterns that come in the envelope have the seam allowances already included, unlike the ones from the magazine, so that's a plus. One thing I liked about the tissue is that the finished hip measurement was clearly shown on the skirt piece. Something I didn't like so much is that the sizing information is also printed on the tissue, rather than on the envelope. I found it tedious to have to unfold the tissue to figure out what size to make, and then refer back to the envelope back for the fabric requirements.
I did my usual alteration of grading out to a larger size for my hips: size 38 at the waist to 40 at the hips. According to those finished measurements on the tissue, this should have been sufficient, giving me about an inch and a half of ease. The true story though, is that from my initial basted fitting, I could tell it was too tight, so I did 4/8" seams rather than 5/8" - and it still wasn't enough. So I would say that unlike the Big 4 pattern companies, the Burda patterns do not include excessive ease. If I'd been really smart, I would have actually measured the pattern pieces, rather than taking their word for it!
The rating on the front of the envelope calls the pattern "easy" and I'd say that's accurate - IF you've ever sewn a skirt before. The instructions are sketchy in some places, and the vent is rather strange. I haven't made a whole lot of skirts with vents, but the way this one deals with the vent seems like a cheat to me: you attach a square of fabric to the inside on the lining, so that it looks as if you'd done a small inverted pleat there.

I had a few reasons for making the skirt as given. I trusted (perhaps wrongly) that this really was a reproduction of a pattern from the '60s, and I wanted to make something that fit as a lady would have worn it back then. Also, since it's probably impossible to find a RTW pencil skirt that would fit my curvy frame, I don't have a whole lot of experience with how one is supposed to fit! As I said, when I tried it on as I was making it, I already knew it was too tight, but decided to finish it anyway. Interestingly, once I had the lining in, it seemed to fit much better! The lining made the lines of the skirt much smoother than they had been.

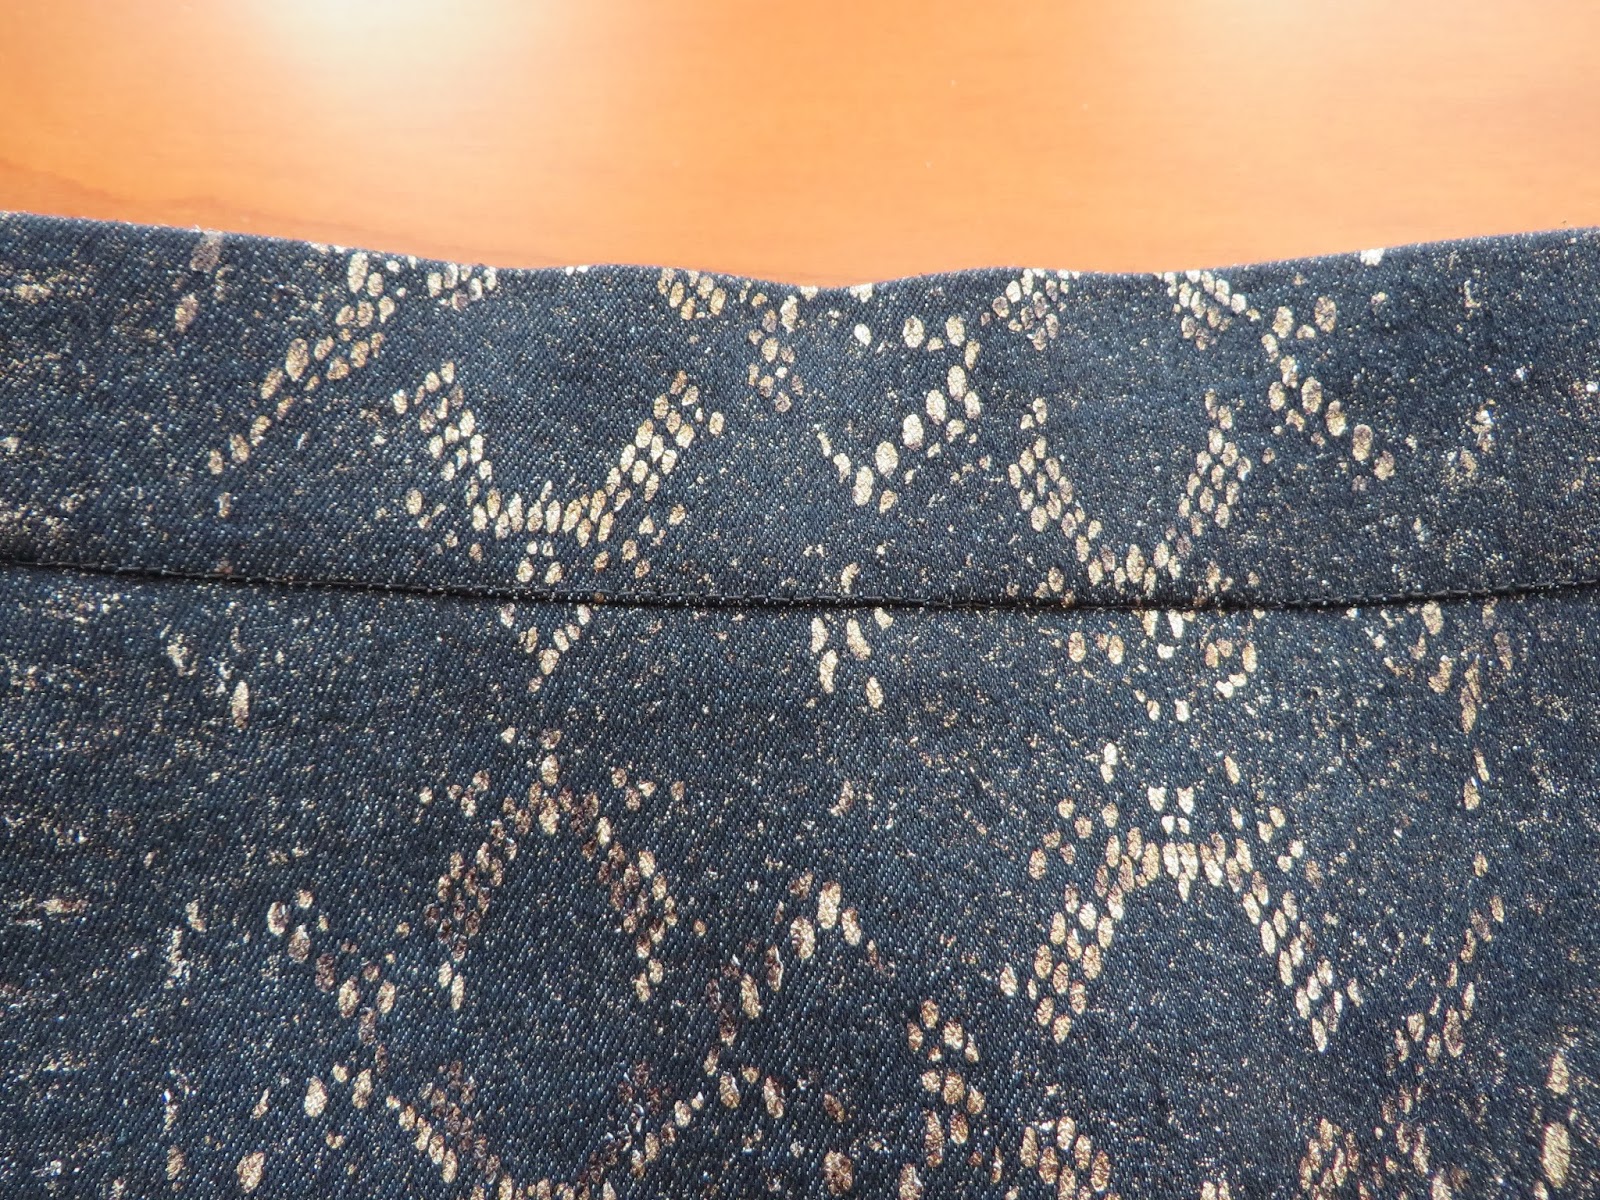
Another factor in the poor fit of the skirt is probably my fabric choice. This is a wool blend gabardine, chosen for its beautiful eau de nil color (and also its cheap price). Of course, in the face of this gorgeous shade, I completely forgot that there's absolutely no give in gabardine. In a fabric with some stretch, I could probably get away with using these pattern pieces.
I think the pattern cheats at the waistband too: it's just a long rectangle. I think this could have benefited from a more shaped waistband.
This project was all about experimentation for me, and I'm still working on it, as I think it's got potential. One of the things I tried out that I love was my new blind hem foot. Check out the photo on the right above: you can barely see where the hemming stitches poke through to the front of the fabric! I've gotten fairly good at blind hems over the years, but this foot makes it incredibly easy to do it perfectly. Well worth the few dollars I spent on it.
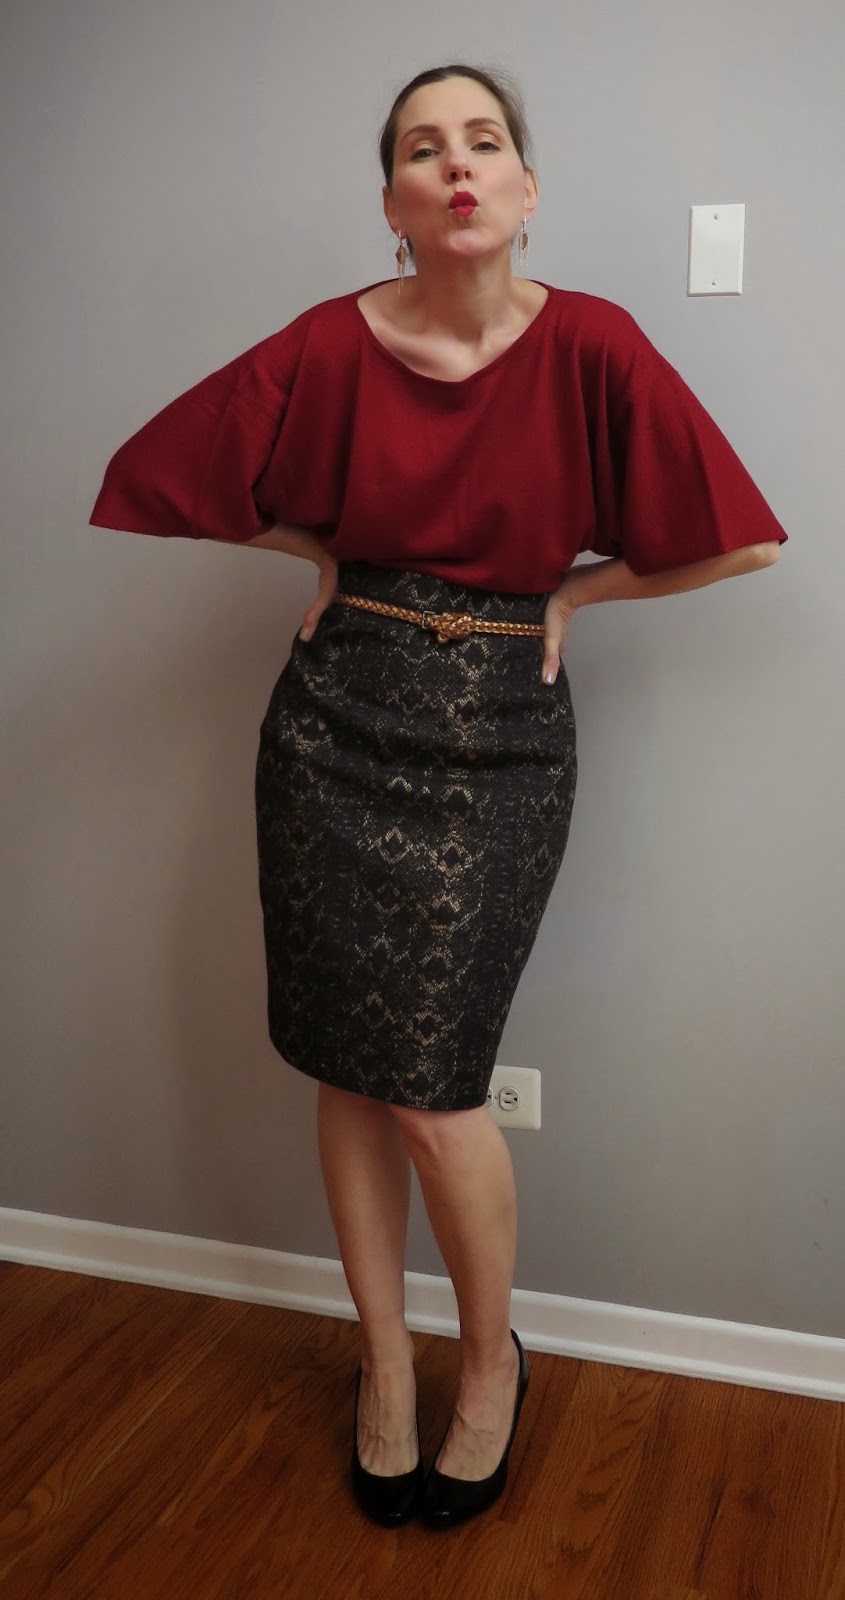
I do plan to let out the side seams a little, but I went ahead and took some pictures yesterday anyway because I had a little free time. I also think it's good to see the drag lines in the photos - they really do show where the garment needs to be adjusted. If I can't let this skirt out enough to make it more presentable, I may make it again in the same fabric, because it goes with a lot of my other me-mades!
With one of my
Sencha blouses. As you can see, all the drag lines are at the hips. Although on a skirt, I guess there's not really anywhere else they would be!
With the
1940s reproduction silk blouse.
With a sweater I've had for years, but have nothing to wear with. That nifty faux fur collar is part of the sweater.
And now for an admission: I love that last outfit, and that sweater is the main reason why I want to make the skirt work. When I first put on the two together, I thought, "The only thing I need to make this the perfect outfit is some leopard-print pumps." I've been looking for the perfect pair for about 3 years, but never found anything that matched what I had in mind. Until last week, when I was picking up a few things at Target, and I spied
these beauties:
Exactly what I'd been looking for, and only thirty bucks! (The uppers are even leather!) So, for the first time in almost a year, I've broken my Seamless Pledge. But I don't even care - they're perfect!