This past weekend, Hubby and I headed to Michigan for a get-together with my Dad's side of the family. I decided I wanted to wear something new and spring-like, but I was afraid to wear my new Roxanne: too many kids and too much food and wine around!
So I made myself a new Archer, but with a twist this time: this one is pop-over style. I've been wanting to try this out for a while, as I love the look of a pop-over shirt. I started out being a really good blogger, taking pictures as I went so I could show you all how I did it.
I narrowed the sleeve by 3/4" each side, and then made a 15" long tower placket.
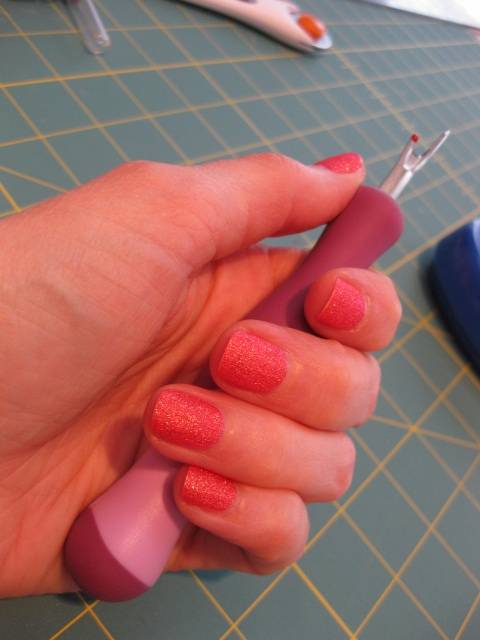
Then I started to sew that placket on:
And then I realized that the next bit - the trickiest bit - would never show up in this crazy fabric! So, tutorial abandonned! But I will be doing this again in a chambray, so I will take lots of detailed pictures of that one. I have seen some comments that people fear the tower placket, but it's really not that hard to do.
Anyhoo . . . My good blogging intentions were further abandonned over the weekend. We left home at 6:15 Saturday morning, so I promised myself to have someone take my picture once we were at my aunt's house. Of course, I spent the whole day yacking with my relatives, eating and drinking, and totally forgot to get a picture of the entire outfit! The closest I got was this picture:
This is a picture my brother took of my niece and me. I trimmed her out because I don't think it's cool to post pictures of other people's kids on the interwebs. Better safe than sorry :-)
So, what you guys get is a picture of my rumpled shirt. It kept me comfortable and stylish all day long.
I thought it was interesting that I got comments from a lot of non-sewing people about my "excellent pattern matching on the front." They were impressed that I centered that butterfly (or as I like to call it, booberfly, due to its position). I should have just said, "Yeah, I'm that good." But instead I found myself explaining how the front is cut on the fold so no matching is required.
The reason I narrowed the sleeve is that I left off the cuff so I could do this:
But it turns out that narrowing it by 3/4" each side was too much for me, so I'll add some back in next time.
I was a little disappointed that the front placket kind of gets lost in the print, but I feel the overall shirt is a success.
Of course, this is more of the Anna Maria Horner Field Study voile, Sinister Swarm in Vivacious.
Here's the collar, also getting lost:
This shirt actually ended up taking less time than it takes me to make a "normal" Archer, despite the placket. I left off the pockets and cuffs, and I only had to make 5 buttonholes on the placket and one each on the button tabs for the sleeves. I left off the buttonhole on the collar stand because it will never get buttoned.
I LOVE making shirts, and it was really fun to do this one with a few changes to the style. I can't wait to do it again, but I think I will have to as I've got more travel in my near future, and I really need to finish that Robson trench I've been working on for I don't know how long!
Showing posts with label anna maria horner. Show all posts
Tuesday, April 22, 2014
Saturday, March 8, 2014
Breaking News: Feather Bed Quilt FINISHED!!
After we got back from our trip, I had a lot of catching up to do - as you do after being away, even for a bit. I didn't feel like I had the time or energy to start a new sewing project, so instead I concentrated my little bit of free time on my knitting and on finishing up my Feather Bed Quilt.
I didn't have a whole lot left to do on the quilt. I spent about 2 hours on the remaining quilting over a couple of days, and finished that up early yesterday morning. I was so excited to be nearly done that I scrapped my plans for the rest of the day and trimmed the edges, cut my binding, pinned and sewed it on, then hand-slip stitched it, for a total of about 4 more hours work. I was so engrossed that I didn't even take any in-progress shots! (Except one of the binding that I posted on Instagram.)
I finished up at about 4:30 yesterday afternoon, and immediately popped my new quilt into the washer. After piecing, my favorite part of quilting is that final wash and dry - I love seeing how the quilt wrinkles up around the lines of quilting.
Here's the final reveal. Honestly, it looks pretty much like the in-progress shots I've been showing all along, except that now it has a binding.
My backing is one full piece of Anna Maria Horner voile: Coordinates in Saffron. It's deliciously soft and silky. My finished top measured 53" by 70", so I bought a two-yard piece of this 54" wide fabric. However, I got some shrinkage after the pre-wash and my backing ended up a bit narrower than I needed. So I got creative and incorporated the printed selvedge into the design; my love for the selvedge has already been documented!
I think I mentioned in one of my previous posts that I made this quilt smaller than the "twin" size given in the pattern. For my quilt, I made 22 feathers rather than the 38 given in the directions. This yielded a quilt exactly the size I like. Here it is on top of my king size bed, to give an idea of the size.
My feathers were made using all the prints from the Patina colorway of the Field Study quilting cotton line. For the binding, I used another piece of the same leopard print as in the feathers. I cut my binding strips 3" x width of fabric, and then attached it with a 3/8" seam allowance rather than the 1/4" usually used. I did it that way partly because I wanted the leopard-ness to be a bit wider and more noticeable, but also because it just feels more secure to me.
I'm so pleased with this quilt. I will say though, using the linen/cotton blend as the background of the feathers makes it quite a bit heavier than if I'd used quilting cotton - heavier than I like really, so I'm not sure I'd use it again, although it's a lovely fabric.
And now I'm having fun imagining what my next quilt will be . . . I actually have another one started, which will be pieced and quilted entirely by hand. I save that one for when I feel like doing some hand work. So I think I need another machine-pieced project to have around, and I already have a fat quarter bundle in my stash from which it will be made. Pink and orange . . . mmmmm!
Friday, January 31, 2014
Turn of Events
I just finished my third Pencil Skirt, which I do believe I'll don to go to a jazz concert tonight:
This one is made from Anna Maria Horner "Turn of Events" velveteen. As I was cutting it out yesterday, I posted a picture to instagram, saying "I love this fabric."
And as I was working on the skirt, it occurred to me: yes, I REALLY love this fabric. Look:
I think it's funny that I didn't realize until halfway through making the skirt that this is the third garment I've made from a "Turn of Events" fabric!
First was my Continental Blouse, made from cotton voile in December 2011. I still wear this fairly often.
Then there was my first coat from February last year, made with home dec weight cotton sateen.
And now this skirt, made of cotton velveteen. So yes, it's fair to say I love this fabric!
And I think I'm ready to move on from pencil skirts now. At least for a while :-) I've got two more cuts of AMH velveteen that are destined to become a couple more pencils, so it may be a short-ish break.
Thursday, October 24, 2013
The Beginning of the End
Ooooooh! Dramatic!
Really it just means that I've begun to finish my quilt ;-)
My backing fabric came lickety-split, and yesterday I washed it up and made my quilt sandwich. I was just able to cover the back of my top with a single, 2-yard cut of 54" wide voile. I won't have the normal 1" - 2" extra buffer around the edges, so I'm going to have to be super careful with my quilting. To that end, I pinned the heck out of that sandwich!
And then I did my first little foray into hand quilting. It's really not that hard. Maybe a little straining on the hand holding the needle, but manageable.
I decided to go all the way around each feather, about 1/4" from the edge, and then down the middle of each vane. (Yes, I googled "parts of a feather" to find the correct word. Once a Montessorian, always a Montessorian! We're obsessed with nomenclature!) I used a piece of dried bar soap to mark the line down the vane to keep things nice and neat, but the outline is freehand.
You can kind of see the dimples down the center of the rachis (ha!) where I tested out how I liked stitching on that. I didn't, so I took it out.
My quilting thread matches the saffron color of the backing. My plan is to do all the outlining of the feathers first, and then go back and do some quilting on the background in ivory.
It looks pretty cool from the back too:
The hand quilting isn't as slow or tedious as I'd thought it would be, but this certainly isn't going to be quick. And that's OK with me.
Friday, October 18, 2013
Comfy Cozy
Remember my Feather Bed Quilt?
I worked on it here and there over the summer, a feather at a time. Last week I started looking at it again, thinking, "I really should get back to that." And since the last few days were cold and rainy here, all I wanted to do was things that make me feel warm and cozy: knitting and quilting.
I had half the feathers done, and decided that things would go faster if, rather than doing each feather individually, I did the remaining feathers assembly-line style:
So Wednesday evening, I attached all the B pieces to the A pieces. Yesterday morning I was back at it. It didn't take me long to sew the A/B units to the C piece (the stem), so I went ahead with D.
And once I had D on, I felt like I might as well go ahead and attach E. And since that didn't take long either, I went ahead with piece F - which finishes out the block!
Well, of course, having all my feathers put together, there was no way I could resist arranging them on the floor to see what my finished top would look like:
And once they were down there in an arrangement I liked, I figured I might as well just go ahead and sew them together so I didn't have to worry about keeping them in that order. So, although I didn't mean to do it, I spent ALL day yesterday working on it, and finished the top! Here it is with the first few rays of sunshine this morning:
When I started this project, I planned to make the twin size from the pattern, which requires 38 feathers. But each feather is surprisingly large, and I realized that 38 feathers would produce a much larger quilt than what I wanted. So I scaled my pattern back to 22 feathers. As it is, this top almost completely covers the top of my queen-sized guest bed, at 54" x 71":
My background fabric is Essex Linen, which I'd never used before this project. It is a lot heavier than I realized, so for the back I'm going to use voile - another print from this line, Anna Maria Horner's Field Study Coordinates in Saffron. I've been thinking about how best to quilt it so as not to interfere with the design, and I'm thinking it's going to be hand-quilted.
So while last week I was wondering if I would get this quilt done before the end of the year, now it's looking like I will. I'm very excited about that, and am already planning out the next quilting project . . .
Sunday, August 18, 2013
Zakka Style Wallet
This week, I spent a good portion of my sewing time making gifts which I won't be able to share until they've reached their intended recipients. But of course I had to moderate all that selfless sewing with a little something for me, so I made up the Zip Organizer from the book Zakka Style.
I first became aware of this wallet when I saw it on Nicole's blog a couple weeks ago. I was immediately smitten; I'd considered buying the book before just based on the fact that it was put together by Rashida Coleman-Hale, but once I saw Nicole's wallet, I knew I had to have it!
Turns out, Nicole is a better woman than I - she states that this was an easy project and quick to put together. I on the other hand had SO many difficulties - a full 50% of the seams I created ended up getting ripped out and redone, and I'd say that altogether I probably spent about 10 hours on this project. Making this wallet really brought home the fact that although garment construction makes intuitive sense to me, the construction of bags and such does not. Add to that the fact that the instructions in the book are pretty sketchy - I don't think I would have been able to put this together if I hadn't found a good sew-along post for this wallet. I will say however, many of the posts I dug up regarding this wallet mentioned an errata page for this book - I did check the page and in the copy I bought, all but one error had been corrected.
This wallet has a LOT of pieces, and most of them are interfaced, so just cutting them all out takes quite a bit of time. One thing that confused me was inserting that outside zipper - rather than cutting two pieces for the outside of the wallet, with seam allowances to compensate for the take-up of the zipper seam, the instructions have you cut the outside piece the same size as the inside piece, and then cut it again into two pieces before inserting the zipper. That works well if you know to allow some room at either side of the zipper teeth - I however am used to sewing a zipper as close to the teeth as I can get. When I did this, my outside piece ended up being a half inch shorter than the inside pieces - that's pretty substantial.
I will say though that now I've done it once, it would be a lot easier for me to do it again. But I don't think I will - although I think it's really beautiful and I'm pretty proud of the finished product, it wasn't until I moved my stuff in that I realized that this isn't a particularly practical wallet/bag for me. Part of the reason I've been making so many bags is that I'm on a mission to find a small but organized carrier for just my essentials. As much as I love my big Frye hobo bag, it's quite heavy and much larger than I need on a daily basis. But this one, being flat, has no place for two of my essential items: a pocket pack of tissues and a lip balm. However, my phone does fit in the outside pocket, so that's a good thing.
As I was thinking this could be a daily carry-all, I added a D-ring to the zipper tab, and then created a wrist band with a swivel clasp - I am happy with that feature and will probably be incorporating it in more bags in the future.
Materials-wise, I used fabrics left over from my Feather Bed Quilt - these are all from the "Patina" colorway of Anna Maria Horner's Field Study line. It's very busy on the inside, but I like seeing little bits of all the different fabrics. For the outside panel, I interfaced with Pellon Craft-Fuse (808) and for all the other pieces I used Pellon Shape Flex (101). The binding is leftover cotton lawn from my maxi skirt. It's a LOT of layers, all of which have been basted together many times. I tried to baste at 1/8" but wasn't always successful, so before applying the binding I ended up trimming the edge all the way around by about 1/8" so that my basting wouldn't show.
Because of all my problems, I was "angry" with this bag much of the time I was working on it, but once I finished I was pleased with the result. I took it on my coffee date with Alicia the next morning and she admired it as well. I really love the beautiful butterfly fabric on the outside. So although it was kind of an ordeal, I'm glad I made this wallet. And now I'm ready to move on!
I first became aware of this wallet when I saw it on Nicole's blog a couple weeks ago. I was immediately smitten; I'd considered buying the book before just based on the fact that it was put together by Rashida Coleman-Hale, but once I saw Nicole's wallet, I knew I had to have it!
Turns out, Nicole is a better woman than I - she states that this was an easy project and quick to put together. I on the other hand had SO many difficulties - a full 50% of the seams I created ended up getting ripped out and redone, and I'd say that altogether I probably spent about 10 hours on this project. Making this wallet really brought home the fact that although garment construction makes intuitive sense to me, the construction of bags and such does not. Add to that the fact that the instructions in the book are pretty sketchy - I don't think I would have been able to put this together if I hadn't found a good sew-along post for this wallet. I will say however, many of the posts I dug up regarding this wallet mentioned an errata page for this book - I did check the page and in the copy I bought, all but one error had been corrected.
![]() |
Friend or enemy? |
This wallet has a LOT of pieces, and most of them are interfaced, so just cutting them all out takes quite a bit of time. One thing that confused me was inserting that outside zipper - rather than cutting two pieces for the outside of the wallet, with seam allowances to compensate for the take-up of the zipper seam, the instructions have you cut the outside piece the same size as the inside piece, and then cut it again into two pieces before inserting the zipper. That works well if you know to allow some room at either side of the zipper teeth - I however am used to sewing a zipper as close to the teeth as I can get. When I did this, my outside piece ended up being a half inch shorter than the inside pieces - that's pretty substantial.
I will say though that now I've done it once, it would be a lot easier for me to do it again. But I don't think I will - although I think it's really beautiful and I'm pretty proud of the finished product, it wasn't until I moved my stuff in that I realized that this isn't a particularly practical wallet/bag for me. Part of the reason I've been making so many bags is that I'm on a mission to find a small but organized carrier for just my essentials. As much as I love my big Frye hobo bag, it's quite heavy and much larger than I need on a daily basis. But this one, being flat, has no place for two of my essential items: a pocket pack of tissues and a lip balm. However, my phone does fit in the outside pocket, so that's a good thing.
As I was thinking this could be a daily carry-all, I added a D-ring to the zipper tab, and then created a wrist band with a swivel clasp - I am happy with that feature and will probably be incorporating it in more bags in the future.
Materials-wise, I used fabrics left over from my Feather Bed Quilt - these are all from the "Patina" colorway of Anna Maria Horner's Field Study line. It's very busy on the inside, but I like seeing little bits of all the different fabrics. For the outside panel, I interfaced with Pellon Craft-Fuse (808) and for all the other pieces I used Pellon Shape Flex (101). The binding is leftover cotton lawn from my maxi skirt. It's a LOT of layers, all of which have been basted together many times. I tried to baste at 1/8" but wasn't always successful, so before applying the binding I ended up trimming the edge all the way around by about 1/8" so that my basting wouldn't show.
Because of all my problems, I was "angry" with this bag much of the time I was working on it, but once I finished I was pleased with the result. I took it on my coffee date with Alicia the next morning and she admired it as well. I really love the beautiful butterfly fabric on the outside. So although it was kind of an ordeal, I'm glad I made this wallet. And now I'm ready to move on!
Monday, February 4, 2013
Feathers!
I got inspired to work on my quilt over the weekend, thanks to Andrea. I spent a good four hours on Friday cutting out almost all the pieces for the blocks:
Even though I haven't completely finished the stripped yardage needed for the feathers, I decided to start cutting them. I'm hoping to be frugal enough with my prints that I can have some fabric leftover for making bags.
I'm making the Twin Size, and the pattern calls for 5 1/2 yards of background fabric. That sounded like an awful lot to me, but I ordered that much anyway because I'm a novice at this kind of thing. And I figured I would be able to use any leftover for . . . making bags! But in cutting out my background pieces I used all but about 3/4 yard - and that's with very frugal cutting, sharing edges.
Each block consists of 2 feathers, and each feather consists of 9 pieces of fabric (if you count the stripped feather piece as one). I need 38 feathers for the quilt. On Saturday, I sewed off and on throughout the day and managed to complete 4 feathers:
I loves them.
It felt really good to get some forward movement on this quilt. Andrea has committed herself to working on her quilt every Friday, and I'm going to try to do the same. Only 34 more feathers to go!
Wednesday, January 9, 2013
Velveteen/Rabbit
This morning I took some pictures of my little bunny friend. He likes to tuck himself in between the gas meters and my garage wall. This is the second winter he's been there, and I really like seeing him when I go out to my car in the morning. (Yes, I'm pretty sure it's the same bunny. Humor me.) He is a little skittish though - as soon as I took his picture, he hopped away.
I guess nobody likes paparazzi. Not even bunnies.
And today I'm wearing my new velveteen skirt for the first time! So I made sure to save a couple of minutes to take some pictures.
Now, I know that I said I always wear a slip, but today I decided to try going without. The inside of this fabric is sticking nicely to my tights, keeping everything in place! I felt like adding a slip would make everything all slidey - something I really can't stand, and have had to deal with a lot lately. What remains to be seen is whether it's going to cause a lot of problems when I walk around!
Tuesday, January 8, 2013
New Quilting Project
Things have been kind of crazy around here the last several days, and it likely won't slow down until at least tomorrow. I have not done a single stitch of sewing yet in 2013 - a travesty! At least a little bit of knitting has happened.
But I didn't want to wait any longer to show my new quilting project: Anna Maria Horner's Feather Bed Quilt.
I first came across this design in late August, just before Niecey-poo and her family left us, via the Hawthorne Threads newsletter. The moment I saw this quilt, I fell head over heels in love - it's what inspired me to try out quilting again after so many years. I quickly ordered a half yard of each print in the "Patina" colorway of the new Field Study line. The pattern itself is a free download on Anna Maria's website.
I started my quilt about a month ago. The first step is to cut strips of random widths across the whole 45" width of the fabric.
These strips then get sewn together to form a new fabric, which will get cut into the feather shapes. Here's a picture of my first third of the pieced fabric, made about a month ago. It contains one piece of each of the fabrics:
The pattern is very detailed, giving the yardages and layout diagram for each size quilt, and step-by-step instructions for piecing the feathers.
Since taking these pictures, I've finished another third of the pieced fabric. I'm hoping to complete the final third later this week and begin cutting out my feather pieces. I still haven't decided on a background color, but am leaning toward a cream or linen shade.
I'm not in a rush to complete this one. I really like knowing it is there on the sidelines, waiting for those times when I feel like sewing straight lines. My only goal is to have this complete by the end of 2013, and to enjoy the process along the way!
But I didn't want to wait any longer to show my new quilting project: Anna Maria Horner's Feather Bed Quilt.
I first came across this design in late August, just before Niecey-poo and her family left us, via the Hawthorne Threads newsletter. The moment I saw this quilt, I fell head over heels in love - it's what inspired me to try out quilting again after so many years. I quickly ordered a half yard of each print in the "Patina" colorway of the new Field Study line. The pattern itself is a free download on Anna Maria's website.
I started my quilt about a month ago. The first step is to cut strips of random widths across the whole 45" width of the fabric.
The pattern is very detailed, giving the yardages and layout diagram for each size quilt, and step-by-step instructions for piecing the feathers.
Since taking these pictures, I've finished another third of the pieced fabric. I'm hoping to complete the final third later this week and begin cutting out my feather pieces. I still haven't decided on a background color, but am leaning toward a cream or linen shade.
I'm not in a rush to complete this one. I really like knowing it is there on the sidelines, waiting for those times when I feel like sewing straight lines. My only goal is to have this complete by the end of 2013, and to enjoy the process along the way!
Subscribe to:
Posts (Atom)