Showing posts with label grainline. Show all posts

Wednesday, September 24, 2014

Following through.

Well, I took some "modeled" pictures of my Alabama Scout today, and I'll tell you:  they're not great.  I thought the soft afternoon light would be perfect for catching glints of the beads, but my camera disagreed with me.  In fact, it didn't even want to focus on my face, preferring instead the electrical cover plate next to me.  Can't say I blame it actually - I got very little sleep last night and I'm wiped out ;-)  So it might be apparent that I wasn't really into this photo shoot; but as much as I love this top, I'm ready to hang it up, post-wise, and move on.

Despite all that, I went to the trouble of doing my hair and putting on makeup.  I even tried two different outfits, but I think the photos will make it clear which I preferred.  Here's the first one:  the "fancy" one, with dressier pants and silver shoes, and understated jewelry.


I actually think this is a pretty OK outfit, but I just couldn't get a picture that relays how nice it is.

Even so, this top really says "Rocker Chic" to me (or at least, something a little more tough than the above).  I felt a lot more at home in the second outfit, with boyfriend jeans, studded ankle-strap flats, chunky jewelry and bright red lipstick.  (Which, by the way, I was terrified I would get on my beautiful top.  Rest assured, all is well.)  I even went all out and did the half-tuck:


By the way, I like that the last vestiges of my summer tan show up in these pictures.

I kept trying to stand right in the light that filters into the house mid-afternoon, hoping it would pick up the beads, but to no avail.  You can almost see them in this shot:


Here are a few more from different angles, which also show how it looks un-tucked - nice and flowy.  I did wash this the other day: by hand, air-dry for about 3 hours and then finished in the dryer on delicate (all inside out, of course).  It softened nicely.


And finally, the silly shot:

Hey camera!  I'm over here!  Quit looking at that cover plate!

And now I have a question to pose to you all that I've been thinking about a lot.  How would you style this top?  I think that I tend to get into a rut with certain items of clothing and end up always wearing them the same way.  Do you guys do that?  I ask because sometimes I read other bloggers' posts about their makes where they say, "I'm not sure what to wear this with."  I always seem to come up with ideas for other people, but not so much for myself!  I'm the same way with home decor too, by the way.  So if anybody would like to share an opinion, I'd love to hear it!

So this is (finally) the last post about this top.  But fear not:  I've already started (and almost completed!) a second Alabama Chanin project!

Sunday, September 21, 2014

Alabama Scout: Construction

Wow, a whole week since I posted!  Over the course of that week, I spent the majority of my free time - about 15 hours altogether - and yesterday completed my Alabama Scout!

I know there are a few of you who were interested in the construction of a garment like this, so I was good and remembered to take photos while I was sewing the top together.  A LOT of photos!  A few  of these have been shared on Instagram over the last couple days, but most are new.

Each day this week, I spent approximately 2 hours working on the beading.  On Friday evening, I finished up the back, the last and largest of the pieces.  Here are all four pieces, in a picture I excitedly shared on IG after I'd gotten to this stage:


And another couple close-ups of the accent beading, which sadly doesn't show in most of the photos:


I couldn't resist sewing up the short shoulder seams that night, just to try it out.  I'd decided ahead of time that all my seams would be inside felled.  As per 
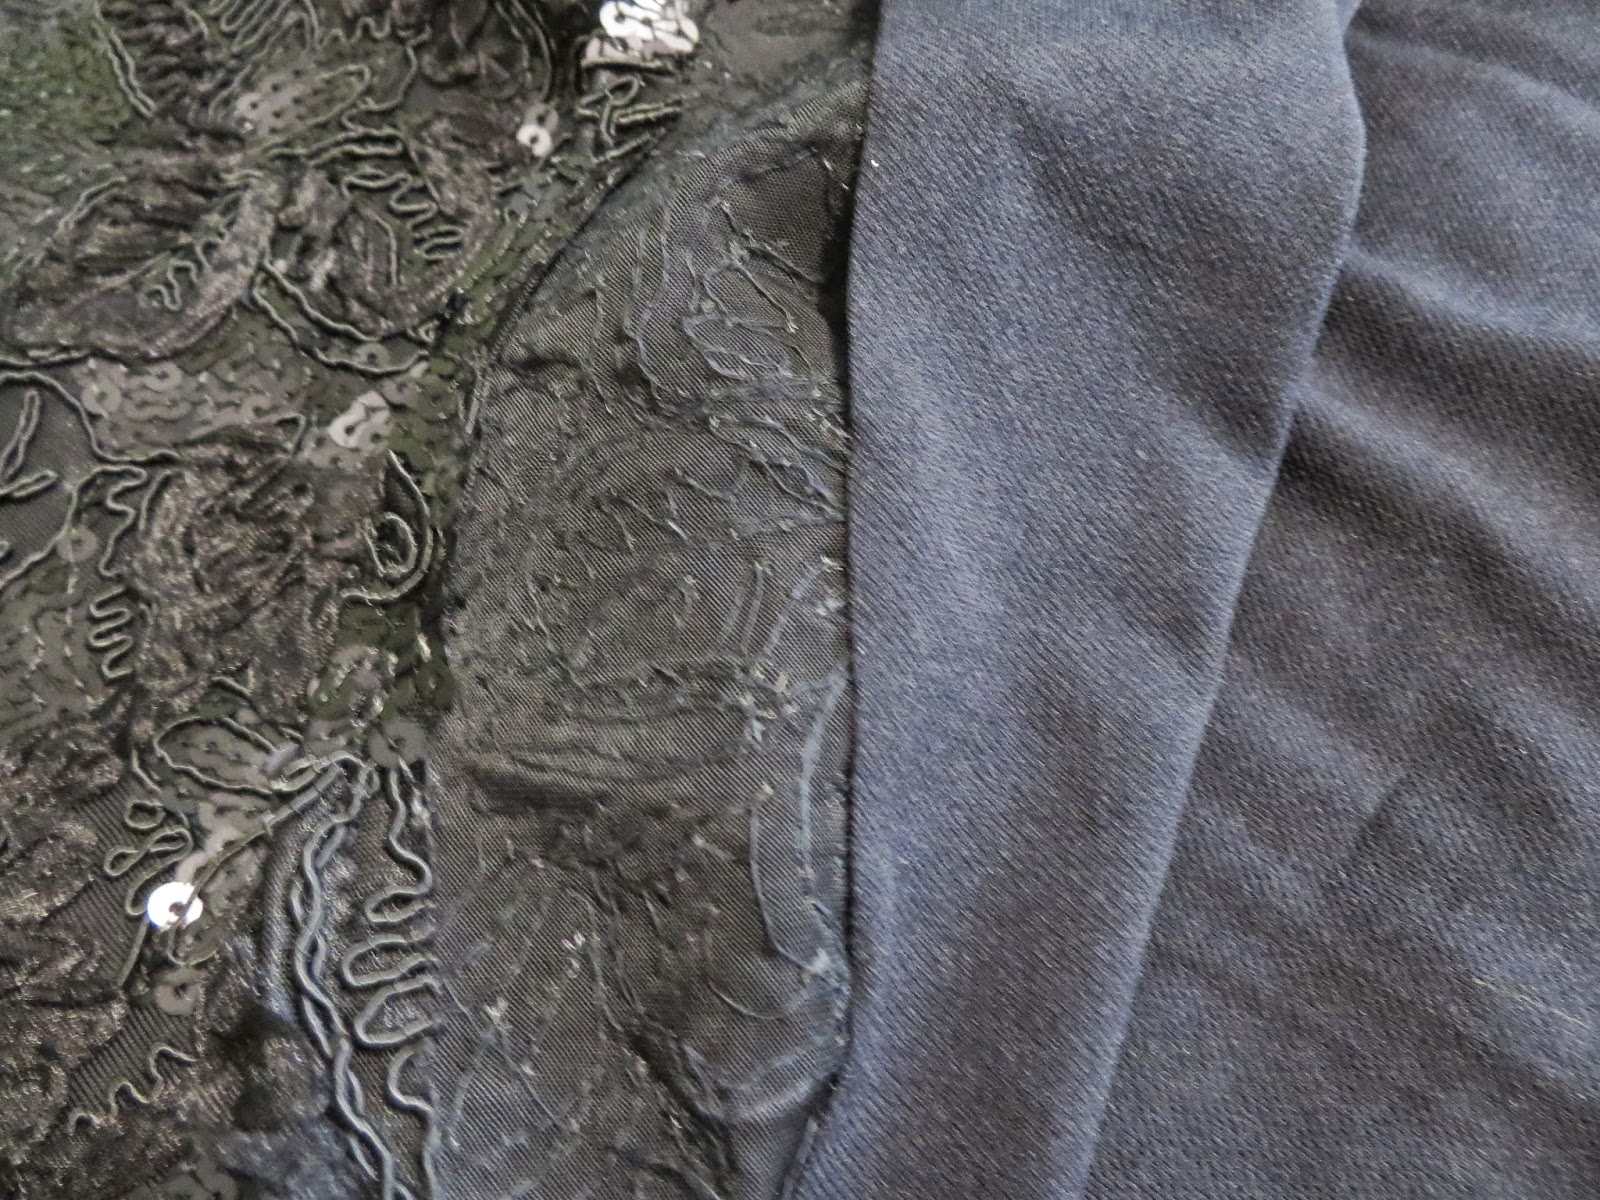
Alabama Chanin's instructions, I used a doubled strand of Button Craft thread and a simple running stitch.  Here is the original seam:


There are a few areas where I changed my construction from the method in the book, using techniques I normally use in sewing, and this is one of them.  Before felling the seam, I trimmed the seam allowance that would be on the inside of the felling in half:


That reduced a lot of bulk and made things much easier for me.  Here is the finished, felled seam:


Yesterday I spent about 4 hours sewing together the remaining seams and the neck binding.   All seams were worked as above, and in addition,  I marked all my seam lines to keep everything on track.


As I set in the sleeve, I actually felt like I had a lot more control than I do when I sew something like this on the machine.  Holding the work in my hands and being able to manipulate and ease the fabric stitch by stitch made the whole process a lot less nerve-wrecking than I usually find it to be.


Other than hand-stitching everything, I used the normal seam allowances and construction for the Grainline Scout.  (Note:  the pattern I used here is the one I adjusted several months ago to have the more swingy back and to fit my measurements.)  After setting in the sleeves, I sewed the side and sleeve seams in one continuous pass.  The bottom edges of the sleeves and body were left unhemmed, so that as the top is worn and washed, they will curl a bit.  In order to keep my layers sandwiched together, I didn't remove my pink silk basting threads until I was ready to sew each seam.

The neck binding is one long strip, cut on the crosswise grain, 1.25 inches wide.  I used the "Cretan Stitch" shown in the Alabama Studio books to apply the binding after sandwiching the neckline in between its folds, again with a doubled strand of thread.


And once I'd done that, I was done!  I almost couldn't believe it!  I quickly tried it on to check the fit and snapped a couple of bathroom mirror selfies:


One thing I'd been concerned about throughout the making of this top is that it wouldn't be comfortable against the skin.  You may have noticed that there are a LOT of knots on the inside:


I was afraid I might end up with a gorgeous, sparkly hair shirt.  So I was really relieved that the knots don't bother me at all!  And I expect that over time, with several washings, everything will soften up.


And now a few thoughts :-)

The whole time I was stenciling, stitching, cutting and beading the pieces, I treated them like gold.  They felt so delicate.  But now that the top is sewn together, the whole thing feels surprisingly sturdy.   I feel like I can wear this without worrying that it's too precious.  And there's an added level of comfort in knowing that any beads or seams that come undone can easily be repaired.

One of the things I struggle with most in sewing is understanding the relationship between the weight of a fabric on the bolt and in the finished piece.  I mentioned before that the fabric I used here is quite a bit lighter than the jersey sold by Alabama Chanin, and I was concerned that my top might be too flimsy in the end.    But now that it's finished, I think this lighter fabric was a good choice for the combination of techniques I used.  The combination of the 2-ply backstitching around each motif and the accent beading inside added significant heft to the finished garment, so that it's actually quite a bit heavier than it looks.  And while I do expect the whole thing to soften with washing, the final result is a fabric with more body than drape.  I think that if I'd used the heavier Alabama Chanin jersey, a top in this style would be far too heavy for me.  That said, the heavier fabric would make for a great jacket, dress or skirt.

I'm happy to have this project finished, and I had a great time making it.  It will probably be a few days though before I can get some "real" pictures of me wearing the top.  It's too cloudy today; I'm really hoping to get some good light so that the sparkly beads show.  And I'm also considering giving it a wash before taking any pictures, so the drying time will add to the wait.

Meanwhile . . . on to the next thing on the agenda!

Friday, September 12, 2014

Hello Again!

We are finally back after a month abroad.  Our family visits took us to Turkey, Germany and Austria*; we had a lot of great times and a couple of not so good times too.  We've been home since Saturday night, and as you can probably imagine, I've spent the better part of the week catching up on things like grocery shopping and laundry. 

*Plenty of pictures on my Instagram feed!

But now I'm ready to get back to my normal routine, and in this post I'm going to pick up right where I left off and tell you all about the Alabama Chanin top I took with me as a travel project.  When last we spoke, I was getting everything ready:  cutting the stencil and the fabric, painting on my design, and putting all my materials together into a kit.  I even did a bit of stitching before we left, as a test.  And what I found is:

I love doing this work SO MUCH!!

This was the perfect project to take along for hot climates, and also for the particular situation I find myself in when we visit Turkey.  That is - it's not the type of vacation where we go around exploring.  Most of the time we are sitting around, chatting with family.  I'm not so great at just sitting, so I always take handwork with me wherever I go.  Usually it has been knitting, but this hand sewing project was absolutely the right choice for me this trip as the weather was very hot and humid. 

I posted pictures of my project in progress on Instagram when I could while I was gone, but I thought I'd re-post some of them here and add a couple new ones so you can see the progression.

Here are the two sleeves - both have been stitched, and one has been cut.


Here are all four pieces after all stitching and cutting had been done.  I'd estimate that at this point, I had about 20 hours of stitching and cutting invested.


My original intention was to completely fill each negative space with small glass beads and sequins - a technique Natalie Chanin calls "armor beading."  I'd done a small test before we left:


I loved how it looked, but I realized after working a couple small areas that doing the entire top this way would make it much too heavy.  I was also surprised by how much weight and heft the stitching added - I used the recommended Button Craft Thread, doubled, and of course using backstitch means you're using a lot more thread than if you use a running stitch.  For the four pieces I worked, I used 4.5 spools of thread just in outlining the design.

So I removed the beading I'd already done and started to work "accent beading" instead.  I wasn't sure I'd like it as much, but I'm very pleased with how it's coming along.


I have eked out a total of about 4 hours work on this since we got back, and at this point I've beaded both sleeves and about a third of the front.  I ended up not doing any beading on our trip, although I'd taken all the beads with me.  It worked out so that by the time I'd finished all the stitching, our schedule became more active so I didn't really have any free time to fill up.


I've always enjoyed hand stitching, so it's really no surprise to me that I'm loving this project.  But there's another element:  during my 2 month sewing hiatus, I thought a lot about how sewing consumes my time and space.  I love my hand-made wardrobe, and the clothing I've made for myself is what I reach for first these days.  However, I don't really think it's sustainable or wise for me to continue making SO many garments per year.  Although I wear my me-mades regularly, there are some I've never worn, because they just don't fit my lifestyle.  At this point, I'm a housewife with no children to care for.  Many days, I see no one but my husband.  Although we do go out fairly often, the number of beautiful dresses in my closet far exceeds my needs.

All this is to say that I'm starting to feel like it's time for me to slow down, output-wise.  However, making is a basic need for me.  A hand-worked project like this, I feel, perfectly balances these two desires.

So expect to see more  . . .  probably as early as tomorrow.

Tuesday, May 27, 2014

My Leopard Levels are constant.

What a busy weekend!  But not too busy to get Hubby to snap a few photos of one of my latest makes - yet another Archer!  Have I mentioned I like making TNT patterns a million times?  Honestly, I do the same with RTW - if I find something that fits well and that I love, I buy it in all the colors I like.

This Archer is leopard-print - something I've been wanting to have in my closet for a long time.  The more I wear leopard, the more I realize the print goes with so much.  But on Saturday I went old school, with some boyfriend jeans, black ankle-strap flats, and a strand of vintage turquoise beads.

It was a little chilly!

I posted a shot of this shirt on Instagram on Saturday too, and faked some folks out.  I think some of you assumed that this is the leopard fabric I bought a couple weeks ago in New York, and that I made it up lickety-split.  But in fact, I had purchased this piece a few weeks before.  It's a super soft and filmy cotton voile that I ordered from Harts Fabric, sadly no longer available.

Now, technically I shouldn't have been buying any new fabric.  BUT:  last December, when I was making my Leopard Sequins top, I wasn't sure it would work out, so when I saw a piece of the sequin fabric on deep discount, I bought it as a back-up.   Last month, I gifted that piece to Andrea so she could make a similar top, so I figured I was justified in filling the Leopard Void I'd created.  My Leopard Levels remained the same, as did my stash numbers.

I don't think it's overkill to make two leopard-print Archers.  The two fabrics are very different in texture, color and print.  Here's a closer look at this one:


That said, I likely won't make the silk leopard Archer til closer to fall, since that fabric is so much heavier.


And now that my guests have gone, I'm going to set up my sewing space once again.  I have high hopes of getting started on an Emery dress this week!

Thursday, May 1, 2014

I finally made a Scout Tee

And it's fabulous!

front

This may be the only Scout out there made of sequins.  As Miss Lulu told me on Instagram:  "When you arrive late to the party, you need to make a fabulous entrance!"

This is the last piece of fabric from my Sequin Fabric Buying Binge of 2013.  I got it from JoAnn's in their Black Friday sale for $12 a yard.  It looks like it's still available too, although not at that price.

Although this was my first time using the Scout pattern, I wasn't too concerned with fitting, as this is basically a stable knit fabric.  The shoulders looked good, so I gave myself a 1/4" broad back adjustment, graded from a 2 at the bust to a 4 at the hip, and then did the "full back alteration" for the full look I wanted with this top.  I think if I do this in a woven in the future, I will have to give myself more room in the hip for the unaltered version.

back

I had quite enough of cutting sequins out of seam allowances back in 2013, so I decided to fully line this one.  The lining is attached at the neck and sleeve seams, and open at the hem.  I'm so glad I did this - it makes a huge difference in how comfortable this top is to wear.


I sewed the whole thing on my sewing machine using a narrow zigzag stitch.  Because I didn't cut away any sequins, I did end up breaking 3 needles in the making of this top :-(  Still - a fabulous, vintage-looking sequin top for $20 + 3 needles!  A bargain!  (The lining cost me $8 - almost as much as the outer!)

I left the bottom of the lining unhemmed:


I was looking through my jewelry and found this old necklace from Anthropologie that I think looks just great with this:


I'm really happy with how this one came out - it's exactly what I had in mind.  I do believe this will be coming to NYC with me, so I'm going to try to remember to take modeled pictures in situ :-)

Tuesday, April 22, 2014

Rumpled

This past weekend, Hubby and I headed to Michigan for a get-together with my Dad's side of the family.  I decided I wanted to wear something new and spring-like, but I was afraid to wear my new Roxanne:  too many kids and too much food and wine around! 

So I made myself a new Archer, but with a twist this time:  this one is pop-over style.  I've been wanting to try this out for a while, as I love the look of a pop-over shirt.  I started out being a really good blogger, taking pictures as I went so I could show you all how I did it.

I narrowed the sleeve by 3/4" each side, and then made a 15" long tower placket.


Then I started to sew that placket on:


And then I realized that the next bit - the trickiest bit - would never show up in this crazy fabric!  So, tutorial abandonned!  But I will be doing this again in a chambray, so I will take lots of detailed pictures of that one.  I have seen some comments that people fear the tower placket, but it's really not that hard to do.

Anyhoo . . .   My good blogging intentions were further abandonned over the weekend.  We left home at 6:15 Saturday morning, so I promised myself to have someone take my picture once we were at my aunt's house.  Of course, I spent the whole day yacking with my relatives, eating and drinking, and totally forgot to get a picture of the entire outfit!  The closest I got was this picture:


This is a picture my brother took of my niece and me.  I trimmed her out because I don't think it's cool to post pictures of other people's kids on the interwebs.  Better safe than sorry :-)

So, what you guys get is a picture of my rumpled shirt.  It kept me comfortable and stylish all day long. 


I thought it was interesting that I got comments from a lot of non-sewing people about my "excellent pattern matching on the front."  They were impressed that I centered that butterfly (or as I like to call it, booberfly, due to its position).   I should have just said, "Yeah, I'm that good."  But instead I found myself explaining how the front is cut on the fold so no matching is required.

The reason I narrowed the sleeve is that I left off the cuff so I could do this:


But it turns out that narrowing it by 3/4" each side was too much for me, so I'll add some back in next time.

I was a little disappointed that the front placket kind of gets lost in the print, but I feel the overall shirt is a success.


Of course, this is more of the Anna Maria Horner Field Study voile, Sinister Swarm in Vivacious.

Here's the collar, also getting lost:


This shirt actually ended up taking less time than it takes me to make a "normal" Archer, despite the placket.  I left off the pockets and cuffs, and I only had to make 5 buttonholes on the placket and one each on the button tabs for the sleeves.  I left off the buttonhole on the collar stand because it will never get buttoned.

I LOVE making shirts, and it was really fun to do this one with a few changes to the style.  I can't wait to do it again, but I think I will have to as I've got more travel in my near future, and I really need to finish that Robson trench I've been working on for I don't know how long!