Hubby and I both got new phones recently. And you know what that means: all new accessories.
Hubby likes to wear his phone on a belt holster at work, but his new phone is so large that there aren't many options. And we found none in leather, his preferred material. He was looking online and saw a really lovely leather holster, but it was far too small for his Galaxy Note 3.
I'm sure you can see where this is heading.
"I can make that," I said.
"Really?" Big eyes.
So yesterday I decided to take the afternoon off from my lengthy list of things I need to get done around the house, and just sew. I had already made up a pattern for the case earlier in the week, so I just needed to cut it out and sew it together.
And here's the back slot for the belt:
And I ordered some button studs just for this project from this Etsy vendor.
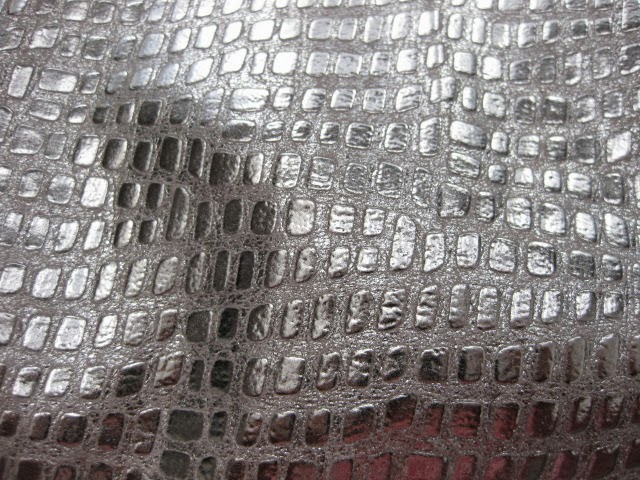
I changed the design a little bit from the original. Also, because the leathers I have in my stash are much softer than what the original is made from, I decided to line the inside of the back with another layer of very fine leather, to keep flakes of suede from getting all over the phone. I attached that with quilter's basting glue spray; the seams keep it in place. This finer leather isn't the same grey, and it's pearlized, but it doesn't show :-)
You can see that I edgestitched all the openings to keep the leather from stretching out with wear. Of course, all of this was sewn with the walking foot and a leather needle. I'm considering this one a test run - I'd like him to wear it for a bit and see if it's practical. If he likes using it, I'll get some black leather and make one where everything matches.
The top piece is a bit larger than the back, so it creates space for the phone. I liked the idea of leaving the corners open rather than trying to miter and sew around them.
Here are my pattern pieces. I started by tracing around the phone, then adding on 1/4" all the way around - 1/8" for wiggle room, and 1/8" for the seams. Once I'd drafted the back piece, I used that to make the belt loop/flap piece and the front.
It was really fun to puzzle this project out. The end result isn't perfect, and we both feel it looks like a man purse. But with a phone that big, what are you gonna do?
Showing posts with label gift. Show all posts
Saturday, June 21, 2014
Wednesday, April 23, 2014
I got a present!!
I got a surprise present! Yay!
A few weeks ago, Ginger sent me a note asking if I'd like the leftover fabric from her recent two-piece cocktail dress. Of course I would - it's gorgeous! So generous of her to offer it to me - but then, that's Ginger: one of the most generous gals in the sewing community!
Well, imagine my surprise a week or two later when I received a largish box from her. When I opened it up, I found not one, but THREE pieces of amazing fabric!! And they're all PINK!
First up, a very large piece of the fabric Ginger used for her dress. Would it be terrible of me to make something similar? With the understanding, of course, that my midriff remain completely covered at all times ;-)
Then, almost two yards of cotton Swiss dot in bright pink. This replaces the poly blend Swiss dot I used for a shirt last year and ended up putting in the donation pile after wearing it for two hours, because it made me so sweaty. Maybe it's time for a redo with my beloved Archer pattern?
Finally - and most mind-blowing of all: a yard of honest-to-goodness Vlisco in ochre, cream, black and hot pink -- with BIRDS! Gah!!!
You can see that the Swiss dot and Vlisco go together perfectly, so I'm having lots of fun daydreaming about what they will become. Two separate pieces, or one garment? Only time will tell!
Thanks again, Ginger, for such an amazing gift!
Wednesday, February 5, 2014
The Secret Hat
A while back I mentioned that I'd been knitting, but couldn't share the project as it was a gift. Well, it was gifted over the weekend, so now I can share!
In December, my friend gave me Vogue Knitting: The Ultimate Hat Book. She'd also bought herself a copy, and as we like to do, we went through it together over Skype, looking at all the designs and deciding which ones we like best.
We both have birthdays this month - hers was at the very beginning and mine is at the very end. So we decided to do a hat exchange for our birthdays. We each chose 3 designs from the book as possibilities. Then it was up to the other person to pick which one to make so it would be a surprise. So here is the hat I made for Sally:
I was surprised when she told me she likes pillbox hats - we've been friends for almost 15 years and I didn't know that! I had a hard time deciding which of the designs she chose to make, so in the end I took the book to the yarn shop with me to see what I could find, and let that determine which hat to make. I ended up with this lovely yarn from The Fibre Co.
This hat was really fun to work, and of course the yarn was luscious. Most of the hat is a simple two-color stranded design, but there are a couple of interesting features: a Latvian braid at the cast-on edge, and some tucks to give the hat a bit of firmness and structure.
You can see that there's some tweediness in the yarn, and the silk gives it a bit of sheen.
Because I made this hat with a wool/alpaca/silk blend, it's a bit less stiff than the original, so it doesn't stand up on its own. But it fits her head perfectly, and actually comes down over her ears to give some extra warmth.
As usual, I steam-blocked the whole thing after I finished the knitting. This was a very quick and easy project - I think it only took me three or so days to knit. Really, choosing the design and yarn was harder!
In a few weeks, I'll be getting my own hat. I can't wait to see which one she chose - I couldn't narrow it down to three choices, so I gave her a dozen!
Friday, January 10, 2014
Apron.
Our friend M recently bought a new house. I told her I was going to make her a housewarming gift, and I had something specific in mind (which I'll probably still make, so I don't want to let the cat out of the bag), but she immediately said, "I want an apron. In orange. Orange makes me happy."
OK then, an apron it is!
It took me a while to figure out what kind of apron I wanted to make. I didn't want anything ruffled, and I wanted it to be a serviceable apron - i.e. cover her clothes while she's cooking. I finally found this tutorial for a deli-style apron like the kind I always wear. I ordered up some cotton sateen: Swirl in Tangerine by Trenna Travis for Michael Miller, and the reverse for the pocket.
When I set about making the apron a couple days ago, I did things a bit differently from the tutorial. Since I thought I might want to make this again, I traced out the pattern on tissue rather than directly onto the fabric. And instead of using cotton webbing for the tie, I made my own tie using the contrasting fabric.
For the tie, I cut three pieces of fabric 2.125" wide by the length of fabric I had, which was about 39". I trimmed the ends to 45-degree angles and sewed them into one long strip, then folded it in on itself and sewed it up with a 1/4" seam. After turning it out to the right side, I poked the ends in and then edgestitched along the entire seamed edge.
There is a fair bit of edgestitching in this project, and my blind hem foot came in quite handy for that.
You can't really see it, but the pocket is divided into three: one larger pocket on the right side, and two smaller ones on the left. M told me that she has to have a pocket to keep her phone in, since it's how she operates her buzzer!
The pattern calls for 1.25 yards of 54" fabric for the apron and .5 yards for the pocket. I have enough fabric left over that I could make a second apron, so I think if you wanted to lay this out cross-wise instead of length-wise, you could get away with half the amount.
This kind of apron is long, and meant to be worn folded up at the waist, like this:
I think the only thing I'd change in the future is to make the tie longer - this one is 98". I like to wrap my apron ties around the back and then tie a bow in the front. This one does wrap to the front, but it's only long enough for a double knot, not a bow.
So that's my second sewing FO for 2014. Sadly, it doesn't count toward my Stash Diet tally, since I'd purchased this fabric at the end of 2013 specifically to make this gift!
OK then, an apron it is!
It took me a while to figure out what kind of apron I wanted to make. I didn't want anything ruffled, and I wanted it to be a serviceable apron - i.e. cover her clothes while she's cooking. I finally found this tutorial for a deli-style apron like the kind I always wear. I ordered up some cotton sateen: Swirl in Tangerine by Trenna Travis for Michael Miller, and the reverse for the pocket.
When I set about making the apron a couple days ago, I did things a bit differently from the tutorial. Since I thought I might want to make this again, I traced out the pattern on tissue rather than directly onto the fabric. And instead of using cotton webbing for the tie, I made my own tie using the contrasting fabric.
For the tie, I cut three pieces of fabric 2.125" wide by the length of fabric I had, which was about 39". I trimmed the ends to 45-degree angles and sewed them into one long strip, then folded it in on itself and sewed it up with a 1/4" seam. After turning it out to the right side, I poked the ends in and then edgestitched along the entire seamed edge.
There is a fair bit of edgestitching in this project, and my blind hem foot came in quite handy for that.
You can't really see it, but the pocket is divided into three: one larger pocket on the right side, and two smaller ones on the left. M told me that she has to have a pocket to keep her phone in, since it's how she operates her buzzer!
pocket dividing stitches from the back |
The pattern calls for 1.25 yards of 54" fabric for the apron and .5 yards for the pocket. I have enough fabric left over that I could make a second apron, so I think if you wanted to lay this out cross-wise instead of length-wise, you could get away with half the amount.
This kind of apron is long, and meant to be worn folded up at the waist, like this:
I think the only thing I'd change in the future is to make the tie longer - this one is 98". I like to wrap my apron ties around the back and then tie a bow in the front. This one does wrap to the front, but it's only long enough for a double knot, not a bow.
So that's my second sewing FO for 2014. Sadly, it doesn't count toward my Stash Diet tally, since I'd purchased this fabric at the end of 2013 specifically to make this gift!
Saturday, September 21, 2013
Ooooh, shiny!
Last week, my mom asked me to make a bag for my aunt for her birthday. I can never refuse my mom :-) After discussing bag style and material options, we decided that I'd make my aunt two bags: a frame purse to use as an evening bag, and a zipped wristlet to carry when she runs her errands during the day.
My aunt shares my love of all things shiny, so we decided to go with an embossed silver leather skin I've had in my stash for a while:
Instead of using the pattern I've used for all my other leather clutches, I drew up my own pattern this time. I wasn't sure what kinds of things my aunt carries with her when she goes out, so I wanted the bag to be a little bigger than the ones I've made before, and I also wanted it to look a little more angular. When I first finished the bag on Thursday afternoon, I wasn't sure I liked it. But the more I looked at it the more it grew on me. I'm now at the point where I think I need to make another for myself!
Here you can see the size difference between this pattern and my old pattern:
It's actually only about an inch deeper, but it makes a big difference. You can fit a lot of stuff in there. With my phone, a pen, a lipstick and a hanky, the bag was still relatively flat. Plenty of room for a couple of candy bars or something!
I took a couple pictures of me carrying it, so you could get an idea of the size.
When sewing up this bag, I used a lot of the tips and tools from Don Morin's Craftsy class, Making Leather Bags. It really did make things go more smoothly, so if you're interested in sewing with leather, do check out the class!
My mom and her four siblings were all born in Rome, so for the "day" bag I used up the last of my Italy Map fabric - I believe these landmarks are in Rome, but I could be wrong! My mom and my aunt have both been to Rome (and one of my uncles still lives there), so they will know! Inside is Va Bene stripe with a pocket in Vespas.
This pattern is the Perfect Zip Bags from Elizabeth Hartman, but I also incorporated some tricks from Don Morin's article in the current issue of Threads.
And even though my mom wasn't sure if this kind of bag would be useful for her, I made her one anyway, because she's my mom and I love her and I like to make stuff for her. I used some of (what I consider to be) the most beautiful fabrics in my stash, from the Dear Stella Piper line. You've seen this fabric before:
And inside are airplanes:
I've been experimenting with different interfacings for this type of bag. For these two bags, I used the stiff woven interfacing for collars. The bags feel crisp and supple at the same time. I recently made a couple of very small zippered pouches using "Craft Fuse" and I think I prefer the stiffer feel myself. For the silver clutch, I used "Shape Flex" for the lining and left the leather un-interfaced, although it is quite thin.
I'm hoping to try out this zipped wristlet pattern using some leather in the near future. But as usual, too many ideas, and too little time!
My aunt shares my love of all things shiny, so we decided to go with an embossed silver leather skin I've had in my stash for a while:
Oooooh! Shiny silver crocodile! |
Instead of using the pattern I've used for all my other leather clutches, I drew up my own pattern this time. I wasn't sure what kinds of things my aunt carries with her when she goes out, so I wanted the bag to be a little bigger than the ones I've made before, and I also wanted it to look a little more angular. When I first finished the bag on Thursday afternoon, I wasn't sure I liked it. But the more I looked at it the more it grew on me. I'm now at the point where I think I need to make another for myself!
This photo actually makes the silver look a little understated, if you can believe it! |
Here you can see the size difference between this pattern and my old pattern:
It's actually only about an inch deeper, but it makes a big difference. You can fit a lot of stuff in there. With my phone, a pen, a lipstick and a hanky, the bag was still relatively flat. Plenty of room for a couple of candy bars or something!
I took a couple pictures of me carrying it, so you could get an idea of the size.
When sewing up this bag, I used a lot of the tips and tools from Don Morin's Craftsy class, Making Leather Bags. It really did make things go more smoothly, so if you're interested in sewing with leather, do check out the class!
My mom and her four siblings were all born in Rome, so for the "day" bag I used up the last of my Italy Map fabric - I believe these landmarks are in Rome, but I could be wrong! My mom and my aunt have both been to Rome (and one of my uncles still lives there), so they will know! Inside is Va Bene stripe with a pocket in Vespas.
This pattern is the Perfect Zip Bags from Elizabeth Hartman, but I also incorporated some tricks from Don Morin's article in the current issue of Threads.
And even though my mom wasn't sure if this kind of bag would be useful for her, I made her one anyway, because she's my mom and I love her and I like to make stuff for her. I used some of (what I consider to be) the most beautiful fabrics in my stash, from the Dear Stella Piper line. You've seen this fabric before:
And inside are airplanes:
![]() |
I think these are such pretty fabrics for fall. |
I've been experimenting with different interfacings for this type of bag. For these two bags, I used the stiff woven interfacing for collars. The bags feel crisp and supple at the same time. I recently made a couple of very small zippered pouches using "Craft Fuse" and I think I prefer the stiffer feel myself. For the silver clutch, I used "Shape Flex" for the lining and left the leather un-interfaced, although it is quite thin.
I'm hoping to try out this zipped wristlet pattern using some leather in the near future. But as usual, too many ideas, and too little time!
Tuesday, September 3, 2013
And the last baby thing!
This was actually the first baby thing I made, but I wanted to wait to post it until my friend got it in the mail, so it would be a surprise for her.
The baby swaddler I made is another pattern from Mamma Can Do It, and was picked out by my friend. But the fabrics were a surprise! She told me that she likes orange and grey, so I went over to Hawthorne Threads to shop. I love it that you can search by color on the site. I started from orange, aiming to find an orange and grey that went together. But then this happened*:
Both these fabrics are from Mo Bedell's Full Moon Lagoon line - up top is Coral Garden in Purple, and below is Bubbles in Orange (apparently no longer in stock). I love purple, pink and orange together, and hoped my friend would too - and it turns out she does! So here's the swaddler:
The "wings" of the swaddler open and close with velcro. You slip the baby inside and then wrap it up nice and tight. Sadly, I don't have anything around here even vaguely baby-shaped, so do visit the website to see it in action!
This was such a fun little pattern to make up. Really the only thing I did differently was to notch my outside curves rather than clip them like the pattern says.
The velcro isn't sewn on until the swaddler is complete. At first I wasn't sure why this was so - why the velcro wasn't sewn on first as you'd do with a bag. But then I realized that it's going to get opened and closed a lot and needs the stability of both layers of fabric. I did something a little new here - instead of pinning the velcro to the fabric, I used a product I'd recently read about and purchased: Roxanne Glue Baste-It. Six little dots on each piece of velcro held it nicely while I stitched. I'm really glad I bought this stuff!
The top and bottom of the swaddler are sewn separately, and then sewn together right side out:
I considered changing it so the seam allowance would be on the inside, but then decided it tied in with the topstitching that goes all the way around the edges and did it as written. See? I can follow directions when I feel like it!
So that's it for the baby stuff! I had a great time making all these baby gifts, but now I'm ready to get back toadult sewing for myself! I've really had the knitting bug lately too - I've finished a sweater I never even blogged about, and have started two new ones!
* I apologize for the fuzziness of a lot of these pictures. It was extremely overcast when I was taking them and I just couldn't get my camera to take a good picture for the life of me! Someday I'll get a new one . . .
The baby swaddler I made is another pattern from Mamma Can Do It, and was picked out by my friend. But the fabrics were a surprise! She told me that she likes orange and grey, so I went over to Hawthorne Threads to shop. I love it that you can search by color on the site. I started from orange, aiming to find an orange and grey that went together. But then this happened*:
Both these fabrics are from Mo Bedell's Full Moon Lagoon line - up top is Coral Garden in Purple, and below is Bubbles in Orange (apparently no longer in stock). I love purple, pink and orange together, and hoped my friend would too - and it turns out she does! So here's the swaddler:
{front} |
{back} |
{open} |
The "wings" of the swaddler open and close with velcro. You slip the baby inside and then wrap it up nice and tight. Sadly, I don't have anything around here even vaguely baby-shaped, so do visit the website to see it in action!
This was such a fun little pattern to make up. Really the only thing I did differently was to notch my outside curves rather than clip them like the pattern says.
The velcro isn't sewn on until the swaddler is complete. At first I wasn't sure why this was so - why the velcro wasn't sewn on first as you'd do with a bag. But then I realized that it's going to get opened and closed a lot and needs the stability of both layers of fabric. I did something a little new here - instead of pinning the velcro to the fabric, I used a product I'd recently read about and purchased: Roxanne Glue Baste-It. Six little dots on each piece of velcro held it nicely while I stitched. I'm really glad I bought this stuff!
The top and bottom of the swaddler are sewn separately, and then sewn together right side out:
I considered changing it so the seam allowance would be on the inside, but then decided it tied in with the topstitching that goes all the way around the edges and did it as written. See? I can follow directions when I feel like it!
So that's it for the baby stuff! I had a great time making all these baby gifts, but now I'm ready to get back to
* I apologize for the fuzziness of a lot of these pictures. It was extremely overcast when I was taking them and I just couldn't get my camera to take a good picture for the life of me! Someday I'll get a new one . . .
Saturday, August 24, 2013
London Dress
Another tiny thing!
At the end of June, my cousin had her second baby girl and named her London. So once I got on my baby kick, I couldn't resist making her a little dress with London-themed fabric!
I used a pattern from a website a friend introduced me to: Mamma Can Do It. There are SO many cute patterns on this site for baby things, it took me a while to decide which one I wanted to use, but I finally settled on the Reversible Baby Jumper. This multi-size pattern includes sizes all the way from newborn to 36 months.
This is actually the second pattern I've used from this site, but I can't show you my first make until my friend receives her present. These downloadable patterns come with very clear photo tutorials. I like to print out the pattern pieces only, then load the pattern and tutorial into iBooks on the iPad so I can easily take it to the table with me when I sew.
The seam allowances on these patterns is 3/8", which I think is great - somehow it makes sewing easier to line the fabric up with the edge of my presser foot! The only thing I changed from the pattern was to notch my curves instead of clipping only, as the pattern recommended: it does make a difference when turning your work out.
I ordered 5 different London print fabrics from Fabric.com because I wasn't sure how the colors would be and which two fabrics would go together best - and you know I'll use the leftovers for bags and such! I made the 3 - 6 month size, which requires 1/2 yard of each fabric, but I really don't think I used that much. I have lots left over. Here's a better look at the two prints I used:
And here's the little dress:
Squee! I love this little thing, and it was so fun to make! It's really clever how the reversible dress goes together - I doubt I could have figured it out on my own but the tutorial makes it really simple.
OK - I just realized that I did change one other thing. The pattern recommends using snaps or velcro on the shoulder tabs, but I wanted the dress to be fully reversible, so I made buttonholes and then sewed two buttons to each tab, front and back, making sure to keep my threads loose:
This project was so quick and easy - I really recommend this pattern. Also, if you buy a pattern from Mamma Can Do It, you get a coupon code for 30% off your next pattern! But at $5, I think this was really reasonable to begin with. I would definitely make this again!
At the end of June, my cousin had her second baby girl and named her London. So once I got on my baby kick, I couldn't resist making her a little dress with London-themed fabric!
I used a pattern from a website a friend introduced me to: Mamma Can Do It. There are SO many cute patterns on this site for baby things, it took me a while to decide which one I wanted to use, but I finally settled on the Reversible Baby Jumper. This multi-size pattern includes sizes all the way from newborn to 36 months.
This is actually the second pattern I've used from this site, but I can't show you my first make until my friend receives her present. These downloadable patterns come with very clear photo tutorials. I like to print out the pattern pieces only, then load the pattern and tutorial into iBooks on the iPad so I can easily take it to the table with me when I sew.
The seam allowances on these patterns is 3/8", which I think is great - somehow it makes sewing easier to line the fabric up with the edge of my presser foot! The only thing I changed from the pattern was to notch my curves instead of clipping only, as the pattern recommended: it does make a difference when turning your work out.
I ordered 5 different London print fabrics from Fabric.com because I wasn't sure how the colors would be and which two fabrics would go together best - and you know I'll use the leftovers for bags and such! I made the 3 - 6 month size, which requires 1/2 yard of each fabric, but I really don't think I used that much. I have lots left over. Here's a better look at the two prints I used:
Next Stop: London Around Town Yellow (Robert Kaufmann) |
London Crowns Light Blue (Andover) |
And here's the little dress:
Squee! I love this little thing, and it was so fun to make! It's really clever how the reversible dress goes together - I doubt I could have figured it out on my own but the tutorial makes it really simple.
OK - I just realized that I did change one other thing. The pattern recommends using snaps or velcro on the shoulder tabs, but I wanted the dress to be fully reversible, so I made buttonholes and then sewed two buttons to each tab, front and back, making sure to keep my threads loose:
This project was so quick and easy - I really recommend this pattern. Also, if you buy a pattern from Mamma Can Do It, you get a coupon code for 30% off your next pattern! But at $5, I think this was really reasonable to begin with. I would definitely make this again!
Subscribe to:
Posts (Atom)