Tuesday, February 12, 2013

Coat Update

When I first posted about my coat project, I said I intended to make this my main project for February and indeed, I have been working on it consistently since the beginning of the month.  Never having made a coat before, it seemed like a big project to me, so I decided from the outset to break it down into small chunks.  I've even been keeping a little journal of all the work I've done on it.  And you know what?  It's really not very difficult - it's just that there are a lot of steps.

The first thing I did - very uncharacteristically - was to read through the instructions.  And I have to say, I think the instructions for this Burda pattern are pretty clear.  I'm glad I took the time to read them:  it was a real confidence-booster.

Last week I officially got started:  I traced out all my pattern pieces, then cut out my outer fabric on another day.  (I decided to cut the lining when I get to that point, since I'm running out of places to keep cut-out pattern pieces!)  I even got myself a set of fancy new pattern weights for the event:


Nine bucks at the hardware store!  And I love them better than my expensive shot-filled pattern weights from JoAnn's!

I also recently bought Sunni's whole pattern tracing system:  medical exam paper, double tracing wheel and wax tracing paper.  Up to this point, I've made all my patterns on Swedish Tracing Paper, but it gets expensive, especially for patterns I don't foresee making more than once or twice.  The initial outlay for these materials was significant, but they'll last much longer than a roll of STP.  It sure felt different though - it's going to take some getting used to!


On the same day, I tested out my favorite marking tool, Dritz Mark B Gone.  The ink from this tracing paper is supposed to fade within 48 hours, and it always has for me.  But I wanted to make double sure in this case.  The marks did fade, but I ended up using water soluble pencils instead because my tracing wheel left perforations in the fabric that I found difficult to remove.


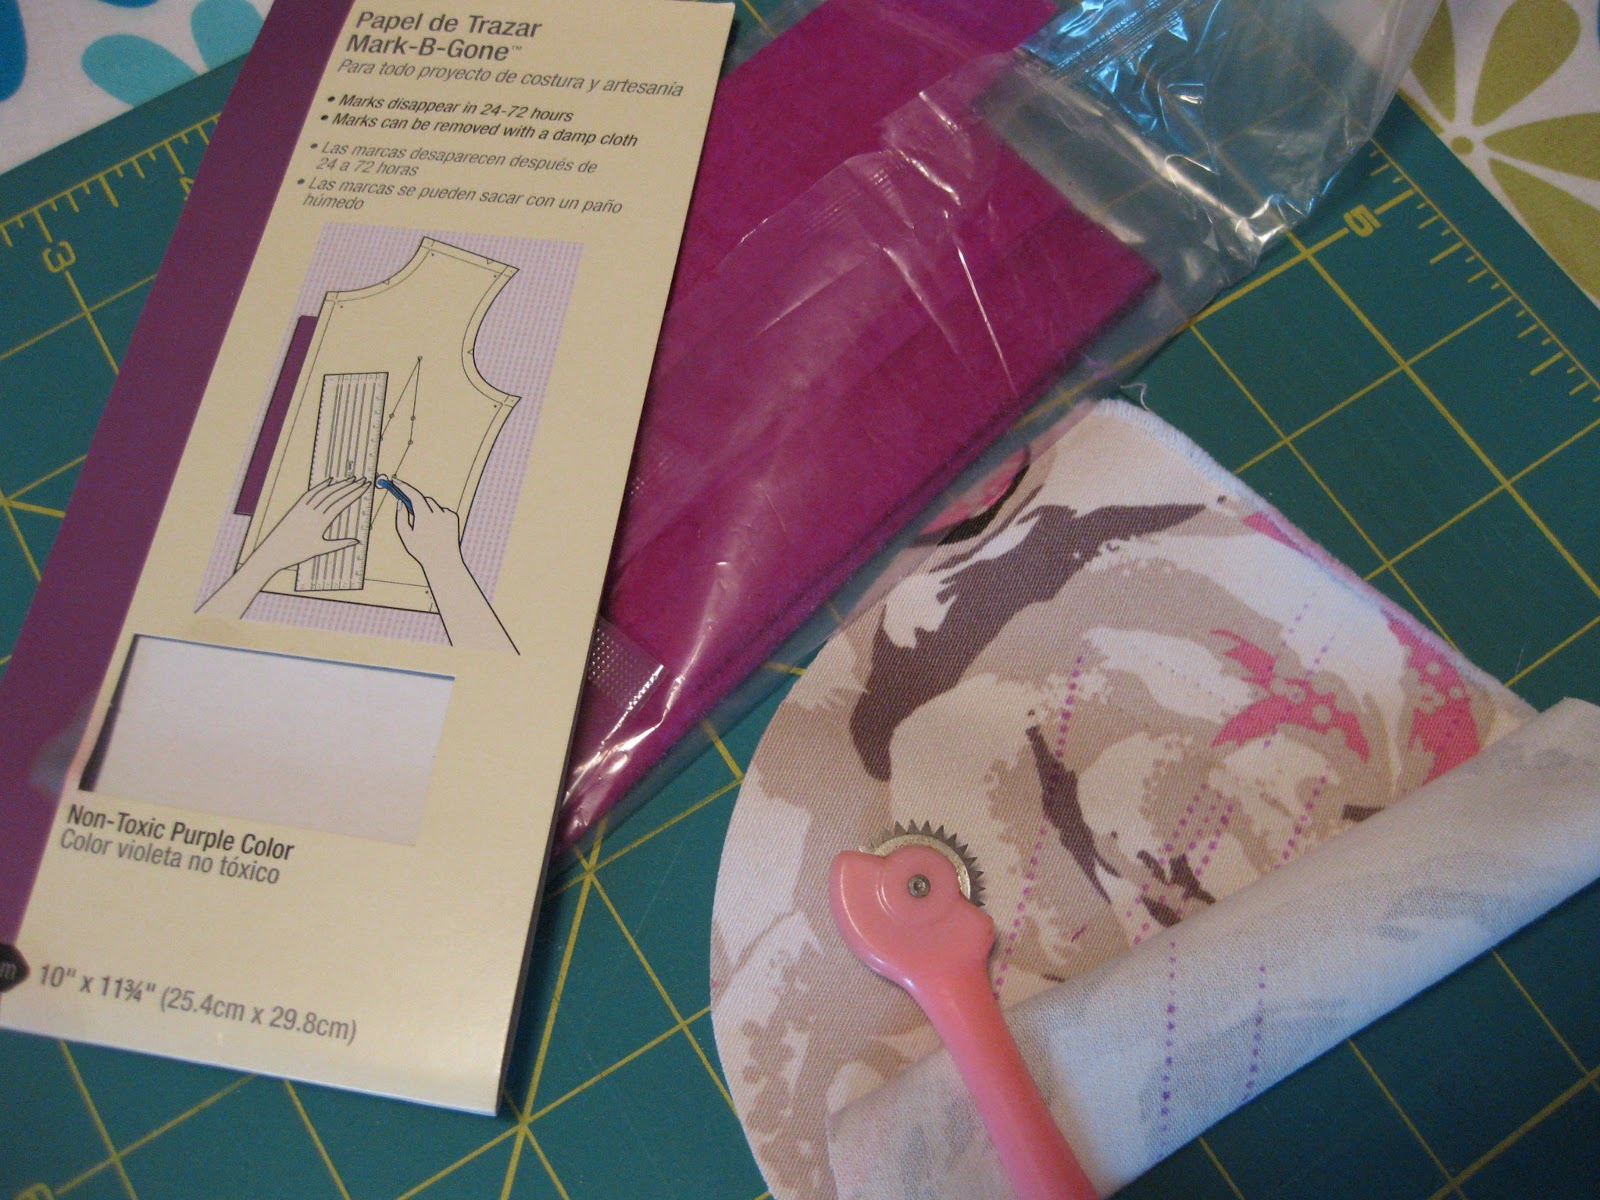
By the way, that tracing wheel is one I stole from my mom's sewing basket years ago - sorry, Mom!  I love it though because it was hers, and also it's pink and says "Queen" on the side!

On Saturday I really only meant to make my markings and apply the interfacing.  But it ended up being a sunny day, so I decided to take advantage of the light and start sewing.  I got a lot further than I'd thought I would.  It's really starting to look coat-like!

{front}

The top sections of the sleeves are attached to the shoulder first, and then the side panel and undersleeve are attached to the body.

{shoulder to sleeve seam}

{side panel}
 
Since the coat is fully lined, I don't have to spend time finishing any seams!

I didn't set up my cutting layout to arrange the pattern in any way.  Since the darker roses form a rather linear pattern, I wanted to keep everything random in order to break the lines up.  The patch pockets and collar will help break it up more too.

{back}

I'm really pleased with how it's coming along.  I've tried it on at this point and the fit seems good.  I'll admit I was a teensy bit nervous about that even though I did measure the flat pattern, and it's a generous shape.

I'm also happy I chose to start with this pattern.  I think it's a great first coat.  I'm still kind of mystified by things not addressed in this project, like interlining and pad-stitching, but I'll cross those bridges when I get to them with my winter coat next fall!

Monday, February 11, 2013

Those socks.

I had a very crafty weekend.  (Smiley face!)

I did a little work on making a pattern for Hubby's shirt.  I did a lot of work on my coat!  I did a fair amount of work on my Lauren sweater - I may even be able to finish it this week!  And I worked on those socks.

It doesn't bode well when your favorite part of a knitting project is how well it goes with the little project bag you made:


It holds a surprising amount of stuff!

I'm not having a fun time of it with these socks.  Here's the source of my discontent:


Fortissima Socka.  Blech!  This is probably the worst sock yarn I've ever worked with.  It's scratchy and very splitty.  Its only saving grace is that it's hot pink.

I bought this yarn* almost two years ago, when my mom was visiting; I bought it specifically to make this pattern.  Kai-Mei is from Cookie A's Sock Innovation book, and this pattern is really the reason I got the book (from my mom for my birthday that year - thanks, Mom!)  It's been in my mind since then to start the socks, but I never quite felt like I had the mental fortitude - it seemed like a very "thinky" pattern, and I'm not always a fan of thinking.  It interferes with my TV watching.

But a couple weeks ago, I really needed a break from all the brown of the Lauren and didn't want to allow myself to start a new sweater.  So I got this out instead.  And you know:  it's really quite an easy pattern!  All that procrastinating for nothing! 

It starts out with 6.5 inches of 3x3 rib, so you get a little mental vacation before easing into the interesting part of the design, which shoots off the gusset of one side. 


The stitch pattern itself is only 8 rows; very easily memorized and quite fun to work.   When seen from the point of view of the wearer, it almost looks like a row of little hearts:


I really hate it that this yarn makes my tension look so horrible.   I hope it evens up in the wash.


I've got a fair few mistakes in the foot portion of the sock (see:  watching TV) which I haven't bothered to fix just because it's so difficult to unpick this splitty yarn.  And anyway:  it's a sock.  There's little chance anyone will be inspecting my feet that closely.


I'm going to make myself finish these, even though working on them frustrates the heck out of me.  The pattern itself is lovely; maybe some day I'll make it again in a nicer yarn.

*An unsolicited insight into my psyche:  Every. Single. Time. I type the word "yarn," I first type "yearn" and then have to go back to correct it.  Hmmmm.

Thursday, February 7, 2013

More feathers.

This time on my nails!

The other day I decided to try out Zoya Minka - an opaque nude - with the Mentality Holo topcoat I bought a few months ago.  The holo topcoat shows up much better on darker colors, but I still like it on the nude:


It was nice and sunny yesterday, so I took lots of pictures:


This morning I was getting ready to take it off and try something different, but decided instead to use a new stamp I got in December.  This is made by a small, indie stamp designer in Israel.  She calls her line (and blog) Nailz Craze, and this is plate NC01.  (Which looks like it may be out of stock at the moment, of course!  Isn't that always the way?)  It includes butterfly wings in large and small for both right and left hands, a peacock feather and a dandelion, along with some assorted heart motifs. 


I found the quality to be excellent on this stamp, and the price was reasonable.  The shipping took a while from Israel, but the designs are so unique I felt it was worth it.  The images are nice and big, and the plate itself is larger than the Konad and Bundle Monster plates I have.  In fact, the peacock feather is so large that it doesn't fit completely on my large stamper!  I tried to use varying parts of the design and mix it up, but I could stand some practice!  I stamped with Essie No More Film:


Looks nice with the new sock I'm knitting, tease tease!

Wednesday, February 6, 2013

In the Jar

I'm sure a lot of you know about Karen's Sewlutions Jar.  Well, I'm in there too!  My 2013 Sewlution was to make at least one business shirt and one pair of wool pants for Hubby.

I hadn't mentioned it yet because I had a romantic notion of making these things on the sly and then presenting them to my boy with a flourish.  He does read my blog (awww! kisses, Honey!) so I decided I just wouldn't write about it until after the fact.  But last week I realized that if I want to get a really good fit, I'm going to have to take a bunch of measurements, which would pretty much let the cat out of the bag.

And getting a good fit is the whole reason for wanting to make the shirts.  (I want to make the pants just because my local fabric shop has some really lovely suiting wools, and I want to work with them!)  We ladies often bemoan the fitting struggles we have with sewing, and say, "Those boys have it so easy!"  Well, my poor boy has never had a shirt that fits him well.  He has a thick neck and broad shoulders compared to his chest and waist, and short arms - even the shortest arm lengths in RTW shirts are about an inch too long.  I swear if you met him on the street, he'd look like a normal guy ;-)

I've made him several casual shirts over the years, but have never altered the patterns for his requirements, as they were meant to be worn without a tie and with a loose fit.  I enjoy making shirts and don't find things like collars and cuffs to be especially difficult.  So my challenge here will be getting a great custom fit for him, along with adding in more details like sleeve plackets and collar stay channels.  To that end, I've ordered a book recommended by LisaShirtmaking by David Page Coffin.  I got the book on Saturday and have already read a lot of it - like Lisa, I highly recommend it if you want to make men's shirts with all the bells and whistles.

This pink fabric is the lining for my coat, which I've started on!

I've acquired a lot of sewing books over the last several months, and this is one of the best I have.  Very readable.  I'll be honest:  a lot of sewing books, while containing great information, are a little on the dry side and often put me to sleep, which is why it takes me so long to get through them!  But this one is positively riveting!  Mr. Coffin has some very definite ideas about what a men's shirt should be, but the technical information is presented in an engaging way, almost as if you're sitting down with a friend and having a discussion on the topic.  I really appreciate that he explains the reasons for why things are done the way they are.

So there you have it.  My plan is to read the entire book before getting started.  There's no rush on this project, but I am really, really looking forward to making some custom shirts for my honey, so I'm hoping to get started sooner rather than later.

Oh yeah - and I ordered a felling foot too :-)

Monday, February 4, 2013

Feathers!

I got inspired to work on my quilt over the weekend, thanks to Andrea.  I spent a good four hours on Friday cutting out almost all the pieces for the blocks:


Even though I haven't completely finished the stripped yardage needed for the feathers, I decided to start cutting them.  I'm hoping to be frugal enough with my prints that I can have some fabric leftover for making bags.


I'm making the Twin Size, and the pattern calls for 5 1/2 yards of background fabric.  That sounded like an awful lot to me, but I ordered that much anyway because I'm a novice at this kind of thing.  And I figured I would be able to use any leftover for . . . making bags!  But in cutting out my background pieces I used all but about 3/4 yard - and that's with very frugal cutting, sharing edges.

Each block consists of 2 feathers, and each feather consists of 9 pieces of fabric (if you count the stripped feather piece as one).  I need 38 feathers for the quilt.  On Saturday, I sewed off and on throughout the day and managed to complete 4 feathers:


I loves them.


It felt really good to get some forward movement on this quilt.  Andrea has committed herself to working on her quilt every Friday, and I'm going to try to do the same.  Only 34 more feathers to go!

Sunday, February 3, 2013

You win some, you lose some.

I think I mentioned a while ago that I made myself a nice sewing to-do list for spring.  I've already referred to it several times and I feel like it's been helping me stay a little more focused.  All the items on the list were garments for spring and summer, with the exception of one leftover winter project, Simplicity 2451, view C.  Yes, the skirt everyone has made except me.

I was dying to make this skirt in the fall, but somehow didn't get around to it.  My grand plan was to knock out a muslin, and then make the real deal in one of the Anna Maria Horner velveteens I'd bought.  I wasn't super crazy about the fabric I got for the muslin, but sometimes I think that's a good thing - there's no great sense of loss if it doesn't work out. (Queue eery foreshadowing music.)


I started having problems as soon as I traced the pattern:  I originally traced a size 12 (for my waist size) and didn't grade out at the hips, thinking the pleats would give me the ease I need there.  Once my pieces were all traced though, I thought, "That looks awfully small."  I took some measurements of the pattern; the waist added up to 27".  But it looked so small

So I decided to measure my waist.  And this is when I discovered that my waist is no longer the 27" I've been sewing for, but now 28"!  Ah, middle age.  You really throw a kink into the works.

Back to the drawing board.  I traced out the next size up . . . and then it just sat.  For a couple of months.  I just couldn't get inspired to sew it, as much as I loved the design.  But it really bugged me - do you guys get bugged by "unfinished business" like that?  So the other day I decided to just knuckle down and sew the darned thing.

I was slightly more enthused when I found a piece of silk in my scraps that made a nice match for the facings:


But obviously not enthused enough to change to matching thread on either my serger or my sewing machine.  Making the vent was fun and easy, and I'm happy with how that turned out, although if I were doing it for real, I'd be much neater in sewing back the edges inside:


Things were going along pretty smoothly for the most part, except for my continued dislike of the fabric, which emits a strong and unpleasant petroleum odor when pressed.  Yuck.

I decided it might not be a bad idea to try the thing on before installing the zipper and waistband facing.  And that's when everything ground to a screeching halt.

WOW!  This is NOT a good style for my body shape!  Aside from being too large (really? after all that business with measuring the pattern?!  You're killing me, Simplicity!) I'd forgotten that pleats in the abdominal region and low-curved skirt yokes are not my friends.  Now, if I'd taken a few minutes before even buying the pattern to think back to the 1990s, I'd have remembered this.  Those of you who are old enough might remember pleat-front chinos, the slightly dressier sister of the Mom Jean.  Yeah, it's that bad.

(Insert harp arpeggio and flashback montage here.)

This style made me look so much wider and pouchier than I really am.  Now, before any of you comment that I'm being too hard on myself, let me reiterate that I'm quite happy with my body!  And I've learned over the years what styles work for me and which ones don't.  There's a reason I wear flat-front pants and a-line or dirndl skirts.   I ought to have remembered that in this case, but I got distracted by how cute it looks on all the other (less curvy) bloggers who have made it.


So this one is going straight into the Goodwill pile, unfinished.  And the pattern will be useful for a swap or something in the future - this view was the only one I really liked.

Have any of you ever done this?  Made something totally unsuitable for you just because it looked good on somebody else?  It's a good lesson to me to think a little more deeply about this in the future!

Friday, February 1, 2013

A Special Gift

My BFF is celebrating her birthday today :-)

I wanted to make her something special.  One night not too long ago, as I was falling asleep, I thought, "It would be cool if I could get some fabric made with a print of her favorite photo."  Then I thought, "Hey, I could do that myself with photo transfer paper!"

The next day I headed over to Michael's, where I found this:


I'd never used transfer paper before, but the directions on the back of the package made it easy.  It was harder actually finding the photo in my old files, and then loading it into a photo edit program and cropping it to the correct size and flipping it to mirror image.   After printing the image onto the transfer paper, the instructions say to let it dry completely.

Once I'd done all that, I ironed my photo onto a piece of plain white muslin.  I had decided that I wanted to make a little zippered pouch with the image on both front and back, so I made each photo about 5 x 8 inches to fit them onto one sheet of transfer paper.


Once they were cooled, I trimmed them down.


Along the way, I fortuitously discovered that although this fabric can be washed,  you can not iron over it - it lifts up and melts the transfer!  I'm glad I found that out on one of my scraps rather than my nice pictures!

Which meant that while I was sewing my pouch together, I couldn't iron any of my seams flat or iron interfacing to the exterior fabric.  The transfer has a kind of rubbery feel, and it worked just fine to press it and my interfaced lining flat with my fingers.  I decided that I didn't want to interrupt the image on the outside of the bag, so I only topstitched the lining to the zipper after it was installed.


Then I proceeded to finish the bag, Noodlehead-style.  And here is the result:


I'm so happy with how this project turned out.  I definitely want to do something like this again.   I think it makes a great keepsake gift when made with a treasured photo, or maybe even a child's drawing!