Sunday, September 8, 2013

Auden: early fall sweater

My latest knit has been finished since last Sunday, but my week didn't go as planned so I'm just now getting around to posting it.  In addition to lots of work and appointments on my schedule, I also managed to get a cold and a sports injury that put me out of commission for several days!  I'm mended enough now though that I wore my sweater today to have lunch with Hubby.  Of course, I forgot to bring along my camera, so here's one he took with his phone.


(My tummy looked somewhat flatter pre-lunch, hehehe!  It was delicious.  Many a crab rangoon was consumed.)

This pattern is Auden by Bristol Ivy.   It's one of a couple of sweaters I meant to make last fall and didn't get to.  The original was made in wool, but I had this Brown Sheep Cotton Fine in my stash that I've been wanting to use up.  Some of you may remember it as the same yarn from my failed Saffron sweater.  This was my fourth try at making a sweater from this yarn.  I was a little afraid it was jinxed, but it worked out quite well.


Being 80% cotton and 20% wool, the fabric is different than that of the original, although the gauge is the same.  It means that my sweater has more drape than the original, which in turn means that my sweater is tunic-length rather than hip length, and I'm OK with that.  The drape works in my favor at the sleeves, which are picked up and knit on kimono-style after the shoulder seams are sewn (or rather, finished with three-needle bind off).  One of the biggest problems people have mentioned in the comments on this sweater is that the sleeves end up looking line-backerish in the sturdier wool.  Even with my drapey fabric, they make my already wide-ish shoulders look even wider.


I find this yarn a little tedious to work with - the high cotton percentage means it has very little give, so it can get hard on the hands.  But the pattern itself was a delight - so well written, as Brooklyn Tweed patterns tend to be.  The fern stitch is easily memorized and fun to work, but you get 6 rows of respite too between them, which makes this pretty good TV knitting in my view.   One place where I ought to have turned off the TV though was for working the bind-off at the sleeve edges.  I ended up picking them out out and doing it over.  Look at the difference between "TV cast-off" and "paying attention cast-off":


SO much neater - I'm glad I made the decision to redo. 

One thing I really appreciated about this pattern is that the designer took the time to make sure all the rib sections line up with the stitch counts in the neckband, which is picked up and knit once the shoulders are seamed.  I actually expected to have to readjust the numbers to get a neat outcome, because I so often do - but with this pattern it was already done!


I've already got 2 more sweaters and a hat on the needles.  The hat is my "coffee date knitting" and one of the sweaters is the other sweater I meant to make last fall.  Better late than never - I've gotten quite far with it and I'm loving how it's coming along.

My illness and injury meant that I wasn't really able to do any sewing this week.  Luckily, I managed to finish up Victoria Blazer #2 before I got sick, so I'm hoping to get some time to post that one in the next couple days.  But even though it's still quite warm here, my brain knows that autumn is almost here, so all I want to do is knit!

Tuesday, September 3, 2013

And the last baby thing!

This was actually the first baby thing I made, but I wanted to wait to post it until my friend got it in the mail, so it would be a surprise for her.

The baby swaddler I made is another pattern from Mamma Can Do It, and was picked out by my friend.  But the fabrics were a surprise!  She told me that she likes orange and grey, so I went over to Hawthorne Threads to shop.   I love it that you can search by color on the site.  I started from orange, aiming to find an orange and grey that went together.  But then this happened*:


Both these fabrics are from Mo Bedell's Full Moon Lagoon line - up top is Coral Garden in Purple, and below is Bubbles in Orange (apparently no longer in stock).  I love purple, pink and orange together, and hoped my friend would too - and it turns out she does!  So here's the swaddler:

{front}

{back}

{open}

The "wings" of the swaddler open and close with velcro.  You slip the baby inside and then wrap it up nice and tight.  Sadly, I don't have anything around here even vaguely baby-shaped, so do visit the website to see it in action!

This was such a fun little pattern to make up.   Really the only thing I did differently was to notch my outside curves rather than clip them like the pattern says.


The velcro isn't sewn on until the swaddler is complete.  At first I wasn't sure why this was so - why the velcro wasn't sewn on first as you'd do with a bag.  But then I realized that it's going to get opened and closed a lot and needs the stability of both layers of fabric.  I did something a little new here - instead of pinning the velcro to the fabric, I used a product I'd recently read about and purchased:  Roxanne Glue Baste-It.  Six little dots on each piece of velcro held it nicely while I stitched.  I'm really glad I bought this stuff!


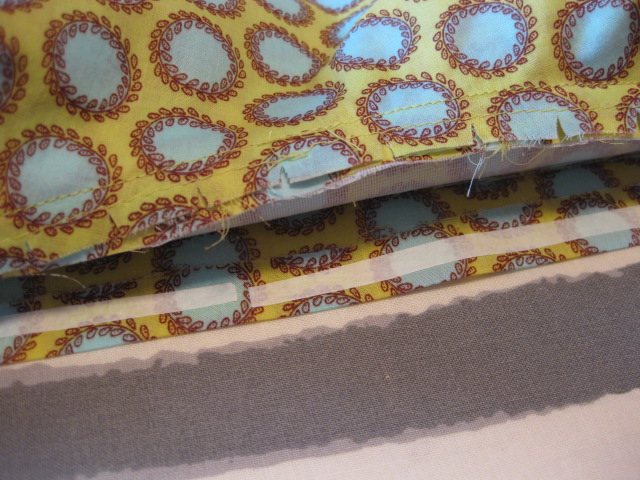
The top and bottom of the swaddler are sewn separately, and then sewn together right side out:


I considered changing it so the seam allowance would be on the inside, but then decided it tied in with the topstitching that goes all the way around the edges and did it as written.  See?  I can follow directions when I feel like it!

So that's it for the baby stuff!  I had a great time making all these baby gifts, but now I'm ready to get back to adult sewing for myself!  I've really had the knitting bug lately too - I've finished a sweater I never even blogged about, and have started two new ones! 

* I apologize for the fuzziness of a lot of these pictures.  It was extremely overcast when I was taking them and I just couldn't get my camera to take a good picture for the life of me!  Someday I'll get a new one . . .

Friday, August 30, 2013

A teeny bit more about the Archer collar.

Last post for this Archer, I promise!  If you're not into the technical stuff, skip this!

I mentioned before that I mostly didn't read or follow Grainline's instructions when making this shirt.  But I did make sure to read the parts about constructing the collar, mostly because I wanted to see how clear it would be to someone who hasn't made a collar before.  And the instructions are pretty good!  I actually enjoy making collars and they're not really that hard, especially if you know a couple little things going in.  So here are my collar-making tips.

One thing I did differently throughout the whole shirt was to edge stitch rather than doing the 1/4" topstitching.  In general, I prefer the look of edge stitching to topstitching - just a personal style preference.  But I think edge stitching is also a little easier IF you use your blind hem foot or edge stitching foot - there's a fence that your fabric butts up to, so you always stay the same distance away from the edge!

Once my collar was made and I'd attached the collar stand pieces to it, I trimmed very close to the curved edges, except at the very bottom.   I've learned from experience that when I trim that bottom edge before turning my collar stand out, it's almost impossible for me to get those seam allowances to stay tucked inside.  I didn't trim them off until after my collar stand was attached to the shirt body.


I agree with Lisa when she said that there's a little confusion in the instructions about which part of the collar stand (interfaced or un-interfaced) goes to the outside of the shirt.  The interfaced collar stand should be on the outside.  You'll want the un-interfaced collar stand to be inside because you'll be turning that under and stitching it down once the collar is attached to the body of the shirt.

To make the collar easier to attach, you should stay stitch around the entire neck edge, starting from center back to each front, at 3/8" - this bit is actually not in the instructions.  Then clip into your seam allowance up to the stay stitching all the way around the neck.  If you do this, you'll be able to pull your neck edge into an almost straight line and it will be so much easier to sew the collar stand to it.  You won't have to do as much easing, so you'll run less of a risk of getting puckers.


The instructions have you attach the outer collar stand to the body, and then turn under the seam allowance of the inner collar stand and hand stitch it in place before topstitching around the entire collar stand.  I know a lot of people are averse to hand stitching.  I don't mind it, but I don't want to do it if it's redundant!  So what I did was to stick some fusible web to my turned-under seam allowance, steam it in place, and then do my topstitching (edge stitching for me) from the outside.  No need to worry that the unstitched collar stand inside will slip, because it's held in place with the fusible web!


Of course, 1/4" topstitching in this area won't be as neat as edge stitching.  I'd say my stitching line here is about 3/32" from the edge.


On this shirt, I didn't take the steps needed to make a curved collar like I would on a man's shirt.  But I still pressed it around my ham once I was done.


Are you afraid of collars?  Have you sewn one before?  They take a little practice, but I think they're kind of fun!

Thursday, August 29, 2013

Archer, Done and Tested

It's hot and humid today, and I have no business wearing a long-sleeved shirt, jeans and flats.  But I really wanted to try out my new shirt!


I'll be honest - after I finished it, I was a little deflated.  The fit is OK, but just OK:  not the hit-the-nail-on-the-head straight out of the box perfect fit I was hoping for.  (Yes, I know that's a pipe dream.  Partly because I haven't really even decided yet what my perfect fit is.)  It looks good enough on, but it's not awesomely flattering.

While I was getting dressed, I got out my Pattern Runway blouse (which I'm a little embarrassed to admit I've not worn yet - because I love it so much) and tried that one on too, to do a little comparison.  The Pattern Runway blouse has bust darts but no side shaping; the Archer has side shaping but no bust darts.  On my Pattern Runway blouse, I did a broad back adjustment; on this Archer, the only adjustment I made was to grade out 2 sizes at the hips.  They both fit well, and I can move my arms forward comfortably in both.  This morning, I would have told you I like the Pattern Runway blouse fit and style slightly better.

But then I wore this outfit to go do my grocery shopping.  I didn't feel at all constricted in the back and upper arms while driving or reaching for things on top shelves.  And this fabric is so luxuriously soft and silky.  The more I wore the shirt, the more I liked it!


And then the deli guy said  (unsolicited), "Nice shirt!"  And when I told him I'd made it, he was super-impressed - in fact both deli guys were impressed enough to start sounding me out to see if I'd make them some shirts!   So that was a very nice pat on the back!

So, I think I'm liking the Archer.  But there will have to be some adjustments made.  For instance:


I certainly need to do the swayback adjustment.  (I actually need to do that on the Pattern Runway blouse too, on my next version.)   And I'm not digging those diagonal lines that radiate from the tops of my shoulder blades to my underarm - I have NO idea what kind of adjustment that requires and will have to research it, so if any of you have any tips or insights, please share!


And this really surprised me:  despite a whopping 7" positive ease in the bust, I get gap-osis when I put my hands on my hips (a fairly common stance for me).  So I'll have to reposition the buttonholes next time.

Also, in the first two photos you can see diagonal drag lines extending from my shoulder points to my bust apex, so I'll have to figure out how to deal with that.

Still, it fits and feels better than any RTW shirts I've tried lately.  It's perfectly acceptable as is, and a layperson wouldn't notice any of these fit issues.  But I know that with some effort, I can make it better.  So while I ended up liking it, I probably won't be making another until I can figure a couple of these things out.  Or maybe I will, because I have a paisley voile I've been dying to make a relaxed-fit shirt from.


I neatened up my hem by trimming the back, but I ended up keeping the length as is - I didn't remove any more.  Length-wise, this shirt is the same as the Pattern Runway blouse.  Although I made the View A shirt, I used the View B cuff - I just felt it went better with this fabric.


The deli guy especially liked my buttons, and I do too:


They're just cheap plastic shirt buttons, but I like this shade of brown and the fact that they're a little bit pearly.

I have a little bit more to say about the construction of the collar, but I'm going to do that in a separate post.  This is getting long, even fore me!


Wednesday, August 28, 2013

Archer Construction

I took a few pix:


Oh.  That isn't what you were expecting to see?  Well, that is Archer, and it's under construction!


I snapped these last night when I went over to Chinatown to pick up a few of my favorite grocery supplies.  You see the lengths to which I go to bring you the funny?  Oh, and you can see Big Willie in the background there.

OK - back to crafting content.  I started on my Grainline Archer shirt on Sunday.  Man, it took For. Ev. Er. to tape those 39 pages together and then trace them all out.  I didn't even trace the back pieces for the "Butt Ruffle" version, because I knew I'd never use them.  While I was tracing, I was kind of begrudging having to trace out pieces for cutting interfacing too, but honestly, when I got to the point of cutting out fabric and such, I was glad I had them.  So thank you, Jen.

I made only two changes to my pattern pieces - I traced a size 2 at the bust, based on my measurement there, but graded out to a 6 from the waist down.  My waist really falls into size 6 territory, but I did some flat pattern measurements and figured I didn't need to go any bigger in the waist for this relaxed-fit shirt.  My hips are actually in Grainline's size 10 range, but I scaled back to a 6 because I didn't want it to be too blousy.  But now that the shirt is mostly put together, I'm wishing I'd given myself a little more room there.

My other change was to convert the cuff pieces from fold-over one-piece style, to two pieces which are sewn together.  I traced down the middle and then added 1/4" seam allowance to the former fold edge.  Previous experience has taught me that fold-over cuffs feel too flimsy to me.


This is basically a test garment, but I decided to use this Amy Butler Laurel Dots voile in Cilantro instead of muslin or gingham.  I bought this a couple years ago in my first order from Hawthorne Threads just because I loved it, but it just doesn't float my boat any more so I didn't mind risking it with an untried pattern.

This is a super busy print, so I decided to do foldover plackets on both sides of the shirt instead of doing the sewn-on placket on the buttonhole side.  I thought it would be better not to break up the print too much with a separate placket, but now I'm thinking I was wrong.  I did take care to line up the dots both horizontally and vertically, and cut both fronts as single layers, but I didn't quite make it.  I'm hoping my buttons will distract from that a little.


I did a much better job, matching-wise, on my pocket.  I decided to just go for a pocket on the left side, to masculinize the shirt a little.


I have to admit that I'm using Grainline's instructions only as a guide for which bit comes next.  A lot of the construction techniques I'm using are those I learned from David Coffin's book when I was making shirts for my boy.  Key among those is always sewing from the center out - on the sleeve caps, collar, collar stand and cuffs.  It really does make a difference in how things line up.

I did do the cuff placket her way though instead of creating a tower placket, because I wanted this shirt to be soft and drapey.  Also, I just like this placket treatment - I think it's very feminine.


And because I wanted this shirt to be mostly soft and feminine, I didn't do felled seams like I would on a man's shirt.  After sewing the sleeve head to the body, I serged the two raw edges together, trimming at the same time, and then pressed that seam toward the sleeve.  Then I sewed the side and sleeve seams all in one go from the bottom to the cuff as the instructions recommend and serged that as well.  For some reason, my back ended up being about 1/2" longer than my fronts, so I'll have to trim the back hem.  I'm pretty sure I traced wrong - I was very tired on Sunday!  But initial try-on has revealed that this shirt might be way too long for me, so I may trim an inch or two off the whole thing, and maybe even give myself more of a curve at the sides to allow for those 40" hips.


I'm going to try to finish this thing today.  I only have the collar, cuffs, buttonholes, buttons and hem left to do.  (Interesting . . . when I just typed "hem" it came out "meh"  . . .  twice)  I'm super tired again today and the weather is gloomy, but I'm going to try to power through.

Or take a nap.

Monday, August 26, 2013

Toofer

We've had an unusually cool summer here in Chicago, which has been great.  But over the weekend temps started to climb back up to normal, and are expected to stay there all week.  I was a little bummed about that, because it meant I wouldn't be able to wear my new Hemlock tee again for a while. 

So yesterday evening I got out my leftover piece of floral linen knit and my Scoop Top pattern to see if I could make a hot-weather top, and I juuuuuust managed to squeeze it out!  Yay!  I cut out my pieces and turned up and fused the sleeve and bottom hems, so everything was ready for me to sew together this morning.


I had so little fabric that I wasn't able to be concerned about pattern placement, but it came out OK.  Another couple inches to the right though with that big red rose, and I would have been in trouble!  I actually like the back a teeny bit better, I think because it's rosier:


I didn't coverstitch around the neckline this time because by the time I remembered I needed to do that, I'd already put the machine away and didn't feel like getting it out again!  I can add that later though if I need to.  I also didn't use any stabilizer at the shoulder seam because I wanted this one to be as drapey as possible.

This is the fourth Scoop Top I've made, but the first on which I've added the pocket.  I used the last little bit of stretch lace from my lace Renfrew - I've been saving it to use as a pocket on something.  I think it goes nicely with the old lady vibe of this fabric.  I added it with a long zigzag stitch on the regular sewing machine.   You can't even see the stitching because it sinks into the lace, but from the back it will be really easy to pick out if this top bites the dust and I want to re-use the pocket.  Yeah, I think about things like that.


The pocket isn't really that narrow, I just couldn't get it to hang flat!  That's how drapey this linen knit is!

So:  two new tops from a two-yard length of fabric.  I call that darn good!

Saturday, August 24, 2013

London Dress

Another tiny thing!

At the end of June, my cousin had her second baby girl and named her London.  So once I got on my baby kick, I couldn't resist making her a little dress with London-themed fabric!

I used a pattern from a website a friend introduced me to:  Mamma Can Do It.  There are SO many cute patterns on this site for baby things, it took me a while to decide which one I wanted to use, but I finally settled on the Reversible Baby Jumper.  This multi-size pattern includes sizes all the way from newborn to 36 months. 

This is actually the second pattern I've used from this site, but I can't show you my first make until my friend receives her present.  These downloadable patterns come with very clear photo tutorials.  I like to print out the pattern pieces only, then load the pattern and tutorial into iBooks on the iPad so I can easily take it to the table with me when I sew. 

The seam allowances on these patterns is 3/8", which I think is great - somehow it makes sewing easier to line the fabric up with the edge of my presser foot!  The only thing I changed from the pattern was to notch my curves instead of clipping only, as the pattern recommended:  it does make a difference when turning your work out.


I ordered 5 different London print fabrics from Fabric.com because I wasn't sure how the colors would be and which two fabrics would go together best - and you know I'll use the leftovers for bags and such!  I made the 3 - 6 month size, which requires 1/2 yard of each fabric, but I really don't think I used that much.  I have lots left over.  Here's a better look at the two prints I used:

Next Stop:  London Around Town Yellow (Robert Kaufmann)

London Crowns Light Blue (Andover)

And here's the little dress:


Squee!  I love this little thing, and it was so fun to make!  It's really clever how the reversible dress goes together - I doubt I could have figured it out on my own but the tutorial makes it really simple.

OK - I just realized that I did change one other thing.  The pattern recommends using snaps or velcro on the shoulder tabs, but I wanted the dress to be fully reversible, so I made buttonholes and then sewed two buttons to each tab, front and back, making sure to keep my threads loose:


This project was so quick and easy - I really recommend this pattern.  Also, if you buy a pattern from Mamma Can Do It, you get a coupon code for 30% off your next pattern!  But at $5, I think this was really reasonable to begin with.  I would definitely make this again!