Showing posts with label palmer/pletsch. Show all posts

Sunday, October 26, 2014

Bourbon and Blazers

As I said earlier in the month, October is all about blazers Chez Agenda.  Alongside my other projects, I've been slowly working on a pattern for a tailored blazer - an item which I'd love to own but which I rarely find to fit well in RTW.  You'll see why later in the post.

My friend Shar and I had been talking about doing a blazer sew-along in the fall, and so "Bourbon and Blazers" was born.  The name came from the title of an email I sent her referencing our plans and thanking her for the recipe for Salty Bourbon Squares she'd sent me.  Since we knew we'd be sharing a lot of our progress on Instagram, we decided to use it as our hashtag.  To our delight, a couple of our sewing friends have decided to join us:  Lisa and Andrea for sure, and maybe even a couple others are thinking about it.  We are all going at our own pace - there are really no rules or structure.  We're just having fun exploring the making of a tailored blazer together.  Please join us if you care to!  #bourbonandblazers

I had several blazer patterns in my stash from which to choose, and in the end I settled on McCall's 6172.  This is a Palmer/Pletsch pattern, which means it has lots of fitting advice, and fitting alteration lines are already included on the pattern.  Since I'm familiar with the Palmer/Pletsch method and fit is one of my biggest concerns in this project, I thought it would be a good place to start.  It turns out that all my sewing buddies have chosen this pattern as well!  I think it's great, because we will be able to compare apples to apples.

I started this project at the very beginning of October and just yesterday was able to trace off my final version of the pattern.  Between tracing, tissue-fitting and re-tracing, I've got about 10 hours into this project already!  I'm hoping all this work will pay off in a big way.

First I started by tracing my four main pieces:  the two fronts and the two backs.  I started with only these four because I wasn't sure if I should use the size 8 or size 10.  A quick tissue-fit of these main pieces verified that the 8 is the right size for me to start from.  It's interesting to me that my Palmer/Pletsch instructor also put me in a size 8, and all the adjustments I needed for this blazer were the ones I needed on the sheath dress we did in our class!

Once I had the correct size, I traced off all the other size 8 pieces, and then got started with my tissue-fitting.  I wish I hadn't done that though - I forgot that the shapes of the linings and facings would change to correspond with the new shapes of the front and back pieces.  So in the end, I ended up re-tracing those as well.

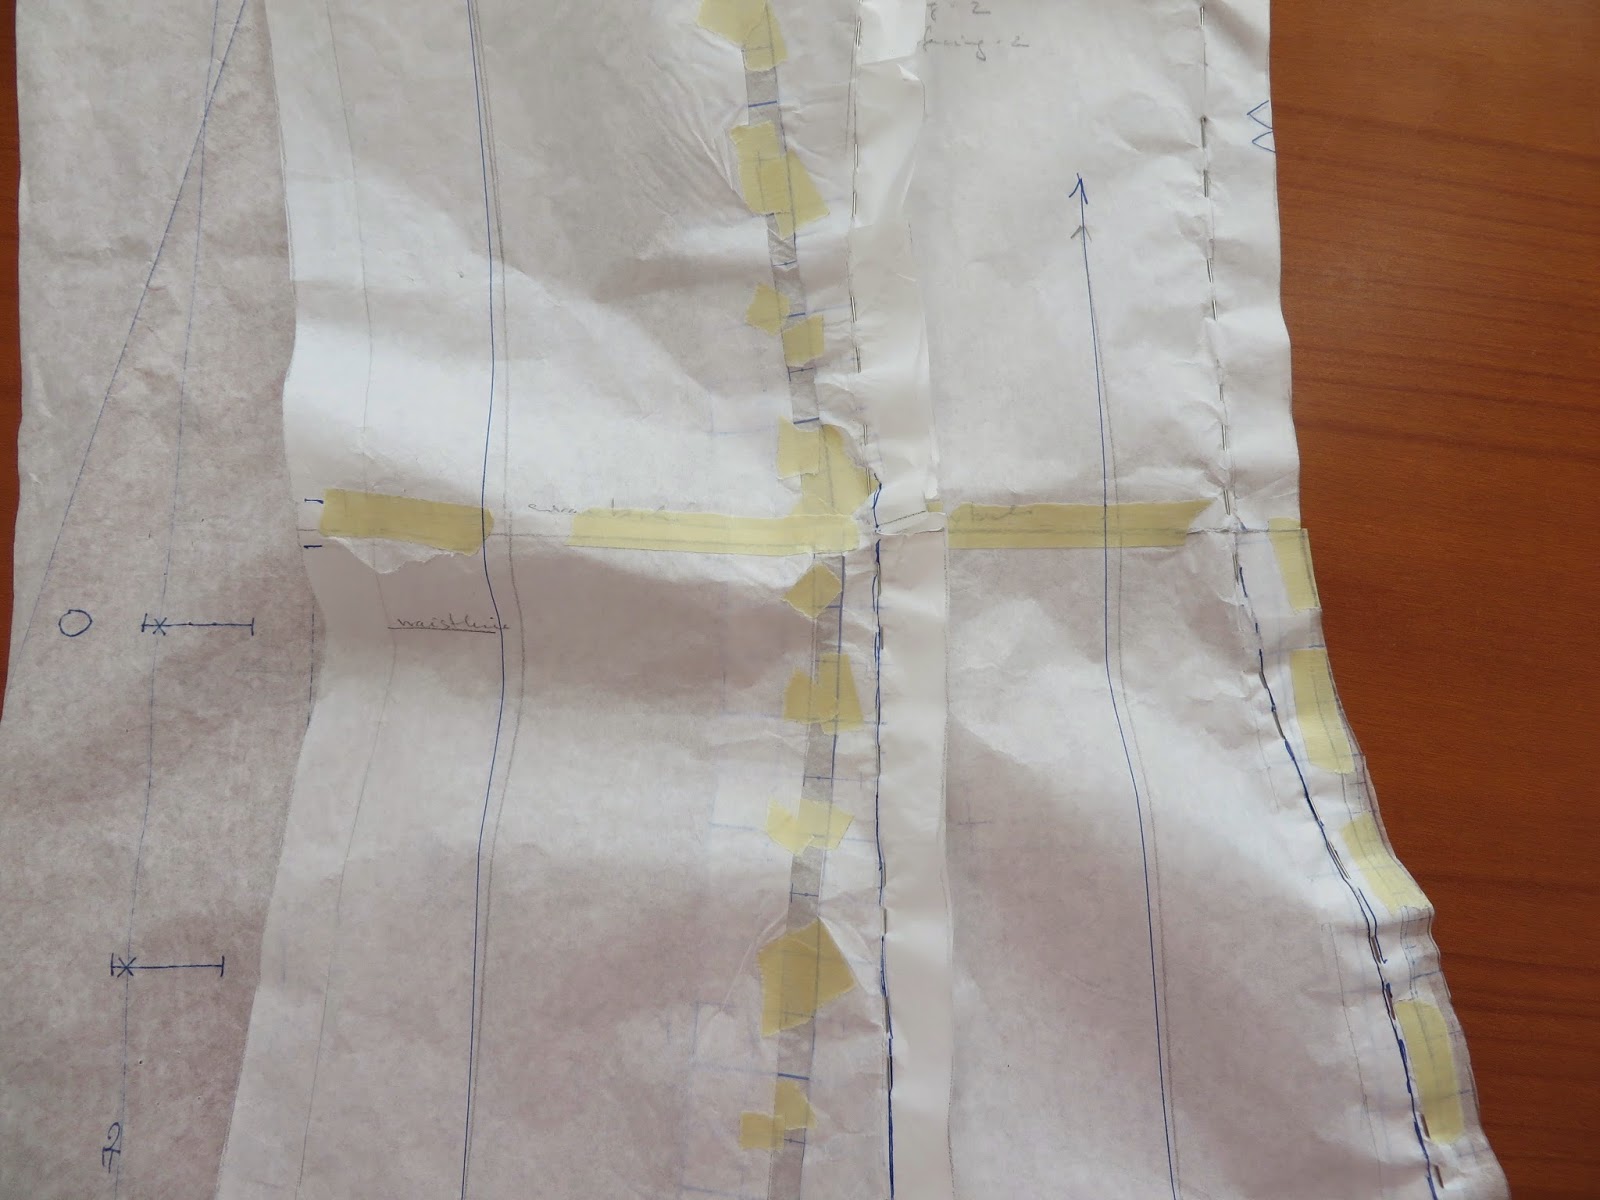
For my tissue-fitting, I was a little over-zealous at first, and had to back some of my adjustments out.  Once everything was done though (over the course of several fittings) I had made TEN adjustments!  No wonder the RTW blazers don't fit me well!  Here's my list as I kept track:


And here's what it says, but in the order of the adjustments:

* broad back adjustment of +1/4"
* shallow upper chest tuck of -1/4" 
* dart remains as it is - I shortened it a bit at first but decided I liked the original better
* forward shoulder adjustment -1/4"
* sway back adjustment -3/4"
* low round back adjustment +1/2"
* increase side seam from waist down +9/16"
* increase back side seam (between center back and side back) from waist down +3/16"
* make tuck corresponding to shallow upper chest tuck (-1/4") the length of the upper sleeve piece parallel to grain line, so that sleeve cap fits into new, smaller armscye
* full upper arm adjustment +1/2"
* shorten sleeve -3/4"

WHEW!  With all that tape, you can see why I wanted to re-trace my pattern pieces.  I have a bad habit of forgetting that I have tape on my pieces and then ironing over it and gunking up my iron!

Here are some pictures of my pieces in progress, in no particular order.

re-traced upper sleeve on left, adjusted sleeve on right

Paper Blazer, front

Paper Blazer, back

shallow upper chest tuck - extends all the way across the lapel; forward shoulder seam line

broad back adjustment and low round back adjustment

sway back adjustment


increased seams at hip area

final fit

I'm very happy with the fit I've achieved.  I only look unhappy in the photo because I've been suffering from sinusitis and a cold for the last several days and I had a massive headache!  Also, a pin was sticking me right in the armpit :-)

At this point, I was ready to re-trace my taped-up pieces and adjust my lining and facing pieces to match - the work of another couple hours.  But VOILA:


My pile of beautiful, fresh pattern pieces is ready to go!  I'm hoping to start on cutting out my fabric today!

Saturday, December 14, 2013

Mediocre Dress Pictures

This morning we headed out to the Field Museum to see the exhibit on the 1893 World's Fair.  Since I wore my new dress I had Hubby snap a few pictures before we left.  (I keep forgetting that since he's a bit taller than me, and definitely taller than my tripod, the pictures get a little foreshortened!)  But at 8:15 this morning, there wasn't a whole lot of light - a trend which continued for the entire day, so I guess waiting wouldn't have helped matters much.

But I think you can at least see how the dress fits - especially across the back, which is my most challenging area.


Remember yesterday when I told you all about how the neckline gapes because of my lack of reinforcement?  You can see it in the top picture.  It's not horrible, but it would be pretty easy to fix in the next version.

I also said that I might take a bit of width out of my left high hip also.  The need to do so became even more evident once I put on these tights.  Interesting . . .  You can see the little bulge of excess fabric I'm pointing at in the picture below.  I think I'll go ahead and fix this, removing the same amount I did on the right hip and with the same curve.


I could even take a half inch or so more out of both sides from the waist down, and may do so.  But I wore this dress all day, walking through the snow to and from the museum (a total of about 2.5 miles) and felt nice and comfy.  Since I'm likely to wear this dress always with a cardi, I might just leave it.  I can take long strides in this dress!

This is not the cardi I wore today - it doesn't fit under my coat!  But since I'd mentioned that the dress goes nicely with my new sweater coat, I popped it on.  This is the best picture we could get!  Hubby cracks me up - which is one of his best qualities :-)


I think I am likely to make the necessary adjustments and make this dress again.  I'm very happy with the fit in the bodice - I think it's just about perfect.  The skirt is easily fixed.  I was surprised at how comfy and easy to wear this dress is - it's my first sheath dress in about 20 years, and the RTW ones I had in my younger (slightly less curvy) days never fit this well so they were never as comfortable.

And gosh - having a solid-colored dress really opens up options of which sweater or jacket to wear with it!  Who knew?!  (Oh yeah - just about everyone but me, LOL!)  I've been daydreaming of reworking the neckline into a boat neck . . .

So I think that wraps up all the things I wanted to say about the fit class.  Now to continue putting it into action!

Friday, December 13, 2013

Bodice Sloper: the pictures

Yesterday I gave a synopsis of the class itself.  Today I'll show you the adjustments I made to my bodice sloper.

To get the right fit, I had to do the following adjustments:

* more width at waist
* broad back adjustment
* round back - shoulder blade area
* lower bust darts
* broad shoulders
* forward shoulder
* higher, more sloping left shoulder
* sway back

Most of these were done to the bodice sloper, but a couple were added in on my sheath dress pattern.  The sloper pattern included with the class, McCall's 2718, comes with alteration lines and "outlets" (increased seam allowances) already printed on the tissue.  The first thing we did after reinforcing the curves with tape was to remove the long waist and broad back outlets.  Of course, I had to open my back piece out again almost immediately!  I ended up having to add in a half inch broad back adjustment - yep, that's a whole extra inch across my back.   And we haven't even gotten to the shoulders yet!


Because my upper chest fell into the size 8 but my waist does NOT, we added width there in a couple different ways:  a quarter inch at each side seam, and reduced width at all four waist darts of about a quarter inch each:


One adjustment that surprised me was that taking a tuck across the upper chest made the bodice fit much better.  I don't know that I would have figured that out on my own!  Of course, doing that changed the bust dart placement, so both the bust dart and the front vertical dart had to be lowered (purple pencil lines):


I'd already begun to suspect that my right shoulder is forward, but it turns out both of them are.  I had to move the shoulder seam forward by 5/8", tapering to nothing at the neck (blue pencil line).


And then we had to deal with the rounding in my mid-back.  On my bodice sloper I was able to get away with only a small dart at the neck, but when I got to the sheath pattern I also had to add a wedge of tissue there.  (Dart in red is barely visible on the right; added tissue is just above the number 6.)


Once my swayback adjustment was in place for the dress, the edge of the pattern that was meant to be the center back fold was quite curvy.  The pattern called for a side zip; to ensure the best fit I added 5/8" seam allowance to my center back so I could move the zipper there and keep the curves.  No great sacrifice for me, as I prefer a back zip to a side zip!  You can see in my fabric once the darts were sewn how curved the upper back is.  Makes me feel a little dowager-y, but I think it's mostly due to rowing.


Adding that half inch to the width of the back still didn't account for my broad shoulders, so we added another half inch to the armscye seam, tapering to nothing just above the under arm:


As an aside, you may have noticed the gridded paper used to add tissue to the patterns.  This is the Palmer/Pletsch Perfect Pattern Paper.  A piece was included with the class, and I liked it enough that I bought a package to bring home.  It's marked with 1/8" increments to make measuring easy.

And we can't forget the hips!  For the sheath dress, I graded from the size 8 at the bust all the way out to size 16 at the hip - and then Janet had me add on another 1/4" on top of that!  Once my dress was made up though, I realized that I could have gotten away without the added extra.


One problem with tissue fitting in this way is that it doesn't account for asymmetries - and my body is quite asymmetrical.  In my initial fitting, Janet told me that my left shoulder is more sloping than the right.  I've also known for quite some time that my right hip is not as full as the left.  When I made up my dress I did remove the extra width at the right hip, but I forgot to adjust the left shoulder, so while the fit is good, it still isn't ideal.  For me to get the best fit, I should probably do a full right/left tissue fit and then cut my fabric single layer.  More work than I'm likely to go to for everyday items, but if I were making a special occasion garment I would certainly consider it.

Because I have so much trouble with garments being tight across my biceps and mid-back, I wanted to try out adjusting a sleeve under Janet's guidance - even though I wanted my dress to be sleeveless.  I didn't take pictures of my sleeve though, because my adjustment mostly involved cutting away so you can't see the original lines.  My sleeve cap ended up having a more vertical curve at the front; the dot for matching to the shoulder seam moved forward by the same amount as the forward shoulder adjustment; and tissue added to the back sleeve seam allowance (not the back of the sleeve cap) until the cap measured 1" greater than the armscye.

When we fit the sloper bodice, most of what we did made sense.  I had a harder time though with the "fashion pattern" - adding in the garment ease sort of threw me off.  I think it's going to take me a while to figure out how to use these adjustments to get a great fit, but not over-fit.

That said, the dress I made fits pretty well - certainly much better than anything ready-to-wear, and better than previous attempts at fitted dresses.  There are a few things I could do to tweak it:  fix that left shoulder for one.  Maybe bring in the side seams a litle from the high hip down.  And in my rush to finish my "homework" I completely forgot to staystitch and interface the neckline, and it did stretch out so it gapes a little.   But it's totally wearable - and I've already tried it out with my Holt coat and it looks quite nice.


Can you see how the home-made bias seam tape I made peeks out a little at the bottom back?  Sway back in action!  So interesting!

Thursday, December 12, 2013

Two Day Fitting Class

As I mentioned on Monday, last week my friend Andrea came to visit, and we drove to Michigan to take a two-day fitting class.  This is something we've been wanting to do for a long time, and a couple months ago it all came together.
The class was a Palmer/Pletsch workshop.  These workshops are held in four different locations throughout the US, one of which is a town very near to where I grew up in Michigan, and only a 3-hour drive from Chicago.  Normally the fitting workshops are four days long, which is quite a time commitment.  But we discovered that the teacher in Michigan, Janet Dapson, offered a two-day mini-workshop, AND was willing to set up a special class just for the two of us! 

Our class was held in Janet's beautiful fabric and yarn shop, Fabrications.  If you ever find yourself in southwestern Michigan, head over to her store!  She carries a gorgeous array of fabrics and yarns.  Andrea and I both loved how organized her fabric offerings are - fabrics of similar fibers, types and colors are grouped together.  She carries some really stunning silks, and we both came away with plenty of goodies.  All of Janet's fabrics are higher-end, but her pricing is very reasonable.  Another genius perk is that fiber content and care instructions are printed on the receipt for you - no trying to remember how to treat your new fabric!

Attached to the shop is a beautiful and spacious classroom.  Although we had to bring our own sewing machines (and of course, notions) everything else is provided for students.  There are several long tables for setting up the machines, and three large cutting tables with the surfaces at waist height.  There are also three irons and ironing boards.  The classroom has plenty of natural light, although the windows are curtained for privacy - necessary because much of the class was spent in our underwear and slips!

Our class ran from 10:00 a.m. to 4:00 p.m. for both days, with about a half hour for lunch.  And we were busily at work the entire time!  I got so absorbed that I forgot to take a single picture, but now that the class is over I realize that there's no way I could have completed all the work AND taken pictures of what we were doing.

If you've read Fit for Real People, you know that the Palmer/Pletsch method involves tissue fitting.  I read the book a couple years ago and refer to it often, but had never tried tissue fitting.  I'm happy to say that it wasn't nearly as tedious as I'd always thought it would be.  I probably won't do it for every new pattern, but for a very fitted pattern, I won't hesitate to work out the kinks with tissue fitting first, before making a muslin.

After some brief introductions and background, Janet got right to work.  The very first thing she did was to take our measurements:  just the high bust and full bust!  From the high bust measurement, we looked at the standard Big Four sizing chart and chose our size.  I fell between the size 10 and 12, and Janet recommended starting out at a size 10.  (Andrea's sizing is different of course; she'll be writing up her own class experience, so go check that out on her blog.)  For this mini class we were just working on making a bodice sloper.

Once we had an idea of our size, we tried on pre-made bodice muslins made of gingham.  Janet had these available in all sizes and cups.  She started me out in a size 10/B cup bodice.  Fit-wise, it looked a LOT like the things I've been sewing - no surprise there, as this is the size I usually use!  It looked OK, but not great. 

Then she suggested that I try out a size 8/C cup bodice.  Knowing that I have a broad back and broad shoulders, I balked.  But I went ahead and put it on - and believe it or not, it looked SO much better!  I was astounded!  Janet explained that I need the smaller size across the front of my shoulders and upper chest but more room across the back, and that the back is easier to adjust than the front.  She also said that in this size, I can consider doing a full bust adjustment, but that depending on the style it may not be necessary.

Once Andrea and I had our sizes as a starting point, it was time to construct our own tissue bodice for fine tuning.  Included with the class was the McCall's sloper pattern.  We took out the front and back bodice pieces for our size, and then reinforced the neck and armhole openings with tape and clipped into the curves.


From there, the rest of the day was spent trying on the tissue and having Janet pin out adjustments, then making those corrections on the tissue and trying it on again.  In the class materials was a list of pattern alterations so that we could make notes on the alterations we each need.  I ended up requiring 8 of the 11 bodice alterations:

* more width at waist
* broad back adjustment
* round back - shoulder blade area
* lower bust darts
* broad shoulders
* forward shoulder
* higher, more sloping left shoulder
* sway back

At the end of day one, we were given homework for the following day.  We had been instructed to bring along a McCall's shift dress pattern; to get ready for the second day we had to cut out the front and back tissue in our size and reinforce the neck and armholes with tape.


We were both exhausted though and left our homework for the following morning :-)  While the class is extremely interesting, it is also intense.  At the end of the day I felt I'd hit a wall and just couldn't think any more.

Day two was similar to day one, but this time tissue fitting our sheath dress patterns.  Many of my adjustments transferred from my bodice sloper to my sheath pattern, but since the dress has ease that's not present in the sloper, there were some surprises too.  Working as efficiently as we could, we managed to get our patterns ready, cut our fabric and baste together our dresses for a final try-on before sewing them together.  Even when it was just basted and pinned together in the back, I could tell that this dress with all its adjustments fit me much better than the garments I've been making for the last couple years.

In my next post I'll go over the pattern adjustments I made in detail, and possibly even show you my dress, which I finished today.  As I worked on finishing the dress over the last few days, I took lots of pictures of my altered sloper and dress tissues.

I'm so glad that Andrea and I took this class.  I had high hopes for it, and they were exceeded.  Janet is a lovely person and great teacher; I've already got my eye on a few more of her classes!  It was so helpful to have a fitting expert work with me; over the last year or so, I've made some headway into fitting, but I found it can be really difficult to assess one's own body.  For me, doing pattern adjustments is the easy part:  not knowing which adjustments I need was the thing holding me back!  I know this is just the beginning of a long process of honing fit, but at least I feel like I have a solid starting point now.

Have any of you ever taken a class like this?  I've taken lots of sewing technique classes in the past, but this was my first fitting class.  Have you ever done tissue fitting?  Love, or hate?