Showing posts with label clutch purse. Show all posts

Sunday, September 29, 2013

Folded Leather Clutch

This is one of those posts that is really about me recording what I did so I can remember it in the future, but you guys might like it too :-)

I had a couple hours to myself today and wanted to sew, but having finished my Archer the other day, I didn't really feel like starting a new garment.  I've had lots of ideas for leather bags swimming around in my head, so I decided to finally get around to making one. 

I've had a very fruitful Leather Acquisition Period lately.  The most recent pieces I bought were at the Textile Discount Outlet here in Chicago.  Last Sunday I went over there with a group of other Chicago sewing and knitting bloggers; of course, I forgot to take any pictures, but the lovely Michelle wrote up a post with pictures and links just a couple days later.  I didn't get inspired by any fabric that day, but I got mightily inspired by the leather.  I came away with a beautiful piece in pale seafoam green with a pearlized finish.  But I couldn't stop thinking about some of the other colors I saw, so a couple days later I went back and picked up burnt orange, naples yellow and navy.  Lucky for me, the outlet is only a couple miles from my house.  Or unlucky, depending on how you look at it!


These skins are a little heavier than what I've been sewing with lately, but thinner than the leather I used for my very first clutches.  I'd say the thickness is about twice that of the shiny silver I showed you last week.  Since I hadn't sewn with this thickness before, I decided to make a very simple almost-square foldover bag, and give it a tassel at the zipper.  I also decided to start with my least favorite of the colors, just in case!  This navy is really murkier than I'd like, but I guess it's a good navy for fall.


I used a nylon zipper because I love all the colors they come in and I hate metal zippers!  I always end up gouging nicks into my fingernails when reaching into a bag with a metal zipper.  Using a nylon zipper also makes it easier to sew over the zipper end covers, although I forgot to do that!  It was a lucky accident though - I really like how it looks without the stitching, and it's held in place with fusible web.  Time will tell how durable that is, but I can always add some glue if it starts to come up.


I used a variety of techniques from different patterns, tutorials and the Craftsy leather bag class I've mentioned before.  The size of my outer and lining pieces was dictated by the length of the zipper I wanted to use.  This is a 9" zipper, so I cut my leather pieces to 10.5" square, and my lining pieces to 10.5" x 10.25" - the short measurement goes top (zipper edge) to bottom, so there isn't excess bulk at the bottom of the bag when it's turned out.

The linings are interfaced with Shape Flex (Pellon SF101) then stitched to either side of the prepared zipper.  Then I aligned the cut edge of the leather with the zipper teeth and stitched that down.  I would have liked to turn it back but this leather is just too thick for that. 


lining is "Mind's Eye"  from Anna Maria Horner's Field Study line

Finally, I put on my roller foot to stitch the bottom and sides of the leather together.  The roller foot works well with the very thin leathers, but it didn't work here, so I ended switching out to my walking foot and didn't have any more troubles.  I used 1/2" seam allowances throughout and just trimmed the points off the corners.  The finished bag measures 9.5" wide by about 10" tall.  When folded down, it's about 6" x 9.5".  I originally wanted a slightly larger bag but was limited by my supplies; however, I think it turned out to be just the right size!


I used this tutorial for making the tassel - I've used it before and I think it gives quite a nice result. Putting it on a swivel clasp instead of a key ring makes it easily removable.

 
While I love the look of foldover clutches - well, clutches in general - they aren't super practical for me a lot of the time, so future renditions will likely have a strap of some sort.  But I'm pretty happy with this bag for a first go.  Expect to see more of these!


Saturday, September 21, 2013

Ooooh, shiny!

Last week, my mom asked me to make a bag for my aunt for her birthday.  I can never refuse my mom :-)  After discussing bag style and material options, we decided that I'd make my aunt two bags:  a frame purse to use as an evening bag, and a zipped wristlet to carry when she runs her errands during the day.

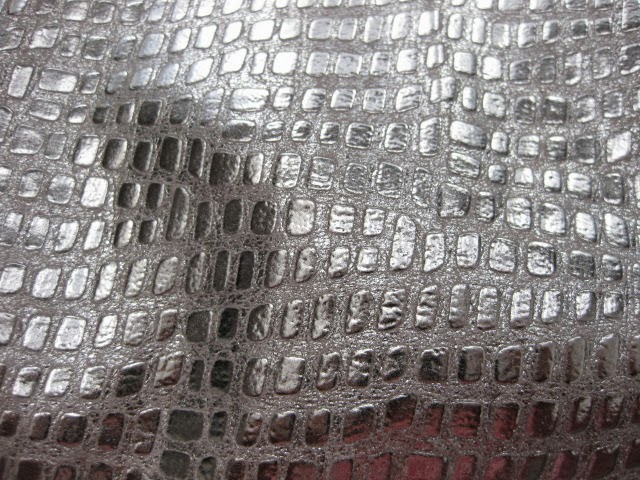
My aunt shares my love of all things shiny, so we decided to go with an embossed silver leather skin I've had in my stash for a while:

Oooooh!  Shiny silver crocodile!

Instead of using the pattern I've used for all my other leather clutches, I drew up my own pattern this time.  I wasn't sure what kinds of things my aunt carries with her when she goes out, so I wanted the bag to be a little bigger than the ones I've made before, and I also wanted it to look a little more angular.  When I first finished the bag on Thursday afternoon, I wasn't sure I liked it.  But the more I looked at it the more it grew on me.  I'm now at the point where I think I need to make another for myself!

This photo actually makes the silver look a little understated, if you can believe it!

Here you can see the size difference between this pattern and my old pattern:


It's actually only about an inch deeper, but it makes a big difference.  You can fit a lot of stuff in there.   With my phone, a pen, a lipstick and a hanky, the bag was still relatively flat.  Plenty of room for a couple of candy bars or something!


I took a couple pictures of me carrying it, so you could get an idea of the size.


When sewing up this bag, I used a lot of the tips and tools from Don Morin's Craftsy class, Making Leather Bags.  It really did make things go more smoothly, so if you're interested in sewing with leather, do check out the class!

My mom and her four siblings were all born in Rome, so for the "day" bag I used up the last of my Italy Map fabric - I believe these landmarks are in Rome, but I could be wrong!  My mom and my aunt have both been to Rome (and one of my uncles still lives there), so they will know!   Inside is Va Bene stripe with a pocket in Vespas.


This pattern is the Perfect Zip Bags from Elizabeth Hartman,  but I also incorporated some tricks from Don Morin's article in the current issue of Threads.

And even though my mom wasn't sure if this kind of bag would be useful for her, I made her one anyway, because she's my mom and I love her and I like to make stuff for her.  I used some of (what I consider to be) the most beautiful fabrics in my stash, from the Dear Stella Piper line.   You've seen this fabric before:


And inside are airplanes:

I think these are such pretty fabrics for fall.

I've been experimenting with different interfacings for this type of bag.  For these two bags, I used the stiff woven interfacing for collars.   The bags feel crisp and supple at the same time.  I recently made a couple of very small zippered pouches using "Craft Fuse" and I think I prefer the stiffer feel myself.  For the silver clutch, I used "Shape Flex" for the lining and left the leather un-interfaced, although it is quite thin.

I'm hoping to try out this zipped wristlet pattern using some leather in the near future.  But as usual, too many ideas, and too little time!


Saturday, July 27, 2013

A Copycat Experiment

Whew!  Where have I been?  Well, I've been steadily crafting as usual, but just didn't have a whole lot interesting to show for it until Thursday night, and then I didn't have time or energy to post until now!

I've been knitting away - the cool, cloudy weather we're having is perfect for that.  I finished all the pieces of my Shimmer cardigan on Monday, and they've been sitting ever since.  I just haven't summoned the will to sew those raglans together to work the neckline!  So meanwhile I finished the pair of socks I had started on our San Francisco trip.  And I started knitting an Auden sweater using the yarn from last summer's ill-fated Saffron cardigan.  I really hope this pattern ends up being "the one" for this yarn - it's my fourth try!  Nothing else really seemed to work!

On Tuesday I made 3 more feathers for my quilt, and on Wednesday I finished watching the Making Leather Bags Craftsy class for the second time and started a little leather clutch.

On Thursday I bought some lovely fabric for my weekend sewing project:  Hubby's requested shirt.  But I also made up a couple of framed clutches that have been on my list for quite a while.

Ever since I came across this post, I've been wanting the same exact purses, so a while ago I bought a little of each of the Dear Stella prints needed to make them.  I followed the linked tutorial to create my own pattern - I knew I wanted my bags to be slightly deeper and more square than the ones shown, so I adjusted my measurements accordingly, and I'm very happy with the shape my pattern produces.

I decided to make two bags and do a little experiment.  For one I used leftover quilt batting and for the other I used fusible fleece on the back of the outer pieces.  I wanted to see what the differences were in the finished product.  I was really hoping that I'd like the batting version most, because I have a LOT of leftover batting laying around!  But I ended up perferring the fusible fleece, so I'll be using that for future bags.

Here's my first bag.  This is the one made with batting.  The bag is nice, but it lacks stability - it kind of falls into itself when empty.  You can see that the sides are a little crumply.  For the outside I used Piper Stripe, and for the inside I used Patterned Dots.  Such fantastic colors and designs on these Piper prints!


For my second bag, I used Queen Anne's Lace in purple for the outside, and Sprinkles for the inside.  This is the one using fusible fleece, fused to the back of the outer fabric.  Look at those crisp, stable sides!

front

side

back

inside

inside

And here are the two of them side by side.  The difference is slight, but I think it's visible in this photo:


Both my purses were made to fit 8" x 3" frames.  I followed the sewing instructions in the Dear Stella tutorial, which was a different method than I've used in the past but which I think gives a superior result.  The stability of the bag made with fusible fleece made it possible for me to insert the purse into the frame without having any of the glue seep out - a first for me!  The glue I use is Beacon 527, which I've been able to find at JoAnn's.

I can see making lots more of these, even though I don't really have a use for them!  I just love them so, and they're very fun to make.  Perhaps I'll need to open a little shop . . . 


Saturday, March 9, 2013

Rally Stripe Clutch

Yesterday afternoon, I told everybody in my immediate circle of family and friends that I was going to do the ironing.  So of course, I made a clutch instead.


I ended up having a very busy week that didn't leave a lot of time for crafting after I made the lining for my coat.  Yesterday I just felt like I had to make something.  This idea had been floating around in my head for a while, so I decided to knock it out.

I've had scraps of this stone-colored leather since last year, and I really wanted to make a clutch out of them because I love the color, but they were too small to make an entire purse from.  When I got this yellow leather recently, I thought they would go well together.  I do believe I was right!  In retrospect, it reminds me of this mani I did last year.   And the shoes I wore here.

I didn't have any fabrics for lining that really went with these two colors, so I decided to use some leftovers from the pieced fabric I made for my quilt.  I sort of wish I'd used something different, but no one will see it but me.


The stone leather is quite thick and difficult to sew because it's also stretchy and a little sticky.  I ended up having to sew all the seams with tissue paper both above and beneath the work, in addition to using my roller foot.  And because the seams were so thick, it was very difficult to keep it all positioned together while sewing.  I ended up with my stripes not matching at the bottom.  But that's OK - I still like it.


I purposely chose a part of the yellow skin that was wrinkled and a little distressed looking, to create more contrast with the very smooth stone leather.


I'm really happy with how this turned out, despite the small flaws.  I'm thinking I'd like to make some more clutches that combine colors, rather than being one solid color.  I'm also hoping to venture into making some zippered leather clutches, but I haven't worked up the courage yet!


Wednesday, February 27, 2013

A Spring Clutch

Recently, I was able to put my hands on some lovely, buttery soft candy-colored skins to make some more clutch purses for spring.  I cut out the first one the other day in hot pink, and sewed it up and glued it into the frame this morning.


It would appear that I haven't gotten over my obsession with these things, despite making four of them for myself last year* (and a few more as gifts).  However, previously all my skins were natural colored - a girl needs little bags in bright colors too, right?  And this one is meant to go with my new coat . . .  These little bags measure about 9" x 5", and are just the right size for carrying the essentials when going out.  I have to credit my dear friend Andrea again for teaching me to make these - Thank you!  If you go on over to her place, you'll see some gorgeous clutches.

The lining is one of the AMH Field Study prints left over from my quilt.  This one is called "Sinister Swarm," but I think it doesn't look  the least bit threatening.  Unless those are wool moths.


Together, I think the pink leather and the butterfly lining make a very spring-like clutch.


I've got two more skins, in  orchid and yellow, so you'll be seeing more of these soon.  And likely more of those tassel keyrings from the leftovers!

Sigh.  Pink just makes me happy!


*If you want to see the other ones, click on "clutch purses" in the category cloud at right!

ETA:  Jenny's comment made me realize that I'd forgotten to link to where I got my supplies.  I buy my purse frames from an Etsy vendor called Upstyle.  The owner, Robin, is in San Diego and is very helpful.  She has several different styles and colors of frames, as well as excellent patterns which you can buy separately or get free with the purchase of frames.  I've found her materials to be of very good quality and reasonable price - these 8" x 3" frames are about $5 each for me because I buy 5 at a time.  The more you buy, the bigger the discount!  Robin also ships very quickly - I usually have my order within a few days.

Etsy is also a great place to look for leather, but these clutches can be made with fabric outer as well, as you'll see on Andrea's blog and in the Upstyle shop.

TIMELY UPDATE!  I just came across this nice little (and free!) tutorial for making these clutch purses.  This is different from the way I've been doing it, and I'm interested in giving it a try - it's a  more squared shape.

Friday, October 14, 2011

Dark Chocolate Clutch

Has anyone noticed how all these names are ice-cream or candy related?  An insight into my soul . . .

This last one is now my favorite:


I used the cute ditsy floral left over from one of my Sorbettos for the lining:


I took the picture with my phone inside for size reference.  My phone is huge, so you can see how much space is in there.  I can fit all my essentials, which for me means phone, packet of kleenex (constant allergies), ID, cards and money, keys, lip balm and tiny tube of cuticle cream.  Possibly even sunglasses, if I wear a smaller one.

Here's me stroking it:


Mmmmm . . . so soft.  That's China Glaze Traffic Jam, by the way.  I put it on last night and I'm quite taken with it.  Here's a closer look:


In my head I keep calling this Raspberry Jam (again with the sugary stuff), and it really is more raspberry than my camera could capture.   It's nice to have something vibrant on the nails after all the dark, somber colors I've been wearing lately.  The sun even came out today, so I can enjoy it properly!

Only one more purse frame left.  I have a feeling I'll need to order more . . .

Thursday, October 13, 2011

Vanilla Clutch, and some nails

Well, I guess it's clutch week here Chez Agenda.  I can't seem to stop myself!  Here's the one I made on Tuesday, from the winter white leather:


This leather was quite a bit thicker than the caramel one, so I decided to do it without the pleat.  Also, I wanted to see how I would like it without the pleat.  Answer:  not as much.  It's OK, but I don't love it as much as the caramel or the magenta wool.  The leather is nice; it's quite pebbled:


I lined this one with some deep purple microsuede I had left over from a wrap jacket I made about ten years ago.  I'd forgotten that microsuede is a little difficult to sew.  The leather needle sure did help though.


I had a fair amount of trouble putting this one together.  It seems that the silver frames are just a smidge narrower than the antique brass ones, and with the thick leather and the microsuede, it was quite a bit of work getting this one into the channels.  Also, I applied way too much glue, and it squished out onto the frame and even onto the leather a little bit.  I managed to get it off with acetone, but also did in my mani.

Here's what I had on my nails:

China Glaze Poetic

Wow!  Last year when I first started stamping my nails, I bought the whole China Glaze Romantique collection, because chromes are so great for stamping.  But I have never used any of them as an all-over nail color.  It never even occurred to me!  Something I saw on the interwebs gave me the idea to try one, and boy!  Now I'll have to try out the rest!

But since that got ruined in the too-much-glue-must-use-acetone incident, that evening I switched it up to this:

Zoya Marina

Double wow!  This is one gorgeous color.  Deep blue with just a hint of teal.  It was one of the colors I was most looking forward to in the fall Smoke and Mirrors collection, and it didn't disappoint.  It's durable too:  it has already been through the ringer making Leather Clutch #3, and still looks great!

Wednesday, October 12, 2011

Caramel Clutch

Here she is, my first experience in sewing with leather!


I think I did OK for my first time, but there are some things I'll do differently from now on.

I took Andrea's advice and used binder clips to hold the leather together.  It worked like a charm. She also said not to backstitch - it's amazing how automatic backstitching is, and I really had to remind myself with each seam!  I wasn't sure what kind of thread to use, but I was pretty sure that normal sewing thread wouldn't be strong enough, so I used some black upholstery thread I had left over from a pleather pillow I made years ago.  Since it is pretty slippery, and I hadn't backstitched, I tied the tails off with a surgeon's knot at the ends of each seam.  I didn't worry about it much, since all the knots end up hidden inside the lining.

I had two problems with putting this together.  First off, I used some leftover hot pink dupioni from the stash for the lining:


I always think of dupioni as a heavy-ish fabric because it is so crisp, but it really is quite thin.  If I use it again, I'll add some interfacing so I don't have to struggle with it as much.

My biggest problem was with the pleat in the leather.  One side was OK, but the pleat on the other side was so thick that I couldn't get it shoved all the way inside the channel of the frame.  I'm really hoping it holds.  In the future, I'll clip open the pleat on the inside a little bit so I don't have to try to fit three layers of leather folded over on themselves into the frame.

I mentioned when I made my first clutch that I wasn't sure what kind of glue to use.  I did a little looking around at purse making supplies on Etsy, and a recommended glue was Beacon 527; turns out this is one of the glues I used (and which I have always called barge cement, since that's how it was sold to me by a shoe repair man years ago).  So I picked up a new tube on my weekend trip to the fabric store.  My new tube has a long thin neck, which makes it much easier to squeeze glue into the channels of the frame.

I was happy with myself after finishing this one, but a little exhausted too!  After taking a few pictures, I rolled up all my leather and put it away for another day.

Sunday, October 9, 2011

Serendipity

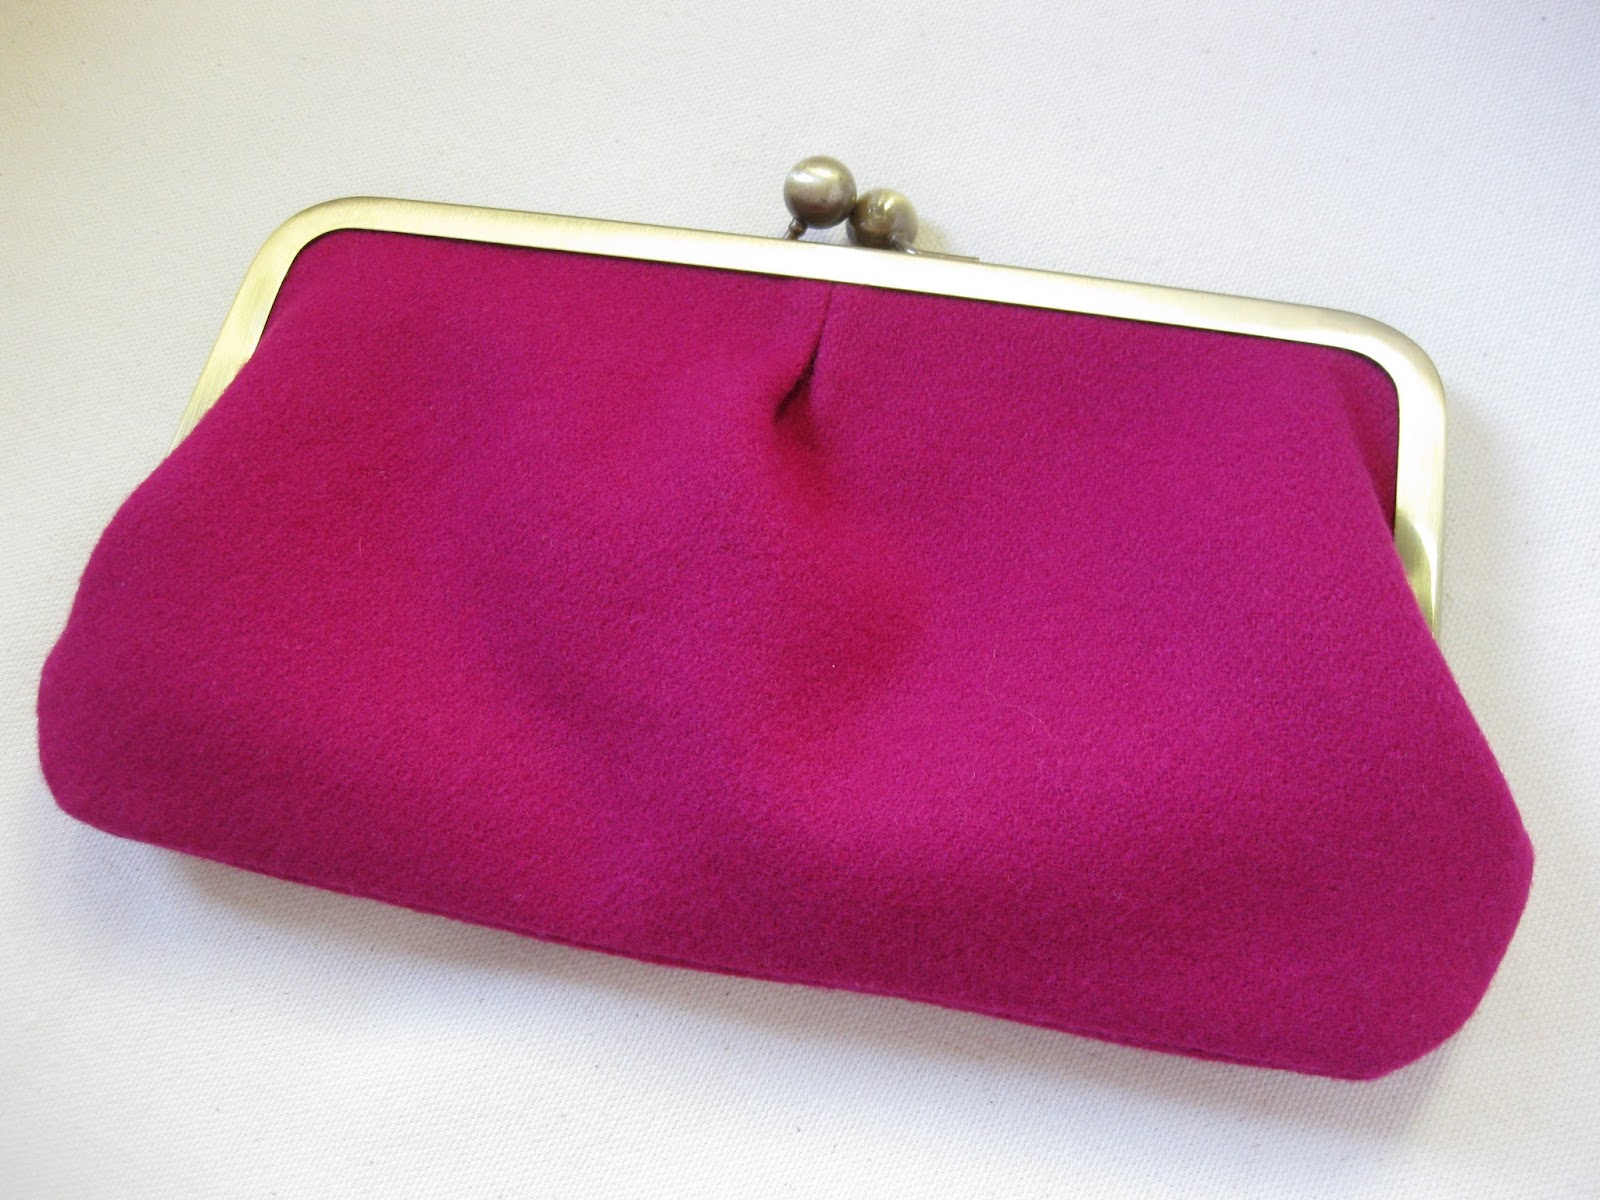
Ever since Andrea made her gorgeous leather clutch back in July, I've been dying to make one of my own. This week, I finally got a chance to order some purse frames. While I was waiting for them to arrive, I decided I should make one up in fabric before investing in leather. So on Friday, I did some stash diving.  I found a lot of cool stuff in there that I'd forgotten about!  I pulled out everything I thought might be useful for a clutch or its lining, and ended up choosing some really thick felted wool left over from a skirt I'd made at least ten years ago.

Yesterday morning, although the frames hadn't arrived, I went ahead and made my pattern pieces and cut out my fabric and lining.  For the lining I chose an ochre brocade left over from a purse I'd made probably eight years ago:


Then I sewed it all up so that when the frames did arrive, all I'd have to do is glue it on.  It was much quicker and easier than I'd thought it would be.  As I was heading toward the ironing board to give it one final press, the doorbell rang - it was the mail lady with my frames!  What perfect timing!!  I glued my purse to the frame, and let me tell you - waiting 24 hours for the glue to cure is the hardest part of making this clutch!  But, patience is a virtue:


Hurray!  This turned out so much better than I was expecting!  It was a little tricky getting the purse to stay inside the channels of the frame because it wasn't quite thick enough.  If I'd had the frame with me when I made the purse, I would have included some interfacing.  So I'm really hoping the glue will hold.  And I wasn't quite sure what kind of glue to use, so I used a combination of barge cement and E-6000.

I love magenta and ochre together!

I bought my frames from this Etsy seller.  I got 5 frames for $25 - pretty reasonable I think.  These are the 8" x 3" frames.  I like it that she allows you to mix and match colors.  I ordered 3 antique brass frames and two silver.

Now I can't wait to go get some leather and make some more!