I had a couple hours to myself today and wanted to sew, but having finished my Archer the other day, I didn't really feel like starting a new garment. I've had lots of ideas for leather bags swimming around in my head, so I decided to finally get around to making one.
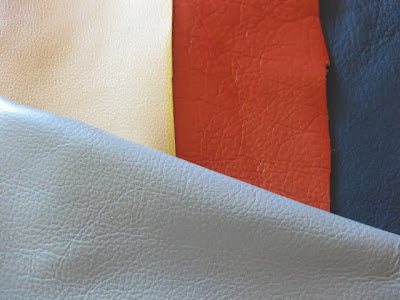
I've had a very fruitful Leather Acquisition Period lately. The most recent pieces I bought were at the Textile Discount Outlet here in Chicago. Last Sunday I went over there with a group of other Chicago sewing and knitting bloggers; of course, I forgot to take any pictures, but the lovely Michelle wrote up a post with pictures and links just a couple days later. I didn't get inspired by any fabric that day, but I got mightily inspired by the leather. I came away with a beautiful piece in pale seafoam green with a pearlized finish. But I couldn't stop thinking about some of the other colors I saw, so a couple days later I went back and picked up burnt orange, naples yellow and navy. Lucky for me, the outlet is only a couple miles from my house. Or unlucky, depending on how you look at it!
These skins are a little heavier than what I've been sewing with lately, but thinner than the leather I used for my very first clutches. I'd say the thickness is about twice that of the shiny silver I showed you last week. Since I hadn't sewn with this thickness before, I decided to make a very simple almost-square foldover bag, and give it a tassel at the zipper. I also decided to start with my least favorite of the colors, just in case! This navy is really murkier than I'd like, but I guess it's a good navy for fall.
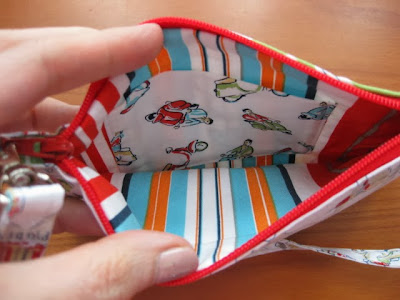
I used a nylon zipper because I love all the colors they come in and I hate metal zippers! I always end up gouging nicks into my fingernails when reaching into a bag with a metal zipper. Using a nylon zipper also makes it easier to sew over the zipper end covers, although I forgot to do that! It was a lucky accident though - I really like how it looks without the stitching, and it's held in place with fusible web. Time will tell how durable that is, but I can always add some glue if it starts to come up.
I used a variety of techniques from different patterns, tutorials and the Craftsy leather bag class I've mentioned before. The size of my outer and lining pieces was dictated by the length of the zipper I wanted to use. This is a 9" zipper, so I cut my leather pieces to 10.5" square, and my lining pieces to 10.5" x 10.25" - the short measurement goes top (zipper edge) to bottom, so there isn't excess bulk at the bottom of the bag when it's turned out.
The linings are interfaced with Shape Flex (Pellon SF101) then stitched to either side of the prepared zipper. Then I aligned the cut edge of the leather with the zipper teeth and stitched that down. I would have liked to turn it back but this leather is just too thick for that.
 |
| lining is "Mind's Eye" from Anna Maria Horner's Field Study line |
Finally, I put on my roller foot to stitch the bottom and sides of the leather together. The roller foot works well with the very thin leathers, but it didn't work here, so I ended switching out to my walking foot and didn't have any more troubles. I used 1/2" seam allowances throughout and just trimmed the points off the corners. The finished bag measures 9.5" wide by about 10" tall. When folded down, it's about 6" x 9.5". I originally wanted a slightly larger bag but was limited by my supplies; however, I think it turned out to be just the right size!
I used this tutorial for making the tassel - I've used it before and I think it gives quite a nice result. Putting it on a swivel clasp instead of a key ring makes it easily removable.


