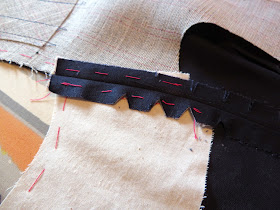
The other day, I wanted to sew but didn't have the energy and focus needed to move on to the welt pockets. So instead I sewed all the vertical seams of the body of the jacket (quite a few, since my pattern has princess seams) and the outer seam of the sleeves.
This is probably the least involved part of the process. Sewing these seams took me about 15 minutes. And then I spent another 45 minutes pressing each seam open on the tailor's board, clipping and shaping the body over the ham and seam roll.
I like to let the seam "tell" me how much to notch or clip. Once I've got a curved seam sewn and pressed, I can see how much needs to be removed for the seam allowance to lay flat. On the picture below, I removed the excess that was bubbling up.
I always press my seams 3 times: flat as sewn, then open on the tailor's board, then again from the right side. Because the front is gently curved, I did my final press over the ham instead of on the ironing board.
One tip I learned recently is that if your fabric tends to show the seam allowance when pressed from the right side, you can press the seam on top of the seam roll. I'm learning to love my seam roll; it's fiddly because it keeps rolling away, but it is a useful tool.
Once the front has the interfacing attached, the turn of the lapel needs to be steamed into place. This too is done on top of the seam roll, hovering the iron just over the fabric without actually touching it, and giving good blasts of steam. Doing this on top of the seam roll gives a very nice wrinkle-free turn to the lapel because the rest of the fabric from the front is being pulled down by gravity and out of the way. I had good success with butting my seam roll up against the edge of the tailor's board to keep it from rolling.
The lapel should tell you where to turn back; the fabric will want to turn just to the outside of the roll line.
Once the piece is steamed the lapel will lay open all on its own, as you can see in the following pictures.
After I've steamed both lapels, I like to check them against each other to make sure they're the same size. If they differ at all, I reshape to make them match.
Another thing I do at this point is to mark the hem lines. Later I'll be adding interfacing to the hem to give it weight, and I find it easiest to mark the line now rather than trying to measure as I add it.


I love that opening! I think it's really part of becoming a better seamstress; the pattern instructions can get you through, but once you're confident enough to develop a method - you can really be productive!!
ReplyDeleteThat is definitely one of the great parts about a princess-seamed garment; you can do a lot of the minor stuff and save the heavy lifting for later :)
It's definitely more productive. But here's a confession: for me it also saves legwork! I keep my iron upstairs but sew downstairs. I do it on purpose to get more movement into my day. But when I feel too lazy, I save up my pressing for as long as I can before climbing those stairs!!
Delete