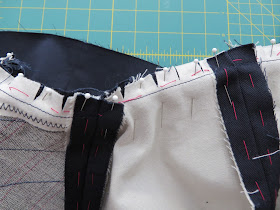
This step isn't really difficult, but you do need to concentrate and be as precise as you can. To start, stay stitch all around the neckline from circle to circle.
Now pin the undercollar to the neckline, right sides together. Match the triangles to the shoulder seams, and match the circles and notches. Clip into the curved neck edge as needed to get the under collar to fit.
We'll be sewing from circle to circle all in one go. One area that always seems to cause a problem is the very beginning and end of that seam - the curved end of the under collar always wants to shift. If it shifts and you sew it down that way, it will throw off the rest of your collar construction. So I always add extra pins at the collar point to keep everything in place. In the picture below I'm pointing at the edge that likes to shift, and you can see the extra pins in an X formation just to the left.
Now sew the neck seam with a smaller stitch (2.2 or 2.4) making sure to start and stop directly in the center of the circles. You will need to backstitch at each end of the seam as well. I like to use a clear foot for this so that I can see what I'm doing.
Sew slowly, making sure that there are no puckers in the jacket. I always think to myself that I'm just sewing 2" at a time. I stop every 2", feel with my fingers that there are no puckers in the next 2", and then sew on. I do this for all types of collars, not just blazers, and I rarely have to unpick a collar because of puckers. Slow and steady wins the race :-)
Once this seam is sewn to your satisfaction, clip the jacket neck to the circle, exactly where your stitching starts and stops:
Clip as close to the circle as you can without cutting into your stitching. The closer you can get, the easier it will be later when we add the facing.
Trim the seam allowances of both the jacket and the under collar, BUT: leave the part from the lapel point to the clip you just made untrimmed. That is a seam allowance you will be sewing later!
After trimming, press this seam open on the tailor's board:
If your fabric doesn't want to hold the press, you should also catch stitch the seam allowances down now to keep them laying flat.
Press your neckline seam from the outside as well:
Next time: sleeves and shoulder pads! And that will make for a complete outer!


Your sewing process is impeccable. Thanks for sharing
ReplyDelete